26.
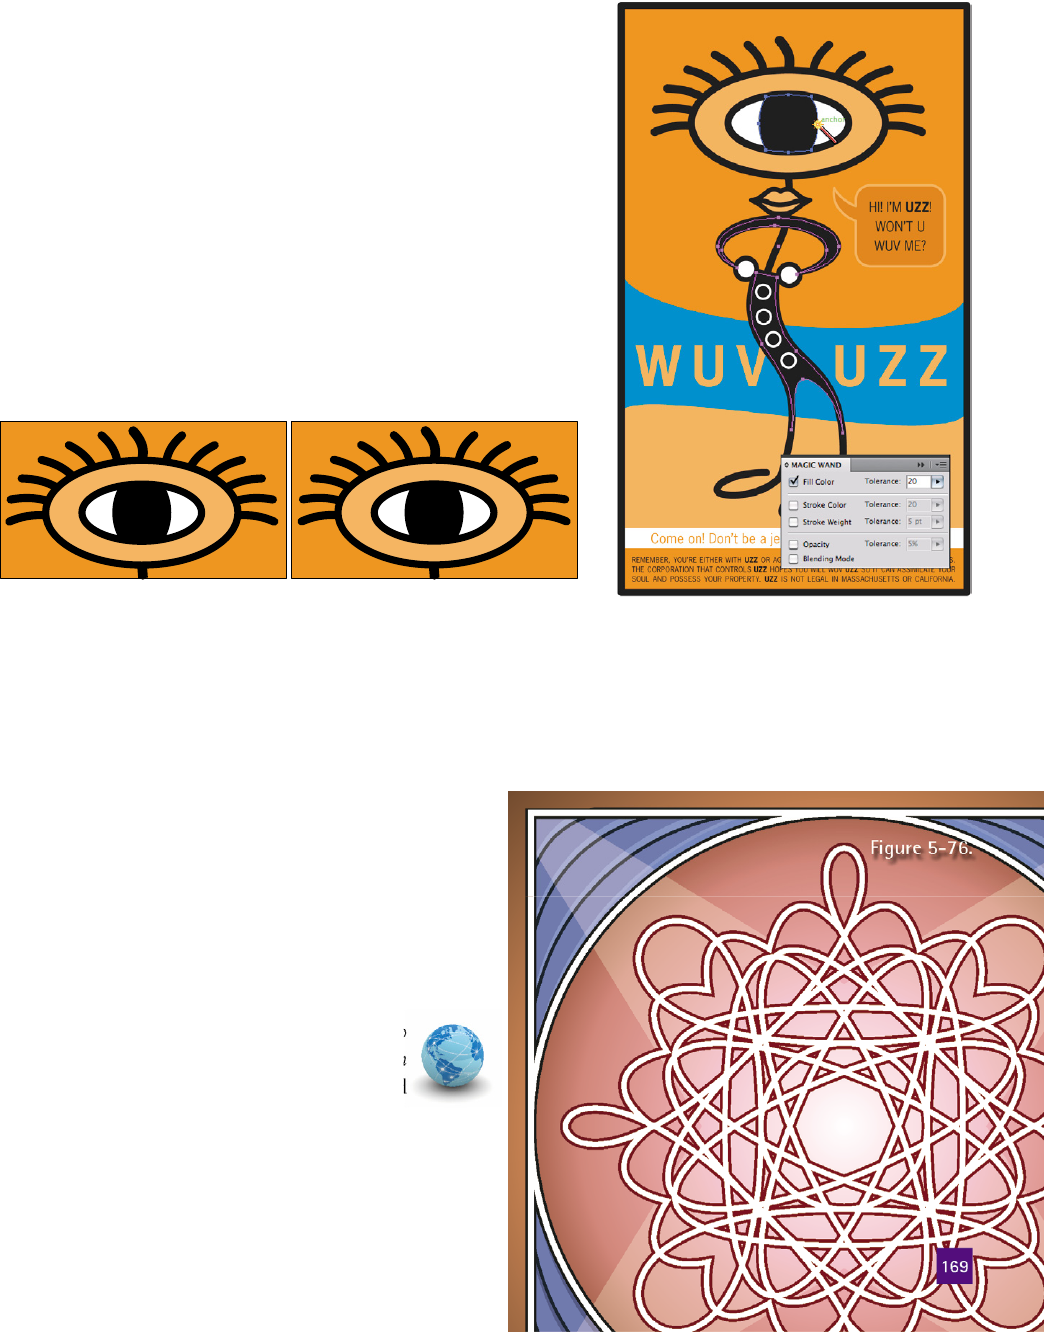
Select the blocks of black text and assign the global swatch. With
the black arrow tool, click the line of text Hi! I’m Uzz! to select
that text group. Next, Shift-click the legalese at the bottom of
the illustration to add that text block to the selection. Finally,
click the global black swatch in the Swatches panel to apply the
swatch to all the selected text. Press Ctrl+Shift+A (-Shift-A) to
make sure nothing remains selected.
27. Edit the black swatch to make it a rich black. Now that the
black elements have been assigned the global swatch, all that’s
left to do is edit the swatch to make it a rich black. Double-click
the swatch, and change the C, M, and Y values each to 50. Click
OK to accept the changes. On screen, you should see the black
go from a dull gray to a rich, true black. Figure 5-75 illustrates
the difference between the plain black and rich black in print.
Uzz is now ready to make his public debut, and you’re now armed
with a number of new tools to deal with selections and transfor-
mations. Save or discard your work as you see fi t; you’ll be starting
with new artwork in the next exercise.
Scaling Partially Selected Paths
In this fi nal exercise, you’ll use the scale and rotate tools
to transform three simple circles into an elaborate lace
pattern, as in Figure 5-76. While the results may seem
like an impossibility, Illustrator’s scale function, when
applied to path segments rather than whole paths, can
create some lovely Spirograph-style effects.
1.
Open the lace-pattern art. Navigate to
the Lesson 05 subfolder inside the Lesson
Files-AIcs5 1on1 folder. Open the fi le called
Lacemaking.ai.
This document has four layers. The Final Lace layer
shows the fi nal artwork; this will be used as your
guide as you recreate the other bits of art. The Just
Figure 5-74 .
Flat black Rich black
Figure 5-75 .
Figure 5-76 .
169
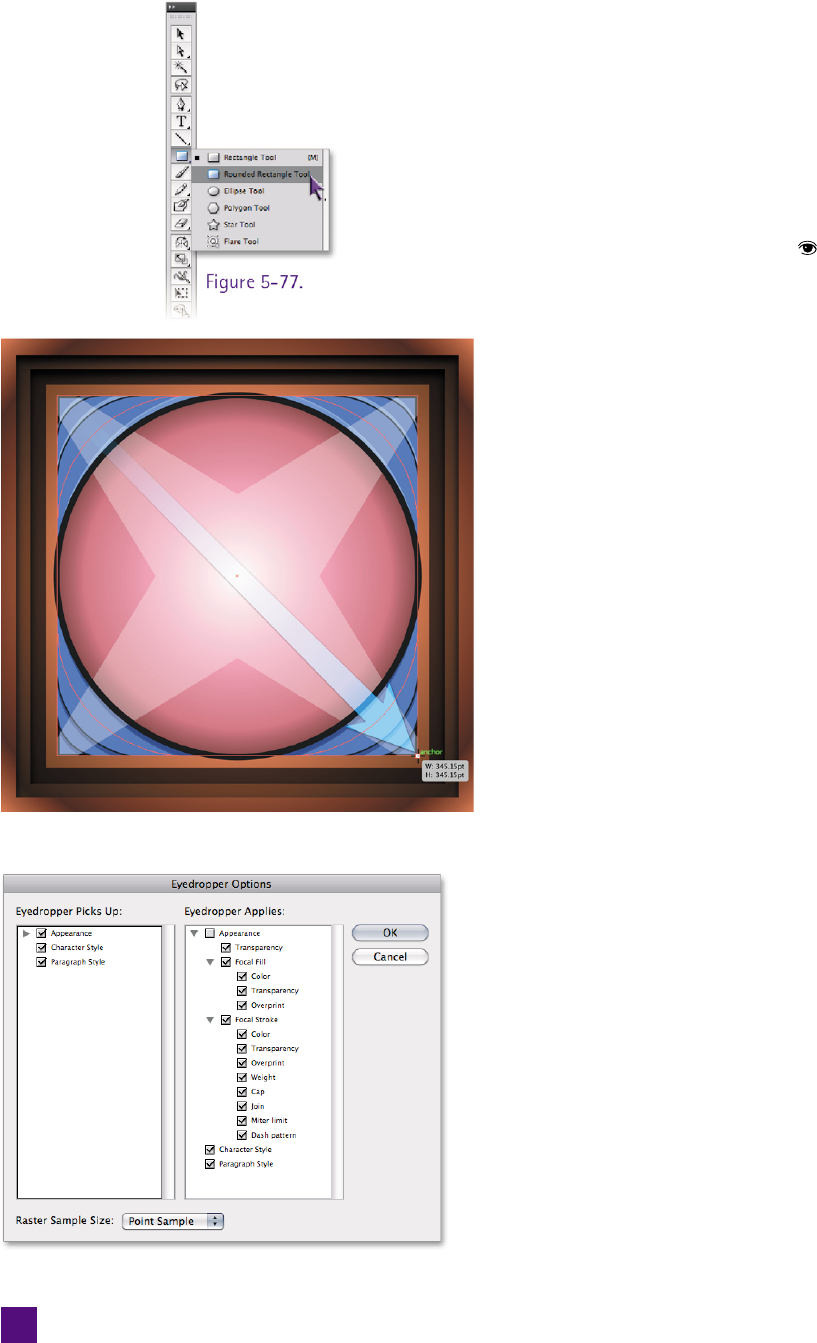
Circles layer houses the circles you’ll use later in the
exercise; you can ignore it for now. The One Shy
layer contains many of the background elements.
2.
Turn on the One Shy layer. You’ll begin the exercise
with the One Shy layer—so-named because it’s shy
one rounded square from the fi nal art. Turn off the
Final Lace layer by clicking its icon, just to make
sure it stays out of the way. Turn on the One Shy
layer by clicking the leftmost column by its name
in the Layers panel, and make that layer active by
clicking the layer name.
3.
Draw the fi nal rounded square. Select the rounded
rectangle tool by choosing it from the rectangle tool
fl yout menu, as shown in Figure 5-77. Draw from
the upper-left to lower-right corner—with smart
guides enabled, you should snap directly to the
anchor points at the corners—and while holding
the mouse button down, press the arrow key to
increase the roundness of the rectangle’s corners.
(Depending on whether you had a previous value
for the rounded corners, you may need to hold the
key down for a little while; if you go too far, press
the key a few times to nudge the outline back.)
Once your outline looks like that in Figure 5-78,
release the mouse button.
4.
Pick up the live effects from one of the other squares.
The square is the right shape, but it has all the
wrong appearance attributes. If you examine the
other rounded rectangles, you’ll see a lighter edge
along the top and a shadow along the bottom. This
effect is achieved by using two separate drop shad-
ows—both of which are live effects. By default, the
eyedropper tool doesn’t pick up live effects, but that
can be changed easily:
•
Double-click the eyedropper tool in the toolbox.
• In the Eyedropper Options dialog box, shown
in Figure 5-79, select the Appearance check box
in the Eyedropper Picks Up column. Click OK.
Figure 5-77 .
Figure 5-78 .
Figure 5-79 .
170
Lesson 5: Transform and Reshape
Get Adobe Illustrator CS5 One-on-One now with the O’Reilly learning platform.
O’Reilly members experience books, live events, courses curated by job role, and more from O’Reilly and nearly 200 top publishers.

