Transforming with Respect
to Independent Origins
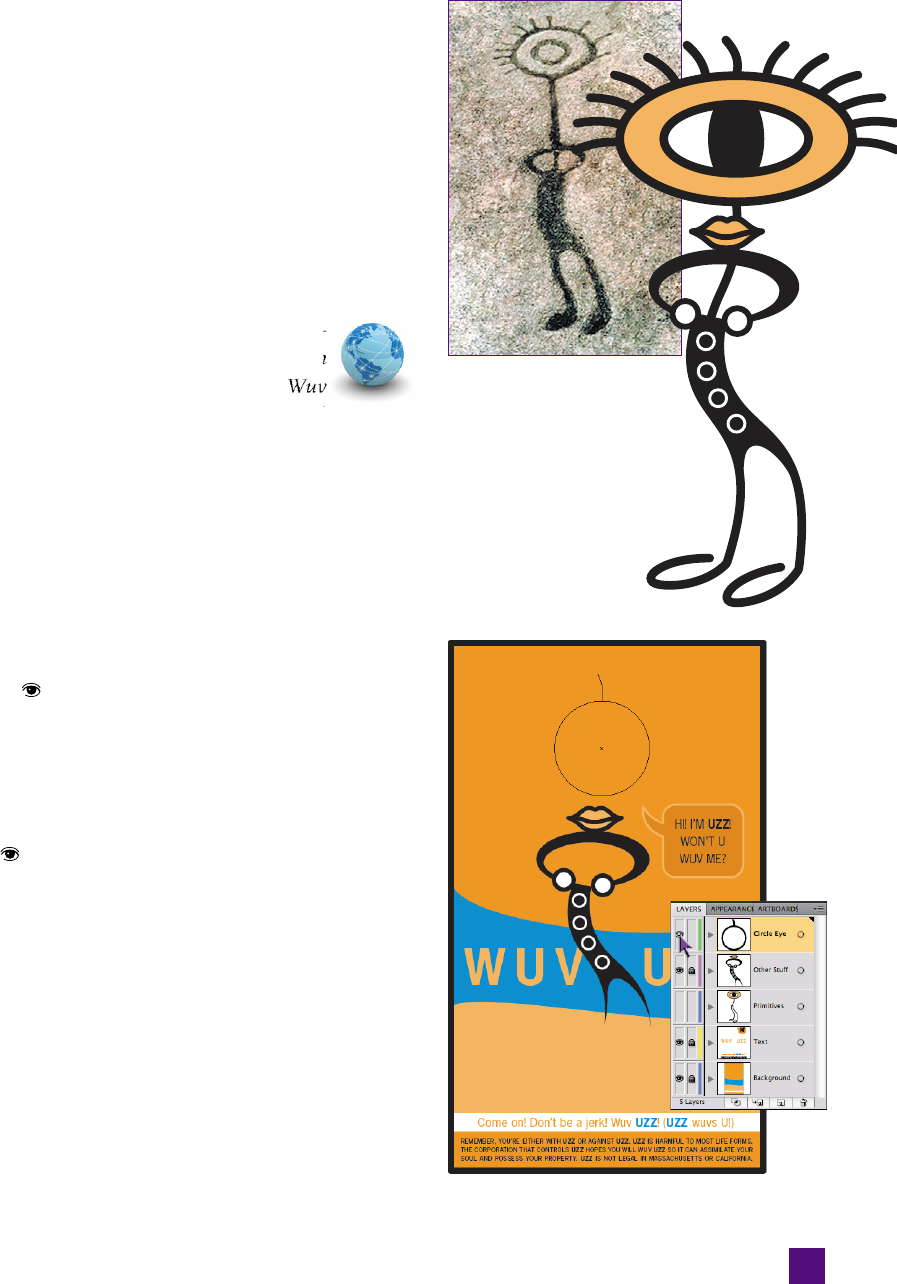
Allow me to introduce Uzz, cloying corporate mascot extraordi-
naire. Based on another found petroglyph (seen in Figure 5-57),
Uzz will plead with, guilt, or cajole his audience into brand loy-
alty—or at least that’s the hope. Over the course of the next exer-
cise, you’ll recreate Uzz’s trademark cyclops eye-head using some
of the techniques demonstrated earlier in the lesson as well as
some new transformations. You’ll also learn about saving selec-
tions and how to use saved selections to speed up future work.
1.
Open the Uzz artwork and examine the layers. Nav-
igate to the Lesson 05 subfolder, inside the Lesson
Files-AIcs5 1on1 folder. Open the fi le called
Uzz.ai, where you’ll fi nd our corporate mascot (sans eye-
lashes), waiting for the fi nal touches before being set loose
on the public.
Bring up the Layers panel if it isn’t open already. The Wuv
Uzz.ai fi le has fi ve layers, three of which are locked and can
be safely ignored for the time being. In this exercise, you’ll
be focusing primarily on the Circle Eye layer.
2. Hide the Primitives layer. For now, the Primitives layer is
going to be distracting to the work needed on the Circle Eye
layer. Click the icon next to the Primitives layer to hide it.
3. Turn on the Circle Eye layer. Click the leftmost column of
the Circle Eye layer to make it visible. You should see a per-
fect circle, adorned with a single eyelash.
4. Switch the Circle Eye layer to outline mode. Ctrl-click (or
-click) the icon by the Circle Eye layer to switch it to
outline mode, as in Figure 5-58.
5. Rotate and clone the eyelash. With the black arrow tool,
select the eyelash by clicking it. Switch to the rotate tool by
pressing the R key, and Alt-click (or Option-click) the center
of the circle to bring up the Rotate dialog box, as shown in
Figure 5-60 on the next page. Enter an Angle value of 15.5,
and click Copy to clone the eyelash.
6. Repeat the transformation fi ve times. Press Ctrl+D (-D)
fi ve times to copy the eyelash around the left side of the circle.
7. Select the left eyelashes and save the selection. Switch to
the black arrow tool, and marquee around the group of eye-
Figure 5-57 .
Figure 5-58 .
163
Transforming with Respect to Independent Origins

lashes (not including the original), as in Figure 5-59.
Shift-click the circle to deselect it.
Illustrator allows you to save selections, much as Photo-
shop does, but Illustrator’s method of saving selections
is quite different in its implementation. Rather than
saving the selection as a channel, Illustrator remembers
the specifi c objects that are part of a saved se-
lection, even if the objects are later moved or
transformed. As shown in Figure 5-61, choose
Select➝Save Selection. In the Save Selection
dialog box, enter “Left Eyelashes” as the name
and click OK. This group is now available under
the Select menu at any time.
8. Refl ect the eyelash group. Now it’s time to put lashes
on the other side of the eye. Switch to the refl ect tool
by pressing the O key. Click at the top- center point of
the circle, and Alt-click (or Option-click) at the bottom
center point, as in Figure 5-62, to refl ect and clone the
eyelashes to the other side.
9.
Save another selection. Again choose Select➝Save Se-
lection, and save the new group as “Right Eyelashes.”
10.
Clean up your existing saved selections. If you choose
Right Eyelashes from the Select menu, things work as
expected. However, if you choose Left Eyelashes, both
groups are selected. What gives?
Illustrator remembers what objects were part of a selec-
tion when it was saved, even if transformations are ap-
plied after the save—and cloning is included in these
transformations. To fi x the problem, repeat the fi rst part
Figure 5-59 .
Figure 5-60 .
Figure 5-61 .
Figure 5-62 .
164
Lesson 5: Transform and Reshape
Get Adobe Illustrator CS5 One-on-One now with the O’Reilly learning platform.
O’Reilly members experience books, live events, courses curated by job role, and more from O’Reilly and nearly 200 top publishers.

