Now that we have imported the clips, it’s time to create a main menu, which the DVD user can use to link to and play those clips. There are three ways to do this:
You can build a menu from scratch in Encore.
You can import a complete menu design created in Photoshop.
You can use some of the predesigned menu templates provided.
For our first project, we’ll use the third option and choose a nice background from Encore’s built-in Library palette, and then add buttons to link our video clips to the menu.
The Library palette, in the second palette window, is a convenient storage place for graphical menus, buttons, images, and other elements that you can share among all your projects. Click the tab for the Library palette to bring it to the foreground (or select Window → Library to open the palette, or just press F8 once or twice until it appears). Next, choose the Corporate option from the drop-down Set menu at the top.
The Library palette contains seven types of graphical assets: menus, buttons, images, backgrounds, layer sets, text items, and shapes, as shown in Figure 1-9. Each group can be included or hidden in the listing by pressing or unpressing the appropriate button. By default, all the buttons are pressed. However, if you select one, you’ll quickly notice that Encore deselects all the other buttons—if you want to select more than one type of asset, just hold down the Shift button while clicking. You can preview each item in the list by selecting it; a thumbnail graphic of the asset will appear in the middle of the window.
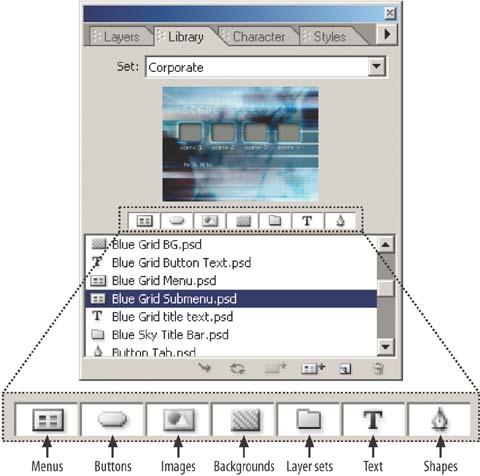
Figure 1-9. Use the Library palette to store menus, buttons, images, and other elements that are shared across different Encore projects.
Here is a précis of each asset, and (more importantly) how they differ.
- Menus
A menu is a full-screen image that groups buttons, images, shapes, backgrounds, and text items. If you’re looking for the easy road to creating menus, this is the way to go. Almost everything has been laid out for you already; you typically just need to tell the menu where to go when various buttons are pressed. A menu is a full-size, layered Photoshop (PSD) file with at least one button and one background.
- Buttons
A button is an item that can be selected on a DVD menu. You usually select a button by moving a “cursor” around a menu, and then pressing a “select” button. Once the button is pressed, the DVD may play a video, jump to another menu, or display a static image. A button is always a smaller PSD file that contains a single layer set (discussed later in this list). This layer set includes specially named layers for the highlight graphics to be displayed when the button is both deselected and selected by the cursor, as well as when the user actually activates (i.e., presses) the button.
- Images
Images are small graphics, such as arrows or separators, which can be placed over backgrounds or other assets. They usually have areas of transparency that allow other images or backgrounds to show through. Images are typically flat image files, and employ one of several common graphics file formats (e.g., PSD, GIF, JPEG, PNG, TIFF, BMP, or EMF).
- Backgrounds
Backgrounds are larger graphics that encompass the background of an entire menu. They are PSD files that consist of only a background layer, and are the target resolution of the television standard the project is building toward.
- Layer sets
Layer sets, familiar to Photoshop users, are PSD files that contain multiple layers, but no background layer. Layer sets often are used to combine text items, shapes, and images into a convenient grouping (e.g., a logo and the lettering to go with it). Note that if a Photoshop file contains a single layer set, and each layer follows a specific naming convention, it will be treated as a button instead of a layer set.
- Text items
Text items are PSD files that contain a single text layer, without a background layer, consisting of styled text.
- Shapes
Shapes are PSD files that consist of vector shapes. They differ from images in that they are scalable without losing any quality.
Feel free to explore the different asset types in each set. For this project, however, we won’t just choose a Library menu. Instead, we’ll learn more if we start with a Library background and build up instead of just using a ready-made menu. So, let’s get to work in the Library palette.
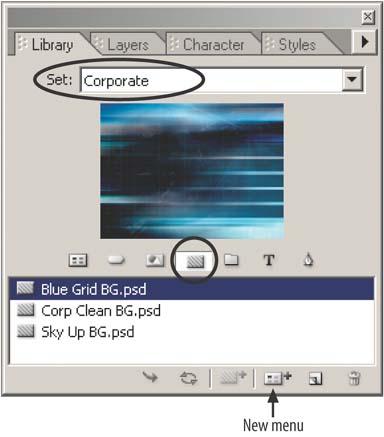
Select the corporate set. This narrows down our selection of assets to choose from.
Toggle the listing to display only backgrounds. This is the fourth button from the left. You should see a small listing of backgrounds, each preceded by the gray rectangular Background icon.
Create a new menu from a library asset. Click Blue Grid BG.psd to select it as the menu design, then right-click and choose Create New Menu. Alternatively, you can click the New Menu button under the list of files, as shown in Figure 1-10.
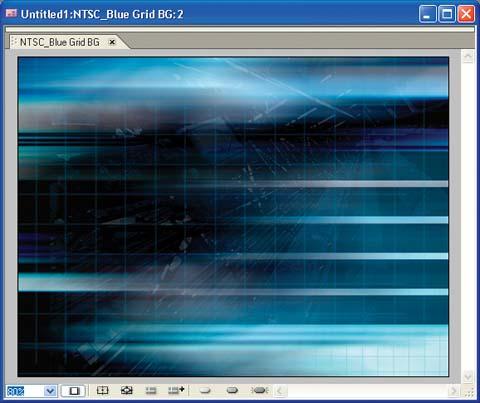
Encore opens a new Menu Editor window with the blue grid image that we selected as the background. Congratulations! You’ve created your first (albeit totally nonfunctional) DVD menu!
Now let’s talk about this new window that has opened. You can think of the Menu Editor window as a customized program for designing and compositing images, graphics, text, and even motion videos into DVD menus. The Menu Editor window is shown in Figure 1-11.
Now that you have created this menu, Encore automatically added it to the list of assets under the Project tab, with a Type of “Menu.” You can access it by simply double-clicking the entry in the Project tab to open it in the Menu Editor window.
Did you notice that when you created the menu, Encore also did one more thing behind the scenes? It marked the new menu with a tiny triangle (arrow) icon in the upper-left corner of the asset icon. In addition, if you select the asset in the Project tab window, you’ll see the words "First Play” next to the same icon at the top (see Figure 1-12). This is because Encore has set this menu as the default element shown when you first start playing the disc. After all, the DVD player needs to start somewhere, and the first play allows you, the author, to choose what that is (e.g., the top menu as shown here, an introductory clip, or an FBI warning). To change the first play, choose a different menu or timeline in the Project tab and select File → Set As First Play (or use the right-click contextual menu).

As you’ve probably guessed, you can edit more than one menu at once in the Menu Editor window. If you decide to add more than one menu to your project (say, for example, you created a new blue grid submenu), each menu is organized as a tab in the Menu Editor window. Again, you can drag the tabs out into separate windows and access each open menu in the Window menu.
Of course, a menu background is not very interesting by itself; it looks lonely and needs something to link to, such as the video clips that we imported earlier. Let’s do that now.
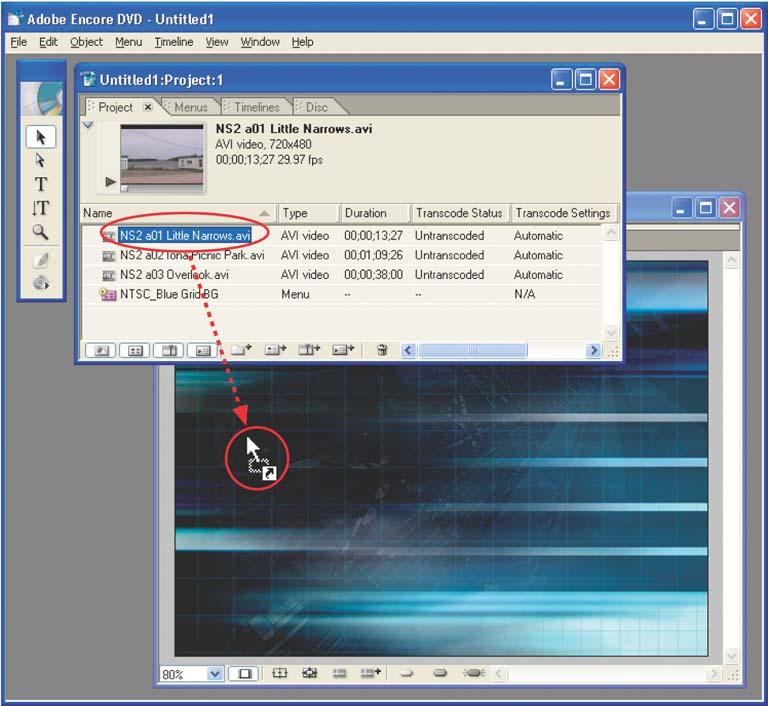
Drag the video clips from the project window to the menu editor. The AVI video clips we imported are listed in the Project window, as shown in Figure 1-13. Go ahead and drag one of them over, but don’t let go. Note that the icon changes to an arrow/square with a plus sign or arrow. This shows that it’s legal to drop the asset here.
Choose a location and drop the clip. When you let go, Encore creates a button for the clip, with a respective thumbnail image and text below it, as shown in Figure 1-14.
Add some more clips. Select a couple more clips (AVI files) in the Project tab and drag them together onto the menu. Encore creates a button for each of them.

This menu could use some cleaning up. To do so, use the floating toolbox in the top left of the Encore window, which contains tools for editing the elements in your menus. You can move and adjust elements, as well as copy and paste and duplicate them. You also can add and edit text for your buttons.
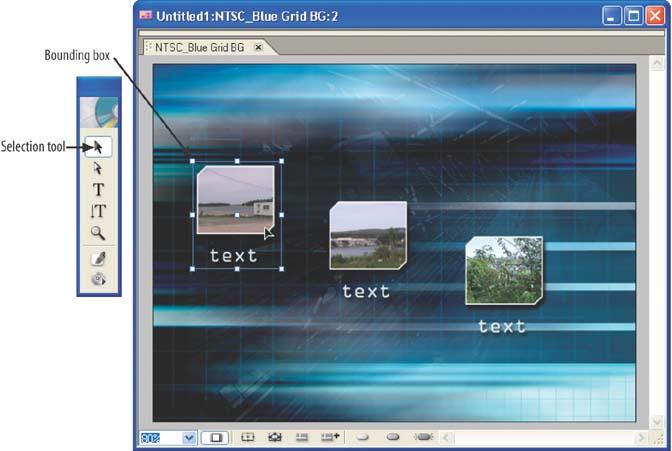
Adjust the position of the buttons. Click on the top solid arrow in the toolbox (the Selection tool) and then select one of the buttons. This causes a bounding box—which is a stretchable rectangle with points at the corners—to appear, as shown in Figure 1-15. At this point, you can drag the buttons around the menu, or, if you want to move them just slightly, try selecting one and using the arrow keys to move them one pixel at a time. In case you’ve stumbled across it already, Encore also provides assists for automated menu layout and alignment under the Object menu. However, let’s defer discussion on that until later.
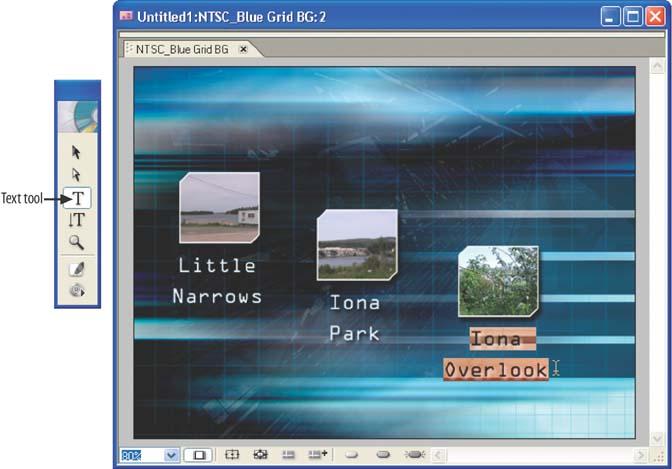
Change the text for each button. Select the Text tool in the toolbox (the third button from the top, with the plain “T”). Note that the cursor changes to an “I” shape for text editing. Next, move the cursor over the “text” lettering under the buttons and click to edit the text. To highlight the currently selected text, Encore reverses the colors of the characters and the background behind it, as shown in Figure 1-16.
Warning
If you like walking on the wild side, try dragging a clip on top of an existing button. The result isn’t what you would expect! Doing so changes the existing button to the new clip, discarding the previous one. Don’t worry—you can get back to where you were by dragging the correct clip back over the button, or using Edit → Undo.
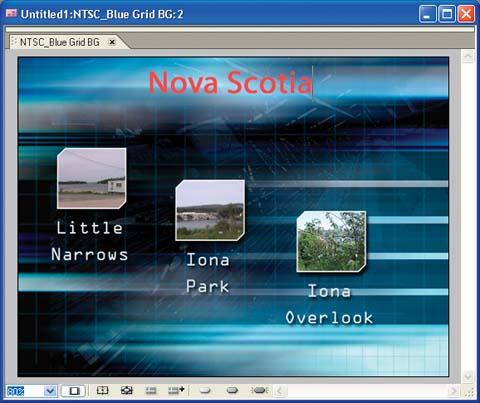
Add a title to the menu. In addition to editing the clip buttons, Encore’s Menu Editor also enables you to composite other graphics and text on menus. For example, to add new text to the menu (such as a title or credits), select the Text tool in the toolbox and click over an unused location of the background (i.e., not over any existing text). Encore displays a flashing vertical bar as the text insertion point, so go ahead and type in some text. See Figure 1-17 for an example.
The first thing you’ll notice is that the new text you type is totally different from the button text, including a different font, size, and color. Don’t worry. Encore gives you complete control of the attributes of the text on your menus.
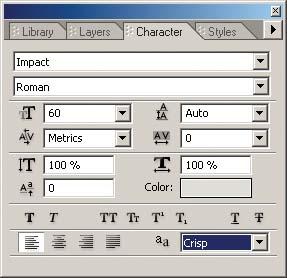
Change the appearance of the title. After you have finished typing the title text, click the Selection tool in the toolbox again. When the text is selected, Encore displays it with a bounding box with resizing handles. But before you mess around with stretching the text, first take a look at the Character palette (Window → Character). The Character palette, shown in Figure 1-18, provides extensive typographic control over type attributes, alignment, and anti-aliasing. We’ll go over this in more detail in Chapter 5, but for now, feel free to experiment by changing common attributes such as font, style, size and color.
To adjust the size of the text, you can also Shift-drag a corner of the text bounding box outline to adjust the text size proportionally, or drag any handle to squeeze or stretch the characters together.
In Figure 1-19, we’ve changed the font and stretched it to be much larger than before.
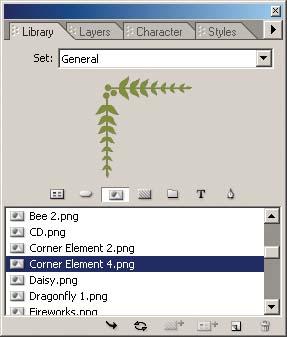
Add graphical elements. To make the menu more visually interesting, we can also add graphical elements along with the text and the buttons. For example, we can use a decorative element from the Library palette to add a touch of class to the title. First, bring up the Library palette shown in Figure 1-20 (Window → Library, or F8), and select the General set of assets. Next, click the Toggle Images button just above the list (it’s the third one from the left). When the icon is the only one that is selected, Encore will ensure that only graphics images are shown in the menu below.
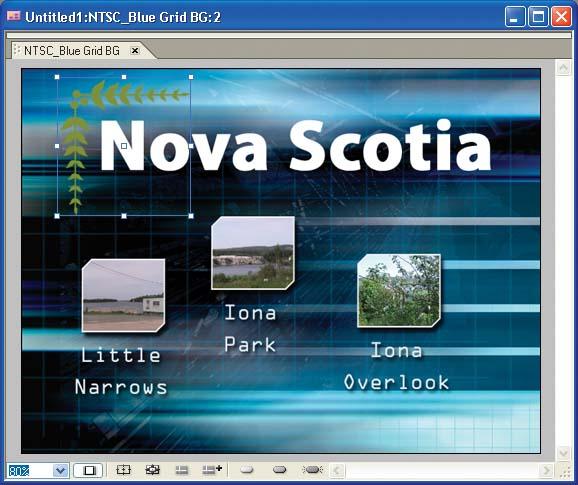
At this point, we need to choose an interesting graphic from the list. For the purposes of this example, we’ll choose the Corner Element 4.png file. Once it is selected, we can drag it from the Library palette to the Menu Editor window (you can drag from either the filename or the preview display). From there, use the Selection tool I mentioned earlier to adjust its position and size using its bounding box. Adding graphics makes your menus more interesting by compositing additional elements onto your menus, as shown in Figure 1-21.
Save the file. Now that we’ve designed our first menu, this is a good time to save our work in progress. Choose File → Save and navigate to the location where you want to save your work. As you might expect, you also can use File → Save As to save another copy of your project under a new name.
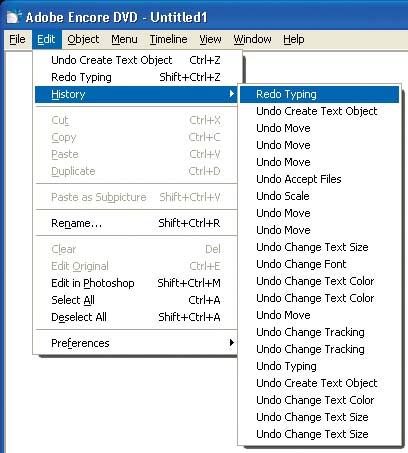
Undo or redo if you need to. Encore also provides the standard Undo/Redo mechanism. If you make a mistake, or just don’t like the results of you most recent edit, choose Edit → Undo to roll it back. Or, if you decide you wanted to do it after all, choose Edit → Redo to apply the action. Encore keeps a list of up to 20 of your most recent actions, which you can review under Edit → History, as shown in Figure 1-22. With the History list, you can undo or redo groups of edits.

So, at this point, we’ve added a title a graphical element to our menu. It’s not the prettiest thing in the world, but in the opening chapter we’re shooting for simplicity, not elegance. That will come later, after we’ve fully covered Adobe Encore fundamentals.
Get Adobe Encore DVD: In the Studio now with the O’Reilly learning platform.
O’Reilly members experience books, live events, courses curated by job role, and more from O’Reilly and nearly 200 top publishers.

