Publishing a Web Database
So far, youâve learned to create a basic web database. But until you upload that web database to a SharePoint server, it isnât fulfilling its true potential (and you have no way to run your web objects in the browser).
Publishing a web database is easy:
Choose FileâInfo.
You arrive in backstage view, where you see a big âPublish to Access Servicesâ button that doesnât appear when youâre dealing with an ordinary database.
Click âPublish to Access Servicesâ.
This command takes you to the FileâSave & Publish section of backstage view, with the âPublish to Access Servicesâ option already selected (Figure 23-6).
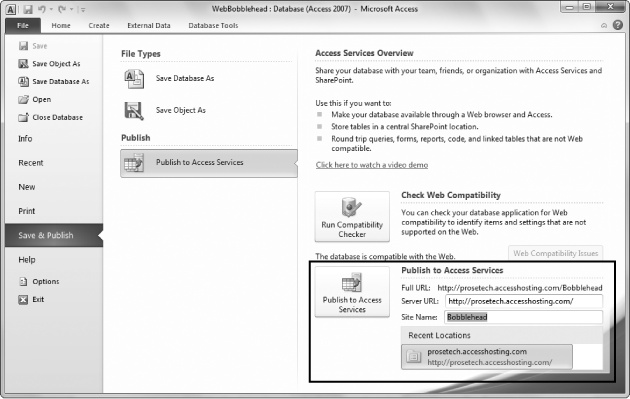
Figure 23-6. In the Save & Publish section, you can do two things: check the web compatibility of your database, or publish it to a SharePoint server (circled). Thereâs no reason to run the Compatibility Checker unless youâre working with an ordinary database. If you created a web database, you already know that itâs free from compatibility problems.
Fill in the Server URL and Site Name boxes.
The Server URL is the name of your SharePoint site. (As you already know, this could be a location on an internal network, or a website on the Internet.)
The Site Name is the site that you want to create for your database. Itâs also where SharePoint will store the hidden lists that make up your database. As you learned in Chapter 22, every ...
Get Access 2010: The Missing Manual now with the O’Reilly learning platform.
O’Reilly members experience books, live events, courses curated by job role, and more from O’Reilly and nearly 200 top publishers.

