It used to be that installing an operating system was a dreadful experience. More specifically, it should be said that it was always a dreadful experience. Fortunately, things have improved to the point where installing Windows 7 is only occasionally dreadful. In fact, it’s usually fairly painless, provided you have a relatively new PC, a true installation disc, and no data you care about on the target drive.
But what if you’re upgrading and you don’t want to ruin a functioning system? Or what if upgrading isn’t an option, and you have to perform a clean install? Or what if setup halts halfway through with nothing more than a blue screen to show for your trouble? Or worst of all, what if setup is completely successful, and now all that awaits you is a bloated, buggy OS that you need to spend time optimizing and configuring? (OK, that last scenario is what the rest of this book is about.)
Microsoft took a somewhat odd approach with Windows 7’s setup tool. Previously, you could install the latest Windows OS on top of just about any recent version, and the installer would perform an “upgrade.” The process was convenient, in that anyone could upgrade Windows by simply popping in a disc, but the resulting system never worked very well because of all the detritus left behind by the previous OS. “Perhaps this was why everyone hated Vista,” Microsoft reasoned, “so we’ll just disable the upgrade feature in Windows 7.” (Or maybe building an installer that actually worked was just too much trouble.)
Note
Whether you’re allowed to install Windows 7 over an older version or you’re forced to perform a “clean install” is unrelated to the special pricing or licensing you may’ve gotten when you purchased Windows 7. In other words, just because you got an “upgrade” version of Windows 7 doesn’t mean you can do an in-place upgrade over Windows XP.
So, can you do an in-place upgrade? If you have Windows Vista or a lesser edition of Windows 7 (e.g., Home Premium to Ultimate), see Table 1-2 to find out. If you have any other operating system, then the answer is no. Frustrating to be sure, but trust me: Microsoft is doing you a favor.
Table 1-2. Allowed Windows 7 in-place upgrade paths; no checkmark (✓) means you must perform a clean install
Windows 7 Home Basic | Windows 7 Home Premium | Windows 7 Professional | Windows 7 Enterprise | Windows 7 Ultimate | |
|---|---|---|---|---|---|
Vista Home Basic | ✓ | ✓ | ✓ | ||
Vista Home Premium | ✓ | ✓ | |||
Vista Business | ✓ | ✓ | ✓ | ||
Vista Enterprise | ✓ | ||||
Vista Ultimate | ✓ | ||||
XP or earlier |
Furthermore, if you want to switch from 32-bit to 64-bit or vice versa, you must do a clean install. You’ll also need to install clean if you’re changing the core language, installing a hobbled version of Windows 7 (e.g., Windows N, Windows KN, etc.), or are upgrading from any beta or release candidate.
Use this method to set up Windows on a brand-new, empty hard disk; if your PC already has a Windows installation, even if it doesn’t support an in-place upgrade, skip to the section Upgrade from a Previous Version of Windows.
The Windows 7 installation disc is bootable, which means that you can pop it in your drive, turn on the computer, and the installation process will start automatically.
If your PC doesn’t boot off your setup disc, you’ll need to do one of the following:
- BIOS setup
Enter your BIOS setup utility (see Appendix A), navigate to the Boot section, and change the boot device priority or boot sequence so that your DVD drive appears before your hard disk. Save your changes and exit BIOS setup when you’re finished.
- Boot menu
Alternatively, some PCs provide a “boot menu” that lets you choose the boot drive on the fly. Look for a message above or below the boot screen right after you power on your PC; usually, all you do is press the F12 key—before the beep; don’t dawdle—select your CD/DVD drive from a list, and hit Enter.
When your PC detects a bootable disc, you’ll usually see this message for three to four seconds:
Press any key to boot from CD or DVD . . .
Press a key on the keyboard, and in a few moments, setup should load normally and display its Welcome screen. (See the section Boot Without a Boot Disc if you can’t boot off the Windows setup disc.)
On the first screen, click Next to display the Install Windows screen shown Figure 1-1. From here, click Install now to proceed.
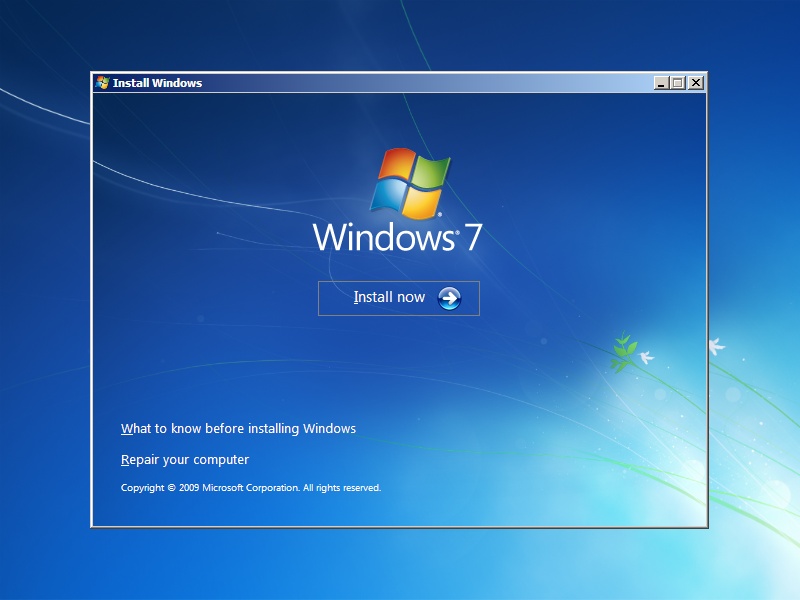
Figure 1-1. From this page, click Install now to begin setup, or Repair your computer to use the repair tools explained in Chapter 6
On the next page, setup asks for your product key, which you can read off the DVD sleeve or the sticker on your PC case. Mercifully, Microsoft allows you to skip this step—leave the field blank, click Next, and then answer No—so you don’t have to waste time fishing around for the sticker and typing the excruciating 25-digit key, only to have setup laugh at your propensity for typos. This is a particularly useful time-saver if you’re only setting up a temporary installation for software testing or data recovery.
Warning
If you complete setup without typing your key, make sure you choose the edition of Windows 7 for which you actually own a license. If you choose the wrong edition, you won’t be able to change it later without reinstalling from scratch. When Windows boots, it’ll operate in a fully functional “evaluation mode” you can use normally for 30 days. If you don’t enter a valid product key for the edition you chose during setup in time—through the System page in Control Panel—Windows goes into a lockdown mode. (See Install clean with only an upgrade disc for a way to extend this evaluation period.) So, if this installation ends up being a keeper, don’t put this step off, lest you risk giving yourself a nice big headache.
A few pages later, you’ll be asked “Which type of installation do you want?”, at which point you can select Upgrade or Custom (advanced). The Upgrade option is only for performing an in-place upgrade from Windows Vista; try it with an earlier version like XP, and setup will display an error and then start over.
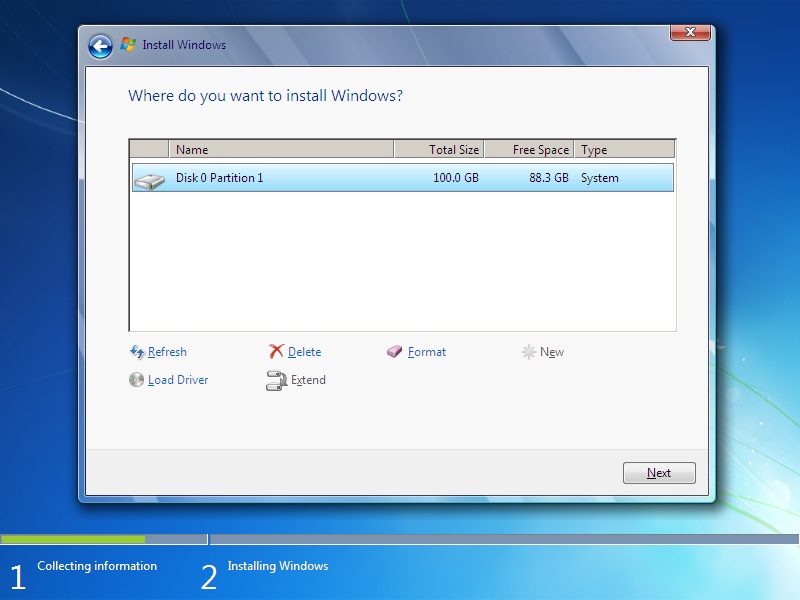
So click Custom (advanced) to advance to the “Where do you want to install Windows?” page, and then click the Drive options link to reveal the partition editor shown in Figure 1-2. See Chapter 5 for more information on partitions and the tools included with Windows to manage them.
If the hard disk is clean and you want to use the entire hard disk for your installation, just click Next to proceed. Otherwise, use Delete to wipe out any existing partitions—as well as the data on them (warning: there’s absolutely no undo here)—and New to create new partitions on the drive. See Chapter 5 for more on partitions and the reasons you might want more than one.
Warning
Windows 7 setup creates a 100 MB “System Reserved” partition when you install on a blank hard disk (Professional edition or better). To keep this from happening and use your entire hard disk for the Windows installation, see Prevent extra partitions during setup.
Follow the screens to complete setup. If setup crashes along the way, or Windows won’t boot after you’re done, see the section Fix Problems with Windows Setup.
So you thought you’d save a little money by purchasing the “upgrade” version of Windows, but now you find yourself in a bit of a jam. Your hard disk crashed, and without a full backup (see Chapter 6), you need to rebuild your system. Or perhaps you’ve decided against an in-place Vista upgrade to avoid passing on two years of accumulated junk to your new operating system. Either way, you’ve undoubtedly discovered that your upgrade disc won’t install if it can’t find an eligible Windows installation to upgrade.
In this scenario, Microsoft suggests that you install Vista and then install Windows 7 over it. Not bloody likely.
Instead, just follow these steps to get a fresh Windows 7 installation from an upgrade disc:
Use your Windows 7 disc to boot your PC, as described in Install Windows on an Empty Hard Disk.
When setup loads, click Install now and proceed normally.
When prompted for the product key, leave the field blank, and just click Next. Without the key, setup will ask you which edition of 7 you’d like to install; make sure you choose the edition you actually own.
When setup is complete, you’ll be operating in the 30-day evaluation period, but you won’t be able to activate 7 until you enter your product key.
To enter the product key, open a Command Prompt window in administrator mode, as explained in the section Control User Account Control, and then type this at the prompt:
cscript \windows\system32\slmgr.vbs -ipk
xxxxx-xxxxx-xxxxx-xxxxx-xxxxxwhere
xxxxx-xxxxx-xxxxx-xxxxx-xxxxxis your Windows 7 product key, taken from the DVD sleeve or the sticker on your PC case. Press Enter to proceed.Note
If this doesn’t work, you may need to temporarily deactivate the UAC feature as described in Chapter 8, and then try again. Then, reactivate UAC when you’re done (should you so desire).
Next, activate Windows with this command:
cscript \windows\system32\slmgr.vbs -ato
and press Enter. To verify that activation was successful, type this:
cscript \windows\system32\slmgr.vbs -dlv
Type
exitor close the Command Prompt window when you’re done.Note
Using a process known as rearming, you can extend the evaluation period up to two or three times, for a total of 120 days. Just execute the slmgr.vbs script with the
-rearmparameter. It will take 15–30 seconds to make the change, at which point you’ll need to restart Windows.
When you install Windows 7 (Professional, Ultimate, or Enterprise editions) on an empty hard disk, setup creates an extra, hidden 100 MB partition. It’s used for BitLocker drive encryption (see Chapter 8), although BitLocker works fine without it. It also holds a copy of the Windows Recovery Environment so you can repair Windows without having to fish out the setup DVD, as described in What to Do When Windows Won’t Start.
Note
If you’re installing on a hard disk that already has partitions with data, if you have the Home Premium edition, or you don’t mind the extra partition—admittedly, 100 MB isn’t much by today’s standards—then you can skip these steps.
Since this is space you can never use for your own data, you can use the following procedure to keep this partition from ever being created:
On the “Where do you want to install Windows?” page (Figure 1-2) partition screen of Windows 7 Setup, click Drive options (advanced). Delete any existing partitions (if applicable) and then create a new partition to fill the drive. See Chapter 5 for more information on partition management.
When Windows warns you, “To ensure that all Windows features work correctly, Windows might create additional partitions for system files,” click OK.
At this point, you’ll see two partitions:
Disk 0 Partition 1: System Reserved (System)
Disk 0 Partition 2 (Primary)
Highlight the Primary partition and then click Delete.
Next, select the System Reserved partition and click Extend. Type the maximum size available for the partition and then click Apply.
Again highlight the newly extended System Reserved partition and click Format.
When the format is complete, proceed to install Windows on the lone partition.
See Chapter 5 if you’ve already installed Windows and you wish to remove this partition.
I still have a box of floppy disks in my closet, most of which are boot disks for old operating systems (Windows Me, Windows 95, DOS 6.2, DOS 4.0, etc.). Not a single one of my PCs still has a floppy drive, but each was such a hassle to create or obtain, I can’t bear to part with them lest someone knock on my door one day with a 25-year-old IBM XT that won’t start up.
Suffice it to say, it can be a real pain to boot a PC before any operating system is installed. Windows 7 comes on a bootable DVD, but if you have an older drive that doesn’t support bootable DVDs, or if you don’t have a working optical drive at all, what do you do? One method is to pull the hard drive from the PC and then use another PC to copy files from the Windows setup disc to a temporary folder on the drive. But that still leaves the question: how do you boot the PC so you can get to those files?
Or, what if Windows is already installed, but you need to accomplish a task you can’t do from within Windows, such as updating/flashing your PC’s BIOS, your video card BIOS, or your hard drive BIOS?
Note
If you’re unlucky enough to be stuck with one of those BIOS update utilities that insists on writing files to a floppy drive, you can use the free Virtual Floppy Drive tool from http://chitchat.at.infoseek.co.jp/vmware/vfd.html to add a fake drive letter. Run your tool, and then use Windows Explorer to retrieve the files.
Fortunately, there are several “alternate” ways to boot a PC if, for whatever reason, you can’t boot the conventional way: a network (PXE) boot, a bootable USB flash drive, and a bootable CD.
Using your PC’s built-in support for Preboot Execution Environment (PXE), you can place boot files on a shared folder on another PC on your network, and then boot the PC off of those files. Setting this up is a bit involved, but it’s often simpler than using a boot disk.
To get started, you’ll need a working PC with an Internet connection. Install the Windows Automated Installation Kit (WAIK), available for free at http://go.microsoft.com/fwlink/?LinkId=136976. Open the Windows PE Tools Command Prompt from the Start menu, and if you’re installing the 32-bit edition of Windows 7, type:
copype.cmd x86 c:\output
or if you’re installing the 64-bit (x64) edition, type:
copype.cmd amd64 c:\output
and press Enter. The batch file will create the c:\output folder automatically. When the files have been copied, issue this command to mount the Windows Preinstallation Environment (PE) image:
imagex /mountrw C:\output\winpe.wim 1 C:\output\mount
Next, open Windows Explorer and create a subfolder inside of c:\output named boot. Copy all the files from c:\output\mount\Windows\Boot\PXE to the new c:\output\boot folder. When that’s done, unmount the Windows PE image:
imagex /unmount C:\output\mount
Back in Windows Explorer, copy the boot.sdi file from the WAIK installation folder to the c:\output\boot folder. If you’re installing the 32-bit edition of Windows 7, get boot.sdi from C:\Program Files\Windows AIK\Tools\PETools\x86\boot, or if you’re installing the 64-bit (x64) edition, get it from C:\Program Files\Windows AIK\Tools\PETools\amd64\boot.
Return to the command prompt window and copy the winpe.wim file to the boot folder and rename it to boot.wim, like this:
copy c:\output\winpe.wim c:\output\boot\boot.wim
After all that, there are a bunch of other tedious commands required to create a Boot Configuration Data (BCD) file using bcdedit.exe, the same tool used in Set Up a Dual-Boot System. For a shortcut, just download makebcd.bat from http://files.creativelement.com/annoyances/makebcd.bat, and run it on your PC. When prompted to cut and paste the GUID, right-click any part of the command prompt window, select Mark, select the text in curly braces just above the prompt, and press Enter to copy the text. Right-click again, select Paste to paste the text, and press Enter to continue execution. If all goes well, you’ll only see a series of messages stating that “The operation completed successfully.”
The last step is to install Trivial File Transfer Protocol
(TFTP) server software, such as Tftp32 (free from http://tftpd32.jounin.net/) so the target PC can
connect to the working PC to retrieve the boot files. Install Tftp32
and start tftpd32.exe. Click
Browse, select the c:\Output folder and click OK to set it as
the Current Directory. Next, choose
the DHCP server tab, click
Help, and fill out the fields as
instructed. In the Boot File field,
type boot.sdi. When you’re done,
click the Save button.
Now that the PXE server is set up, you need to enable PXE Network boot in your new PC’s BIOS setup screen, as explained in Appendix A. You’ll need the host name or IP address of the PC acting as the PXE server; see Chapter 7 for more on IP addresses, general networking tips, and troubleshooting.
There are many ways to make a bootable CD, but to make a bootable Windows 7 CD, follow these steps.
First, install the WAIK, as described in the previous section. Open the Windows PE Tools Command Prompt from the Start menu, and if you’re installing the 32-bit edition of Windows 7, type:
copype.cmd x86 c:\bootcd
or if you’re installing the 64-bit (x64) edition, type:
copype.cmd amd64 c:\bootcd
and press Enter. The batch file will create the c:\output folder automatically.
Next, copy the Windows PE image file like this:
copy c:\bootcd\winpe.wim c:\bootcd\ISO\sources\boot.wim
and copy the imagex.exe tool as well:
copy "C:\program files\Windows AIK\Tools\x86\imagex.exe" C:\bootcd\iso\
Finally, create the ISO (disc image) by issuing this command:
oscdimg -n -bC:\bootcd\etfsboot.com C:\bootcd\ISO C:\bootcd\bootcd.iso
When the ISO file is ready, use Windows’ own Disc Image Burner (isoburn.exe) or a program like ISO Recorder (free from http://isorecorder.alexfeinman.com/) to burn the ISO to a blank CD. Insert the CD and turn on your computer to boot. See the section Install Windows on an Empty Hard Disk for tips on booting off a CD.
A flash drive is the modern day floppy, so why not use it like one?
You’ll be wiping the flash drive clean, so back up any data on the drive before you continue. With the flash drive inserted into a USB port, and your Windows setup disc in your DVD drive, make note of each of these drive letters.
Note
You’ll need a flash drive of at least 4 GB, and one that plugs directly into a USB port. (In most cases, flash cards used for cameras are not suitable.) Also, only newer PCs can boot from flash drives; to see if yours can, check the documentation or snoop around your PC’s BIOS for settings to enable this feature, as explained in Appendix A.
Next, open a Command Prompt window in administrator mode (see
Chapters 9 and 8,
respectively), and type diskpart to open
command-line disk partitioning tool (discussed in Work with Partitions). At the
diskpart prompt, type:
list disk
Look through the list and find the number assigned to your USB flash drive. Then type:
select disk nwhere n is the number of your flash
drive. Then type these commands in order:
clean
create partition primary
select partition 1
active
format fs=ntfs
assign
exit
to prepare the flash drive. When that’s done, type:
d:\boot\bootsect.exe /nt60u:
where d: is the letter of your DVD
drive and u: is the letter of your USB
flash drive. Finally, copy all of the files from the Windows DVD to
the flash drive root (top-level) folder.
When all the files are in place, plug it into one of the target PC’s free USB ports and use it to start your computer.
In a departure from earlier versions, Microsoft has made it impossible to perform an in-place upgrade on any Windows older than Vista. (And XP users thought they were unhappy when Vista came out!)
This means you’ve got some work to do before you can install Windows 7 on a hard disk that already has an earlier version of Windows on it. (If you don’t have anything of value on the drive and don’t mind wiping it clean, check out Install Windows on an Empty Hard Disk for instructions.) The good news is that there isn’t much to do, despite what Microsoft would lead you to believe.
Note
Before you get started, it’s a good idea to collect a few things that might be harder to get once you’ve begun setup. For one, put a Windows 7-compatible driver for your network adapter on a USB flash drive or CD, just in case Windows doesn’t support your hardware and thus won’t allow you to download the files you need. Also, since you’re essentially doing a fresh install, make sure you have the installers for your most important applications. And if there’s anything you absolutely can’t live without, use Microsoft’s Compatibility Wizard to see if you’ll need to put off a Windows 7 upgrade until there’s an update for your must-have application or device driver.
Now, if you’re upgrading from Vista, you can technically use the Upgrade feature shown in Figure 1-3, but don’t be fooled: it’s not all it’s cracked up to be. Sure, you won’t have to reinstall all your applications—although many will need to be updated anyway to work with Windows 7—and you won’t have to do any real prep work, but what you’ll end up with may be slower and more buggy than it needs to be, all because of the junk left behind by the old installation. Now’s your chance to start over with a clean slate—take it!

Warning
One of the upgrade scenarios that Microsoft doesn’t support—regardless of the version of Windows you’re upgrading—is upgrading from 32-bit Windows to 64-bit (even from Windows 7 to Windows 7). So if you’re considering taking the x64 plunge, right now is your best chance if you don’t want to bother with yet another clean install in a few months. See 64-Bit Windows for details.
Microsoft’s answer is to use the Windows Easy Transfer (WET) tool (formerly known as the Migration Wizard) to copy your personal files to an external hard disk, USB flash drive, or network drive, wipe your hard disk, and then install Windows 7. To do this, pop in your Windows 7 install disc and open Windows Explorer. Navigate to the \support\migwiz folder on the DVD, double-click migsetup.exe, and follow the prompts.
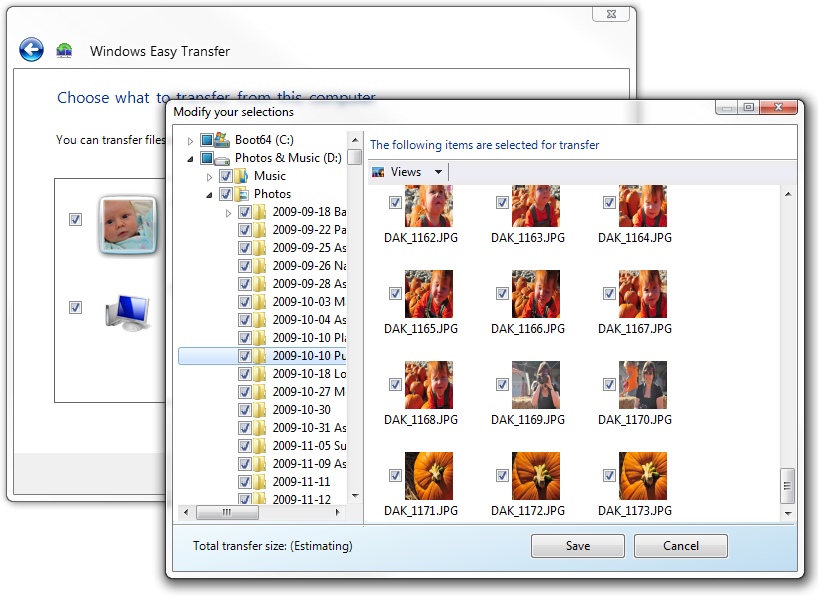
What gets transferred? By default, Windows Easy Transfer grabs most—but not all—of the stuff in your user account folder (c:\users\{your user name}), which includes your desktop, your Documents folder, your Internet Explorer Favorites, and a handful of application saved settings (e.g., iTunes library, Firefox bookmarks). It also collects most of the stuff in the All Users folder, which it calls Shared Items. To customize what is saved, click the Customize link next to any item in the Choose what to transfer from this computer list, and then click Advanced. On this Windows Explorer-like window shown in Figure 1-4, place a checkmark next to any folder or individual file you want to keep.
When you’re done choosing files, Windows Easy Transfer compresses your files into a single .mig file, which you can save anywhere you like, presumably on a removable or network drive.
Once your data is safe, go ahead and install Windows 7, following the instructions in the previous section. When setup asks “Where do you want to install Windows?” (see Figure 1-2, shown earlier), you can delete the existing partition on your hard disk and then recreate it to ensure a totally clean install. (Keep in mind that any data not backed up with Windows Easy Transfer will be lost for good if you do so.) Or, just leave the partition intact, as described later in this section. As soon as Windows 7 is installed and running, just connect the drive and double-click the .mig file to restore your stuff.
So what’s wrong with the WET approach? For one, it doesn’t save all your files, only those in standard locations (like the Documents, Music, and Pictures folders) plus the ones you explicitly check off. Miss something and you might lose it. WET also doesn’t save registry settings for your installed applications (e.g., settings, toolbars) or any of your custom file types (see Chapter 3). Don’t be surprised if you lose your file encryption (Chapter 8) and shadow copies (Chapter 6). WET also doesn’t transfer installed applications, but even if it did, you’d have to reinstall them anyway.
Note
To move registry data (including file types) from your old Windows to the new one, use registry patches, as described in Chapter 3.
Another problem with WET is that it requires that you move all the data you want to keep—which might be sizable—to another medium. Say you’ve got 675 GB of home movies and photos, another 60 GB of music, and 12 GB of business documents. You’ll have to wait while WET tries to compress and consolidate all 747 GB of data, and then try to find a place to put the resulting 746 GB file. Don’t have a 750 GB drive handy, and don’t want to go buy one just for 3 hours use? Or maybe you just don’t feel comfortable relying on a single piece of hardware and a potentially buggy program to safeguard your data?
But the biggest problem with WET is that it is largely unnecessary. Instead, why not do some Drive Reorganizing Yourself, or DRY? By going DRY, you simply take charge of migrating your own data so you can be sure that you’ve got everything and that it all ends up where you want it.
Warning
Whether you do a WET or DRY upgrade to Windows 7, it’s an awfully good idea to back up your entire hard disk first. That way, if there’s some catastrophic problem with the upgrade—or you decide this PC isn’t ready for Windows 7—you can restore the previous Windows installation and all your data in one step. But make sure your backup software is compatible with Windows 7, or you may not be able to get at any of your files.
If you’re upgrading from Vista (Business edition or better), you can use the Complete PC Backup and Restore feature in Control Panel to image the hard disk, allowing a full restore to the pre-upgrade state, or quick restore of individual files from within Windows 7 (see Chapter 6). Other editions and versions may require third-party backup software.
The Custom (advanced) installation type shown in Figure 1-3 is a workable choice for upgrading Windows XP and older machines, despite the explanation beneath it. In fact, the bit that reads, “This option does not keep your files, settings, and programs” is a flat-out lie. (It really means that it won’t migrate your stuff.)
When you perform a Custom installation on, say, Windows XP, setup moves your old Windows, Program Files, and Documents and Settings folders into a new folder called Windows.old so it can install Windows 7 on the drive unhindered. Other folders (e.g., c:\Dave’s Personal Stash) are left alone. None of your data is deleted, and provided you have enough free disk space (at least 11 GB), setup performs what’s called a “parallel installation,” where Windows 7 is placed alongside your old operating system.
Note
A parallel installation isn’t the same as a dual-boot setup. After installing Windows 7 in this way, the old version will no longer be bootable. If you want to keep both versions of Windows bootable, you’ll need more than one hard disk or hard disk partition, as described in the section Set Up a Dual-Boot System.
The end result is effectively the same as installing on an empty hard disk as described in the previous section, except that all your old data stays on the drive. It’s not quite as convenient as WET, but it potentially takes less time, and you don’t have to worry about missing any files because nothing from the old installation is deleted. Here’s how you do it:
Boot your PC into the old version of Windows, and insert your Windows 7 DVD.
Warning
If your old Windows installation won’t start, boot off the DVD as described in the previous section. But doing so will permit setup to make changes to your partitions, making it possible to delete your primary partition and lose all your data.
When the Install Windows page appears, click Install now.
If you have a working Internet connection and wish to do so, click Go online to get the latest update for installation. Or, if you prefer, click Do not get the latest updates.
Choose your Windows 7 edition from the list and click Next; make sure to pick the one for which you have a valid license key, or you’ll have to do this all over again.
Accept the license terms and click Next. You’re not going to read all that, are you?
When setup asks “Which type of installation do you want?” (Figure 1-3), choose Custom (advanced).
On the “Where do you want to install Windows?” page (Figure 1-2), click the drive with the previous version (usually drive C:) and click Next. Don’t delete or reformat any partitions here, or you’ll lose data with no hope of recovery.
At this point, you’ll get a warning about files from a previous installation; click OK.
Go get yourself a nice cup of tea while Windows copies half a million files to your hard disk and reboots a few times.
When Windows 7 finally loads, it’s time for the DRY step: reorganize the old folders so the new Windows installation can find all your data. Fire up Windows Explorer (Chapter 2) and navigate to your c:\Windows.old\Documents and Settings folder (or, if upgrading Vista, c:\Windows.old\Users).
Next, open the subfolder of your user account, and then open the Desktop folder. Press Ctrl-A to select all files and then drag them to your new Desktop folder at the top of the tree. (Or, create a new folder called Old Desktop if you don’t want to clutter up your new desktop with all that old junk.)
Note
If you want to keep the old files in the old locations, hold the Ctrl key while dragging and dropping (see Chapter 2 for subtleties) to copy the files instead of moving them.
Repeat the previous step for Pictures (or My Pictures in XP), Music (or My Music), etc., copying each collection of files to the appropriate new location.
Next comes Application Data, which houses the various personalized data files created by Windows and most of your applications. By default, both the old folder and its new Windows 7 counterpart are hidden, but if you show hidden files in Windows Explorer (explained in Chapter 2), you’ll see them.
In Windows XP, the old files are in C:\Windows.old\Documents and Settings\{your_user_name}\Application Data. For Vista, they’re divided in both C:\Windows.old\Users\{your_user_name}\AppData\Roaming and C:\Windows.old\Users\{your_user_name}\AppData\Local.
You don’t have to copy all the files in these folders. In fact, you may prefer to only copy certain branches as you discover you need them; that way, you won’t put anything in your new installation you don’t actually need. For instance, your Mozilla Firefox profile—complete with your old bookmarks, cookies, and saved passwords—from your old Vista installation can be found in C:\Windows.old\Users\{your_user_name}\AppData\Roaming\Mozilla\Firefox\Profiles. But inside the Profiles folder is also your Firefox cache, which is better left behind. In this case, you’d copy or move everything except the Cache subfolder to C:\ Users\{your_user_name}\AppData\Roaming\Mozilla\Firefox\Profiles.
When you’re done, leave the Windows.old folder intact and close Windows Explorer. Once you’re sure you’ve got everything from the old folder—perhaps weeks or months from now—you can go back and delete the defunct Windows.old folder.
Another use for the DRY method is to repair a seriously munged Windows 7 installation. If Windows 7 won’t boot, you can perform a parallel installation to place a new copy of Windows 7 on your PC without harming the existing data on your hard disk.
One downside to the DRY method—apart from the need to do some manual shuffling of files—is that your hard disk never gets formatted. If it’s an old drive with a long history of upgrades, a clean format may improve reliability.
The most common cause of a failed installation of Windows 7 is an out-of-date system BIOS. If setup crashes, or if Windows won’t boot after you finish installing, check with the manufacturer of your system or motherboard for any BIOS updates, and update your BIOS if needed. Better yet, make sure you have the latest BIOS before you begin installation, particularly if your PC is more than a year old. See Appendix A for details.
Another common stumbling block to a successful Windows 7 setup is your video card (display adapter). If setup stops with an unintelligible error message, reboots unexpectedly during setup, or just hangs at a blank screen, your video card may be at fault. Unfortunately, setup will rarely, if ever, warn you about such an incompatibility before you begin. Of course, updating the driver won’t help, since you’d either be installing the driver software on an older version of Windows that will soon be replaced, or installing it on the new OS that won’t boot. Your best bet is to replace the video card and try again.
Note
Installing on a desktop PC and suspect your video adapter is sabotaging your installation? If your motherboard has built-in video that you’re currently not using because of an add-on card, just re-enable the on-board video through the system BIOS (if necessary), and then remove the troublesome card. Or if the on-board video is to blame, try assigning it more video memory (again, see Appendix A) or replacing it with an add-on video card.
Next, if you see an error that says something like “failed to open the Windows image file,” this is an indictment of your DVD drive. Setup installs Windows 7 from a single, huge hard-disk image file, and some older drives can’t handle files larger than 3 gigabytes in size. The solution is to replace the drive, or, if you’re particularly attached to the drive and you’re not in a hurry, purchase a copy of Windows setup on a stack of CDs (which Microsoft calls “alternate media”) and try again.
Lastly, if it’s an older disc, the culprit might be nothing more than a little dust; wipe the disk against your shirt and try again.
Dual-boot (or multiboot) installations used to be all the rage, and even though virtualization (discussed in the next section) has stolen a lot of their thunder, there are still times when having two or more operating systems installed side by side on the same PC can be useful.
For instance, you can have both Windows 7 and Windows XP—or Windows 7 and Linux, for that matter—installed on the same PC, and choose which to boot each time you power on the machine. Now, virtualization does this one better by allowing you to run both platforms simultaneously, but it has its limitations. Most notably, a virtualized Windows won’t run nearly as fast as a non-virtualized installation; if speed matters for every OS you use, a dual-boot setup is the way to go.
Also, virtualized operating systems don’t have full access to your PC’s hardware—particularly non-USB devices—while each OS on a multiboot system can use everything for which drivers are available. Games are a great example; without unfettered communication with your 3D video hardware, many games won’t run, and that rules out virtualization.
Windows 7 comes with built-in support for a multiboot setup called the Windows Boot Manager, which is installed automatically whether you want a dual-boot system or not. If, at the end of the installation, Windows 7 is the only operating system on your computer, it boots automatically without giving you a choice. Otherwise, you’ll see a menu of installed operating systems, from which you can choose the OS you wish to use.
To set up a dual-boot system, you’ll need at least two partitions or two physical drives: one for each operating system. Install the first OS on any drive you like. Then, during Windows 7 setup, when you see the “Where do you want to install Windows?” page (Figure 1-2, shown earlier), just select the empty drive, and setup will do the rest.
Note
See Chapter 5 for more information on partitions, including a way to divide your current single-partition drive into two partitions without having to reformat.
In most cases, the boot manager of the most-recently installed operating system is the one that will be used for all your operating systems, so the sequence in which you install your operating systems is very important. Most of the time, you’ll need to install older operating systems before newer ones. For instance, on a PC already running Windows 98, just install 7 on a different drive, and voilà: you’ll have a functional dual-boot system.
Warning
Some other operating systems, such as FreeBSD and Windows 2000, have boot managers of their own, and can therefore be installed either before or after 7 is installed with little additional fuss. However, those operating systems without their own boot managers, such as Windows 9x/Me, will break the Windows 7 boot manager if installed subsequently. For another consideration, see the sidebar Of Operating Systems and Filesystems.
The Windows Boot Manager is responsible for loading Windows 7, and, optionally, booting any other operating systems you may have installed.
The Boot Manager in both Windows XP and 2000 stored its configuration in a tiny, easily editable file called boot.ini in the root folder of your C: drive, but in Windows 7, this file is no longer used. If you install 7 on an XP system, and then open the boot.ini file left behind, you’ll see this message:
;Warning: Boot.ini is used on Windows XP and earlier operating systems.
;Warning: Use BCDEDIT.exe to modify Windows 7 boot options.
The BCDEdit (bcdedit.exe)
tool that comes with Windows 7 is a command-line tool, and
isn’t exactly user-friendly. Open a Command Prompt window (in
administrator mode, as described in Chapter 8), type bcdedit and press Enter, and you’ll see output that looks
something like this:
Windows Boot Manager
--------------------
identifier {bootmgr}
device partition=C:
description Windows Boot Manager
locale en-US
inherit {globalsettings}
default {default}
displayorder {ntldr}
 {default}
toolsdisplayorder {memdiag}
timeout 3

Windows Legacy OS Loader
------------------------
identifier {ntldr}
device partition=C:
path \ntldr
description Earlier version of Windows

Windows Boot Loader
-------------------
identifier {default}
device partition=D:
path \Windows\system32\winload.exe
description Microsoft Windows 7
locale en-US
inherit {bootloadersettings}
osdevice partition=D:
systemroot \Windows
resumeobject {70c7d34d-b6b4-12db-cc71-d30cdb1ce261}
nx OptIn
detecthal Yes
What a mess. In short, the first section describes the menu you
see when you first boot; the second section here—Windows Legacy OS Loader—describes the older
version of Windows (XP); and finally, the third section—Windows Boot Loader—describes your new
Windows 7 installation.
If you type bcdedit /? at the
prompt, you’ll see a bunch of command-line parameters you can use to
add or remove entries, choose a new default (the OS that’s loaded if
you don’t choose one before the timer runs out), or run a variety of
debugging tools.
But if all you want to do is choose a default and maybe change
the timeout, there’s a better tool. Open your Start menu, type
msconfig in the Search box and press Enter to open the System Configuration
window, and choose the Boot tab as
shown in Figure 1-5.
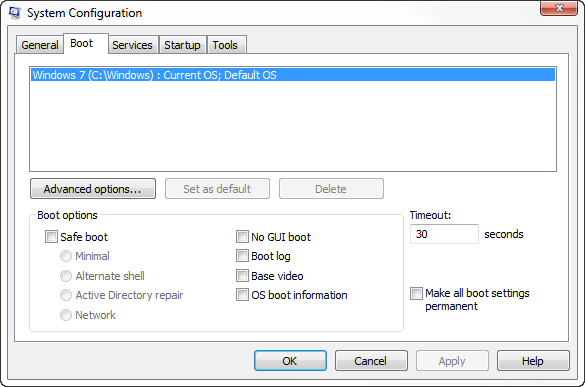
Figure 1-5. The Boot tab of the System Configuration tool provides most of the features of BCDEdit in a much more pleasant interface
Here, the easy options are truly self-evident, and the advanced
options are at least available. On the right, you can adjust the
Timeout from its default of 30
seconds; type 5 here, and you’ll
instantly shave off 25 seconds from your unattended boot time. (Don’t
use a value so small that you won’t have time to change it, lest you
set an inoperable installation as the default and have no way to get
around it.)
To choose the default OS, select it in the list and click Set as default. When you’re done, click OK, and then restart Windows to see your new settings.
A Gedanken experiment—also called a “thought” experiment—is a means of testing a hypothesis without actually conducting any physical experiment. (“Maxwell’s demon” and “Schrödinger’s cat” are both Gedanken experiments.) And as luck would have it, there’s a way to conduct a Gedanken experiment of sorts with Windows 7.
Say you’re using Vista or XP, and you’re considering upgrading (or rather, “transitioning”) to Windows 7. How do you find out if the new OS works with all your software without actually completing a painful, laborious, and possibly one-way operating system upgrade? Virtualize!
Virtualization has been around for years, but thanks to processor-level optimizations and recent improvements in virtualization software, it’s easy, quick, practical, and, for the most part, free. The idea is that you can run a second copy of Windows—or any other operating system, for that matter—in a window. The new OS behaves as though it was installed on its very own PC, and even shows up on the network; the experience is not unlike remote control software discussed in Chapter 7, except you don’t need to buy any more hardware. In most cases, you can copy and paste data between the “host” OS and the OS running in the window (the “guest”), and even drag-drop files onto the virtualized desktop.
Note
For best performance for your virtualized operating system, make sure support for virtualization is enabled in your PC’s BIOS; see Appendix A for details. Not sure if your CPU supports this? Try Securable (http://www.grc.com/securable.htm).
Also, you’ll need at least 3 GB of physical RAM (4 or 8 is better) and more than enough free hard disk space for a virtual hard disk (20 GB minimum).
With virtualization, you can test Windows 7 right on your Vista or XP desktop before you commit. Or, if you’re already running Windows 7, you can set up a virtual Vista or XP desktop to allow you to run older software that isn’t yet 7-friendly (see Windows XP Mode for a special case).
The process itself is quite easy. All you need is virtualization software (see Table 1-3) and an original installation disc for the operating system you wish to install in a window.
Table 1-3. Virtualization software comparison chart
Microsoft Virtual PC 6.0 | Windows Virtual PC 6.1 | VMware Workstation 6.5 | VirtualBox | |
|---|---|---|---|---|
Windows 7 as host OS | ✓ | ✓ | ✓ | |
Windows Vista or XP as host OS | ✓ | ✓ | ✓ | |
Runs Windows 7 in a window | ✓ | ✓ | ✓ | ✓ |
Runs Vista or XP in a window | ✓ | ✓ | ✓ | ✓ |
Includes Windows XP for free | ✓[a] | |||
Supports 64-bit host OS | ✓ | ✓ | ✓ | ✓ |
Runs 64-bit OS in a window | ✓ | ✓ | ||
Supports direct file drag-drop | ✓ | ✓ | ||
Clipboard sharing | ✓ | ✓ | ✓ | ✓ |
Dynamic desktop resize | ✓ | ✓ | ||
Non-network folder sharing | ✓ | |||
Virtualized windows alongside host windows | ✓ | ✓ | ||
Supports multiple virtual processors | ✓ | ✓ | ||
Supports multiple virtual monitors | ✓ | ✓ | ||
USB devices recognized by guest system | ✓ | ✓ | ✓ | |
Snapshots[b] | ✓ | ✓ | ||
Record movies | ✓ | |||
Runs Linux/Unix in a window | ✓(unofficially) | ✓(unofficially) | ✓ | ✓ |
Runs Mac OS X in a window | ✓(unofficially) | |||
Cost | Free | Free | Free 30-day trial | Free |
Available from | ||||
[a] Windows XP Mode is included in the Professional and Ultimate Editions of Windows 7 only; see the upcoming sidebar Windows XP Mode for details. [b] See the sidebar Virtual Time Machine. | ||||
Note
In order to run a 64-bit operating system in a window, the host PC must also be running a 64-bit operating system. And 64-bit Windows requires a 64-bit processor, as described in64-Bit Windows. At the time of this writing, running a 64-bit guest OS is only supported in VMware and VirtualBox.
Setting up a new virtual machine is a snap. Here are a few sample scenarios:
Want to test Windows 7 in a virtual environment on your Vista PC before you commit? Here’s how.
Start by installing Microsoft Virtual PC 6.0 on your Vista PC, and then start Virtual PC. On the Virtual PC Console window, click New and then follow the prompts in the New Virtual Machine Wizard.
When it asks you to choose an operating system, select Windows Vista and click Next.
Next it’ll ask you to allocate memory; this is the amount of physical RAM the guest OS sees, so give it enough to run (at least 1.0–1.5 GB). Whatever you allocate for the virtual machine will be sucked out of your host PC’s memory, so don’t give it more than you can spare. Click Adjusting the RAM and move the slider or type a value (1536 MB for 1.5 GB) and then click Next.
Next comes the virtual hard disk, the .vhd file your virtual machine uses for storage. Select the A new virtual hard disk option, click Next, and then specify a filename (and folder). Thankfully, the virtual hard disk works differently than the RAM: the file starts off small and grows as needed. The value you specify for Virtual hard disk size is only a cap, so type a sufficiently large number (like 100000 for 100 GB) and then click Next. Click Finish to close the wizard.
Note
You can change the virtual hardware assigned to your new virtual PC at any time—unless the virtual machine is running or paused—by clicking the Settings button in the Virtual PC Console.
When you’re returned to the Virtual PC Console window, select the new virtual machine and click Start. Immediately a black window will appear, and you’ll see Virtual PC attempt to boot off the network. Since that’s not likely to work, open the CD menu, select Use Physical Drive D: (or whatever drive letter is assigned to your DVD drive), and pop in your Windows 7 disc. Or, if you’re installing off an ISO, select Capture ISO Image and select the .iso file. When you’re ready, open the Action menu and select Reset to boot off the disc (or image).
From this point, install Windows 7 as described earlier in this chapter.
Note
Virtual Machine Additions is a sort of link between the guest and host sessions; it makes the guest OS aware that it’s running in a virtualized environment. First and foremost, VMA lets you move your mouse in and out of the Virtual PC window freely; otherwise it’ll get stuck whenever you click in the window. (Without VMA, press the right Alt key to release the mouse pointer.) It also lets you drag-drop files directly onto—and out of—the windowed OS, and it even resizes the virtual desktop when you resize the Virtual PC window.
When Windows 7 first loads, open Virtual PC’s Action menu and select Install or Update Virtual Machine Additions. In a few moments, the guest Windows 7 session will detect a new virtual CD and ask if you want to run setup.exe. Follow the prompts to install the software and then answer Yes to restart Windows.
Need to run an application that won’t work on anything newer than Windows XP? Here’s one way to do it in Windows 7.
First, install Windows Virtual PC 6.1 (or later). If you’re using the Professional, Enterprise, or Ultimate editions of Windows 7, you can also install the optional Windows XP Mode software, also available at http://www.microsoft.com/virtualpc; see the sidebar Windows XP Mode for an introduction. Otherwise, you’ll need an original Windows XP install disc and appropriate license code.
Now, Windows Virtual PC doesn’t have a central control panel like the one found in earlier versions; click the Windows Virtual PC icon in your Start menu, and it’ll just open the Virtual Machines folder in your home folder. “Now what?” you may ask. Good question.
Don’t waste time looking for instructions or a way to create a new virtual machine here; you won’t find it. Instead, just open the Start menu, and in the Search box, type VPCWizard.exe and press Enter.
When prompted, choose a name for the new virtual machine configuration (e.g., “Windows XP in a box”) and click Next. Specify how much memory (RAM) you’d like to allocate—give it at least 1024 MB (1 GB) if you have it to spare—and click Next. On the next page, choose Create a dynamically expanding virtual hard disk and then click Create.
Back in the Virtual Machines folder, you’ll see your new Windows XP in a box.vmcx file; double-click it to start your virtual machine. When it first starts, your virtual PC will attempt a PXE network boot (described in Boot Without a Boot Disc), which will almost certainly fail.
Next, from the Tools drop-down, select Settings, and then highlight DVD Drive in the list on the left. Select Access a physical drive and choose the drive letter where your Windows setup disc can be found. (Or, if you’re installing from an ISO disc image, select Open an ISO image and click Browse to locate it.) Click OK when you’re done, and then click the Ctrl+Alt+Del button on the Virtual PC toolbar to restart the virtual machine and boot off the CD.
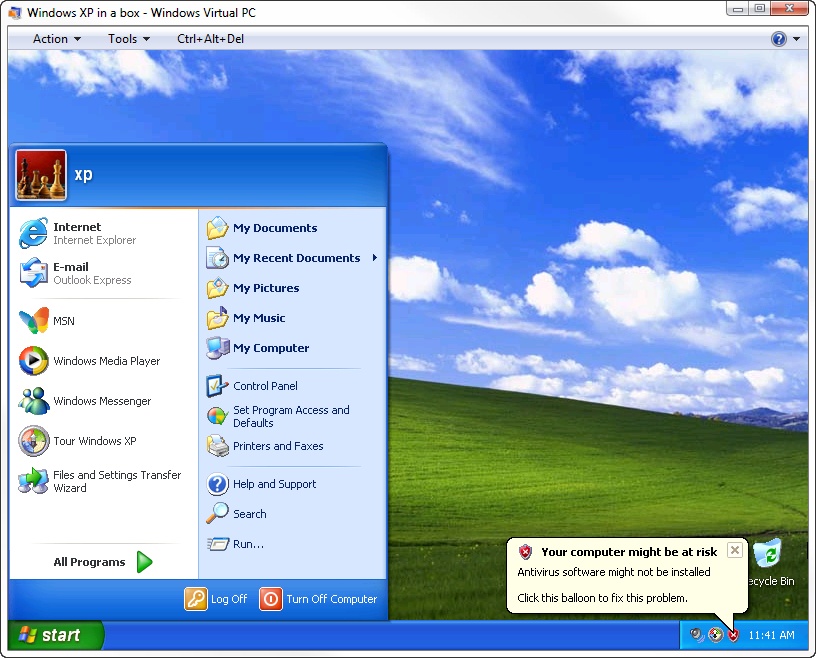
At this point, you can install Windows normally; when setup is complete, you should get something like the setup shown in Figure 1-6.
Here’s a handy way to create a clean Windows 7 install for testing purposes. For this you’ll need the VMWare Workstation software and the 64-bit edition of Windows 7 running on the host PC. (The same procedure also works if the host is running Vista x64 or XP x64.)
Start VMWare, and from the File menu, select New and then Virtual Machine (or press Ctrl-N). On the first page of the New Virtual Machine Wizard, select Custom (advanced) and click Next. From the Hardware compatibility list, select Workstation 6.5 and click Next.
Next, specify the location of your installer disc—either a physical drive on your PC or an .iso image file if applicable—and click Next. On the Easy Install Information page, VMware lets you enter the license key, user account name to create, and associated password, all of which are optional; type them in, and VMware will pre-enter them for a (nearly) unattended setup.
When asked to allocate memory, you’ll need to specify at least 2048 MB (2 GB); more is better, if you can spare it. (Whatever you allocate for the virtual machine will be sucked out of your host PC’s memory, so don’t give it everything you’ve got.)
On the Network Type page, select Use bridged networking and then click Next. What follows is the selection of a SCSI adapter, which doesn’t matter. (In fact, for some other operating systems, you’ll need to disable the SCSI support altogether.)
Just like with Microsoft Virtual PC, you’ll need to set up a virtual hard disk, so on the Select a Disk page, choose Create a new virtual disk and click Next. For the virtual disk type, select IDE. On the Specify Disk Capacity page, choose a large Maximum disk size—at least 100 GB, since you can’t easily enlarge it later—and make sure the Allocate all disk space now option is not checked.
Complete the wizard and then click Finish. If all is well, VMware will automatically start the virtual machine, load the Windows 7 installer, and get to work.
Akin to Microsoft’s Virtual Machine Additions described earlier in this section, VMware offers VMware Tools, which allow you to easily move your mouse pointer in and out of the VMware session window. From VMware’s VM menu, select Install VMware Tools, and then follow the prompts to install.
Get Windows 7 Annoyances now with the O’Reilly learning platform.
O’Reilly members experience books, live events, courses curated by job role, and more from O’Reilly and nearly 200 top publishers.

