The client-side configuration for Windows
clients is really simple. All you have to do is switch from workgroup
to domain networking by enabling domain logons, and in the case of
Windows NT/2000/XP, also provide the root password you gave
smbpasswd for creating computer accounts. This
results in the Windows NT/2000/XP system becoming a member of the
domain.
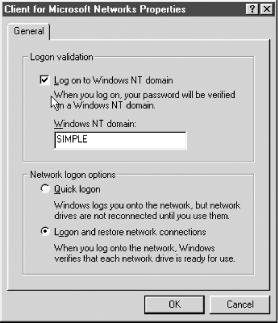
To
enable domain logons with Windows 95/98/Me, open the Control Panel
and double-click the Network icon. Then click Client for Microsoft
Networks, and click the Properties button. At this point, you should
see a dialog box similar to Figure 4-1. Select the
Logon to Windows Domain checkbox at the top of the dialog box, and
enter the name of the domain as you have defined it with the
workgroup parameter in the Samba configuration
file. Then click OK, and reboot the machine when asked.
Warning
If Windows complains that you are already logged into the domain, you probably have an active connection to a share in the workgroup (such as a mapped network drive). Simply disconnect the resource temporarily by right-clicking its icon and choosing the Disconnect pop-up menu item.
When Windows reboots, you should see the standard logon dialog with an addition: a field for a domain. The domain name should already be filled in, so simply enter your password and click the OK button. At this point, Windows should consult the primary domain controller (Samba) to see if the password is correct. (You can check the log files if you want to see this in action.) If it worked, congratulations! You have properly configured Samba to act as a domain controller for Windows 95/98/Me machines, and your client is successfully connected.
Now that you have a primary domain controller to authenticate users, you can implement much better security for shares that reside on Windows 95/98/Me systems.[23] To enable this functionality, open the Control Panel, double-click the Network icon, and click the Access Control tab in the dialog box. The window should now look like Figure 4-2.
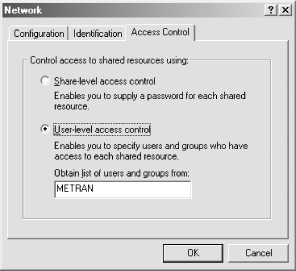
Click the User-level access control radio button, and type in the name of your domain in the text area. Click the OK button. If you get the dialog box shown in Figure 4-3, it means that shares are already on the system.
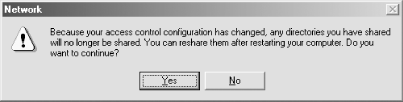
In that case, you might want to cancel the operation and make a
record of each of the computer’s shares, making it
easier to re-create them, and then redo this part. (To get a list of
shares, open an MS-DOS prompt window and run the
net
view
\\
computer_name
command.) Otherwise, you will get a message asking you to reboot to
put the change in configuration into effect.
After rebooting, you can create shares with user-level access control. To do this, right-click the folder you wish to share, and select Sharing.... This will bring up the Shared Properties dialog box, shown in Figure 4-4.
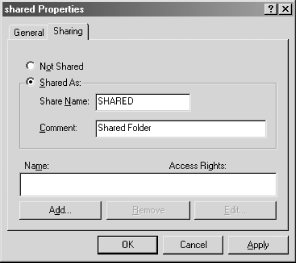
Click the Shared As: radio button, and give the share a name and comment. Then click the Add... button, and you will see the Add Users dialog box, shown in Figure 4-5.
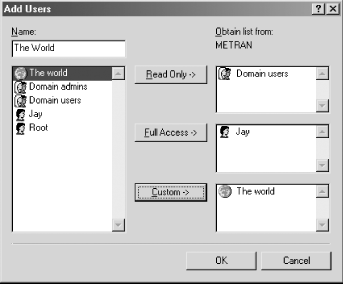
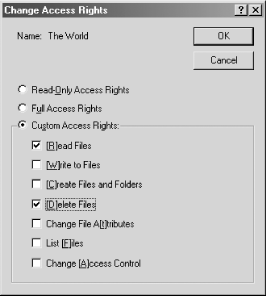
What has happened is that Windows has contacted the primary domain controller (in this case, Samba) and requested a list of domain users and groups. You can now select a user or group and add it to one or more of the three lists on the righthand side of the window—for Read Only, Full Access, or Custom Control—by clicking the buttons in the middle of the window. When you are done, click the OK button. If you added any users or groups to the Custom Control list, you will be presented with the Change Access Rights dialog box, shown in Figure 4-6, in which you can specify the rights you wish to allow. Then click the OK button to close the dialog box.
You are now returned to the Shared Properties dialog box, where you will see the Name: and Access Rights: columns filled in with the permissions that you just created. Click the OK button to finalize the process. Remember, you will have to perform these actions on any folders that you had previously shared using share-level security.
To configure Windows NT for domain logons, log in to the computer as Administrator or another user in the Administrators group, open the Control Panel, and double-click the Network icon. If it isn’t already selected, click on the Network Identification tab.
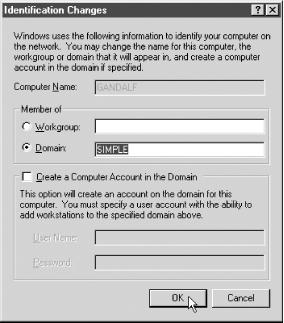
Click the Change... button, and you should see the dialog box shown
in Figure 4-7. In this dialog box, you can choose
to have the Windows NT client become a member of the domain by
clicking the checkbox marked Domain: in the Member of box. Then type
in the name of the domain to which you wish the client to log on; it
should be the same as the one you specified using the
workgroup parameter in the Samba configuration
file. Click the checkbox marked Create a Computer Account in the
Domain, and fill in “root” for the
text area labeled User Name:. In the Password: text area, fill in the
root password you gave smbpasswd for creating
computer accounts.
Warning
If Windows complains that you are already logged in, you probably have an active connection to a share in the workgroup (such as a mapped network drive). Disconnect the resource temporarily by right-clicking its icon and choosing the Disconnect pop-up menu item.
After you press the OK button, Windows should present you with a small dialog box welcoming you to the domain. Click the Close button in the Network dialog box, and reboot the computer as requested. When the system comes up again, the machine will automatically present you with a logon screen similar to the one for Windows 95/98/Me clients, except that the domain text area has a drop-down menu so that you can opt to log on to either the local system or the domain. Make sure your domain is selected, and log on to the domain using any Samba-enabled user account on the Samba server.
Warning
Be sure to select the correct domain in the Windows NT logon dialog box. Once it is selected, it might take a moment for Windows NT to build the list of available domains.
After you enter the password, Windows NT should consult the primary domain controller (Samba) to see if the password is correct. Again, you can check the log files if you want to see this in action. If it worked, you have successfully configured Samba to act as a domain controller for Windows NT machines.
To configure Windows 2000 for domain logons, log in to the computer as Administrator or another user in the Administrators group, open the Control Panel, and double-click the System icon to open the System Properties dialog box. Click the Network Identification tab, and then click the Properties button. You should now see the Identification Changes dialog box shown in Figure 4-8.
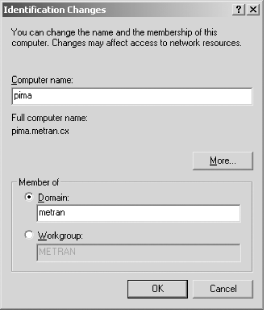
Click the radio button labeled “Domain:” and fill in the name of your domain in the text-entry area. Then click the OK button. This will bring up the Domain Username and Password dialog box. Enter “root” for the username. For the password, use the password that you gave to smbpasswd for the root account.
Warning
If Windows complains that you are already logged in, you probably have an active connection to a share in the workgroup (such as a mapped network drive). Disconnect the resource temporarily by right-clicking its icon and choosing the Disconnect pop-up menu item.
After you press the OK button, Windows should present you with a small dialog box welcoming you to the domain. When you click the OK button in this dialog box, you will be told that you need to reboot the computer. Click the OK button in the System Properties dialog box, and reboot the computer as requested. When the system comes up again, the machine will automatically present you with a Log On to Windows dialog box similar to the one shown in Figure 4-9.
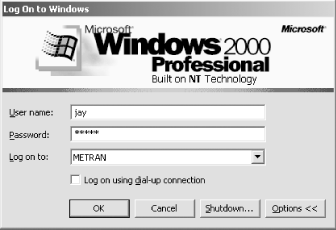
If you do not see the Log on to: drop-down menu, click the Options << button and it will appear. Select your domain, rather than the local computer, from the menu.
Warning
Be sure to select the correct domain in the logon dialog box. Once it is selected, it might take a moment for Windows to build the list of available domains.
Enter the username and password of any Samba-enabled user in the User name: and Password: fields, and either press the Enter key or click the OK button. If it worked, your Windows session will start up with no error dialogs.
You have our condolences if you are trying to use the Home edition of Windows XP in a domain environment! Microsoft has omitted support for Windows NT domains from Windows XP Home, resulting in a product that is ill-suited for use in a domain-based network.
On the client side, Windows XP Home users cannot log on to a Windows NT domain. Although it is still possible to access domain resources, a username and password must be supplied each time the user connects to a resource, rather than the “single signon” of a domain logon. Domain features such as logon scripts and roaming profiles are not supported.
As a server, Windows XP Home cannot join a Windows NT domain as a domain member server. It can serve files and printers, but only using share-mode (“workgroup”) security. It can’t even use user-mode security, as Windows 95/98/Me can.
Considering these limitations, we do not recommend Windows XP Home for any kind of local area network computing.
To configure Windows XP Professional for domain logons, log in to the computer as Administrator or another user in the Administrators group, open the Control Panel in Classic View, and double-click the System icon to open the System Properties dialog box. Click the Computer Name tab and then click the Change... button. You should now see the Computer Name Changes dialog box shown in Figure 4-10.

Click the radio button labeled “Domain:”, and fill in the name of your domain in the text-entry area. Then click the OK button. This will bring up the Domain Username and Password dialog box. Enter “root” for the username. For the password, use the password that you gave to smbpasswd for the root account.
Warning
If Windows complains that you are already logged in, you probably have an active connection to a share in the workgroup (such as a mapped network drive). Disconnect the resource temporarily by right-clicking its icon and choosing the Disconnect pop-up menu item.
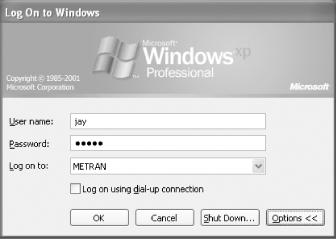
After you press the OK button, Windows should present you with a small dialog box welcoming you to the domain. When you click the OK button in this dialog box, you will be told that you need to reboot the computer to put the changes into effect. Click the OK buttons in the dialog boxes to close them, and reboot the computer as requested. When the system comes up again, the machine will automatically present you with a Log On to Windows dialog box similar to the one shown in Figure 4-11.
If you get a dialog box at this point that tells you the domain controller cannot be found, the solution is to change a registry setting as follows.
Open the Start Menu and click the Run... menu item. In the text area
in the dialog box that opens, type in
“regedit” and click the OK button
to start the Registry Editor. You will be editing the registry, so
follow the rest of the directions very carefully. Click the
"+" button next
to the HKEY_LOCAL_MACHINE folder, and in the contents that open up,
click the "+"
button next to the SYSTEM folder. Continue in the same manner to open
CurrentControlSet, then Services, then Netlogon. (You will have to
scroll down many times to find Netlogon in the list of services.)
Then click the Parameters folder, and you will see items appear in
the right side of the window. Double-click
“requiresignorseal”, and a dialog
box will open. In the Value data: text area, change the
“1” to a
“0” (zero), and click the OK
button, which modifies the registry both in memory and on disk. Now
close the Registry Editor and log off and back on again.
If you do not see the Log on to: drop-down menu, click the Options << button and it will appear. Select your domain from the menu, rather than the local computer.
Warning
Be sure to select the correct domain in the logon dialog box. Once it is selected, it might take a moment for Windows to build the list of available domains.
Enter the username and password of any Samba-enabled user in the User name: and Password: fields, and either press the Enter key or click the OK button. If it worked, your Windows session will start up with no error dialogs.
Get Using Samba, Second Edition now with the O’Reilly learning platform.
O’Reilly members experience books, live events, courses curated by job role, and more from O’Reilly and nearly 200 top publishers.

