Special Effects
Elements gives you some other useful ways of drastically changing the look of your image. You can apply these effects as Adjustment layers (Layer → New Adjustment Layer) or by going to Filter → Adjustments (there's much more about filters in Chapter 13). Either way gives you the same options for their settings. You can see them in action in Figure 9-20.
In most cases, you use these adjustments as steps along the way in a more complex treatment of your photo, but they're effective by themselves, too. Here's what each does:
Equalize makes the darkest pixel black and the lightest white, and redistributes the brightness values for all the colors in a photo to give them all equal weight. When you have an active selection, you see a dialog box that lets you choose between simply equalizing your whole photo and equalizing it based on a selection. It doesn't always work, but sometimes Equalize is great for bringing up the brightness level of a dim photo. This choice is not available as an adjustment layer, only as a filter.
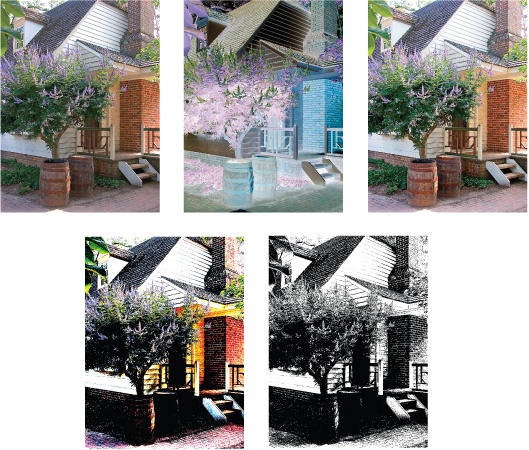
Figure 9-20. You can get some interesting special effects with the Adjustment commands, whether you apply them as filters or Adjustment layers. If you want to use them as filters, it's not a bad idea to start with a duplicate layer. Top row (left to right): The original photo, Invert, Equalize. Bottom row (left to right): Posterize and Threshold.
Gradient Map ...
Get Photoshop Elements 6: The Missing Manual now with the O’Reilly learning platform.
O’Reilly members experience books, live events, courses curated by job role, and more from O’Reilly and nearly 200 top publishers.

