The Organizer is where your photos come into Elements and go out again (when it's time to print or email them). The Organizer stores and catalogs your photos, and you automatically come back to it for any activities that involve sharing your photos, like printing a photo package or making a slideshow. The Organizer's main window (Figure 1-2) is sometimes called the Photo Browser. It lets you view your photos, sort them into albums, and assign keyword labels to them.
The Organizer has lots of really cool features you'll learn about throughout this book when they're relevant to the task at hand. The next chapter shows you how to use the Organizer to import and organize your photos, and Appendix A covers all the Organizer's different menu options.
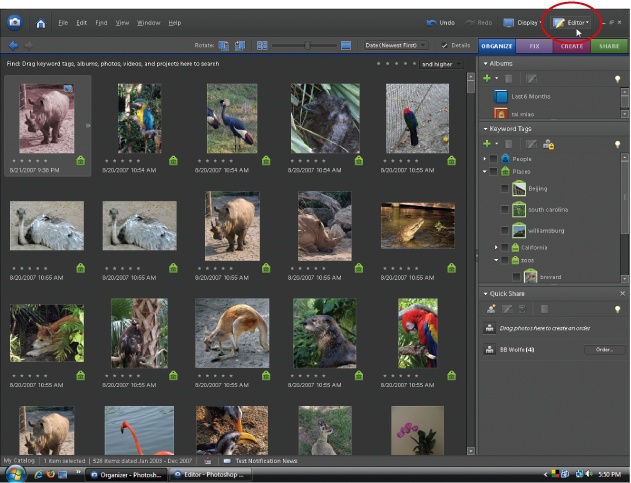
Figure 1-2. The Photo Browser is your main Organizer workspace. Click the Create tab and you can choose to start all kinds of new projects with your photos, or the Share tab for ways to let other people view your images. Click the Editor button (circled) for a menu that gives you a choice of going to Quick Fix, Guided Edit, or Full Edit. The Fix tab gives you access to some quick fixes right in the Organizer. The Organizer also gives you another way to look at your photos, Date View, which is explained in Chapter 2.
Actually, Elements has one other component, which you may have seen already if you've plugged your camera into your computer after you installed Elements: the Photo Downloader (Figure 1-3).
This bumptious little program is meant to help you get your photos into the Organizer, and it's more zealous than a personal-injury lawyer on the scene of an accident. It sniffs out any device you attach to your computer that may possibly contain photos, and it races to the scene, elbowing the Windows system dialog box (where you can also select how to handle your photos) out of the way. Depending on the speed of your computer, it may show up before the Windows dialog box or slightly after it. You have to dismiss the Downloader first if you want to use another program to import your photos.
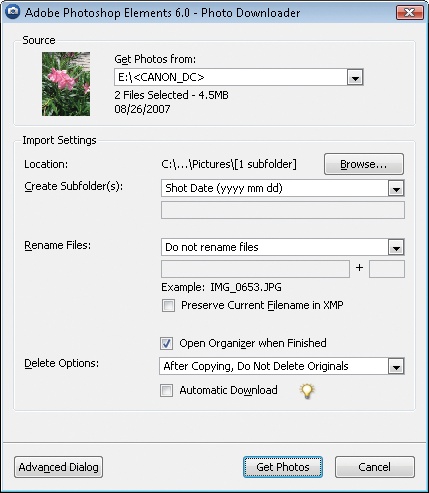
Figure 1-3. Adobe's Photo Downloader is yet another program that you get when you install Elements. Its role in life is to pull your photos from your camera (or other storage device) into the Organizer. The Downloader runs even if Elements isn't currently open (although, as you'll learn in the box on The Photo Browser, you can disable the Downloader if you don't like it). After the Downloader does its thing, you end up in the Organizer.
You can read more about the Downloader in Chapter 2, including how to easily tame it so that you control when it appears. If you plan to use the Organizer to catalog your photos and assign keywords to them, reading the section on the Downloader can help you avoid forehead-smacking moments.
Get Photoshop Elements 6: The Missing Manual now with the O’Reilly learning platform.
O’Reilly members experience books, live events, courses curated by job role, and more from O’Reilly and nearly 200 top publishers.

