Making Selections and Masking
As you’ve learned in previous chapters, selecting stuff like hair and fur is really hard. Sure, there are some tricks that make it simpler, but a plug-in specifically designed for that task can make your life a heck of a lot easier and save tons of time (especially if you do this kind of thing a lot). That said, you’ll need a bit of patience when you start working with masking plug-ins because they’re not for the faint of heart. But with practice, you can use them to create selections you just can’t make any other way.
Note
Adobe has put a lot of work into improving the Refine Edge dialog box (Creating Selections with Channels) and creating the new Focus Area command (The Magic Eraser). So before you pay for a masking plug-in, make sure you’re up to speed on wielding those two tools.
Fluid Mask
This powerful plug-in helps you mask around complex areas like hair and fur. As soon as you open Fluid Mask, it analyzes your image and marks what it thinks are edges with blue lines (see Figure 19-3) so you can decide which edges keep and which to zap. Then it creates a cutout of the image you can send back to Photoshop to use as a mask. You can also save your project and return to it later—a nice touch. Fluid Mask costs about $150 (www.vertustech.com).
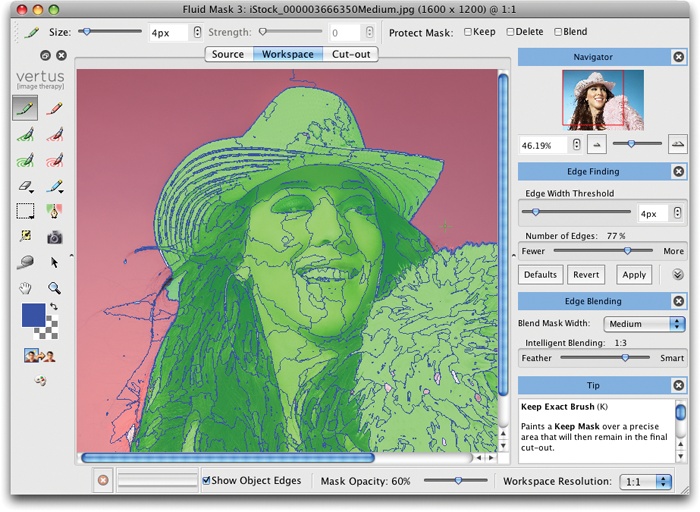
Figure 19-3. These blue lines mark the edges that Fluid Mask found in this image. You can use the plug-in’s tools ...
Get Photoshop CC: The Missing Manual, 2nd Edition now with the O’Reilly learning platform.
O’Reilly members experience books, live events, courses curated by job role, and more from O’Reilly and nearly 200 top publishers.

