
ONE OF THE NIFTIEST things about the NOOK HD is its ability to have multiple people use it, each with his or her own account, preferences, books and media, and more. No other ereader or tablet offers these family-friendly capabilities, so read on to learn how to share your NOOK with the whole gang.
People are different. Some like detective novels, while others like literary fiction. Some prefer romantic comedies, while others can’t get enough action-hero movies. Some say tomato, and others tom-ah-to. For whatever reason, whether it’s hard-wiring, upbringing, age, or some combination people have different tastes and needs in a tablet.
The NOOK recognizes this fact of life and lets you create different profiles for different family members. That way, if you’re a lover of literary fiction and foreign-language dramas, you don’t have to wade through the young adult fiction, thrillers, buddy movies, and romantic comedies that near and dear ones have put on the NOOK. And they don’t have to wade through yours, either.
In addition, if you’ve got kids sharing the NOOK, you can make sure that they won’t have access to books, movies, and Internet content that aren’t suitable for them, because you can create a kids’ profile with full parental controls that limit what they can do.
NOOK profiles are delightfully flexible. So, for example, if there are books and movies that everyone wants to enjoy, you can give everyone access without buying multiple copies. Or, you can block access as well.
Note
Even though the NOOK can have multiple profiles, all of the payments for all content come from a single profile. So when anyone with a profile makes a purchase, it’s charged to the same account (probably yours).
Profiles have one small limitation: You can have a maximum of six of them on a single NOOK. But then again, if you were to have more than six people share a NOOK, no one would get much reading time or screen time.
The NOOK lets you create three types of profiles:
Primary profile. This profile is created for you automatically when you first use your NOOK—it’s your profile. It can see all the content on the NOOK, including all the content viewed by other profiles. It can also create and edit other profiles. And all payments for all profiles are made through this primary profile.
Adult profile. Someone with this type of profile can buy, view, and use any kind of content. The profile can control what content it sees, and can view any content on any child profile on that NOOK HD. This profile can also set parental controls for a child profile. It can’t, however, make changes to the content visible to the primary profile, or edit the primary profile in any way.
Child profile. Someone with a kid’s profile can only buy, view, and use content that was authorized by an adult profile (including the primary profile). Children can’t create or edit other profiles. Child profiles are also subject to parental controls and can never override them.
With that as a background, you’re ready to create profiles. First, you must be connected to a WiFi network, because without a WiFi connection, you can’t create or edit a profile.
Here’s how to set up an adult profile:
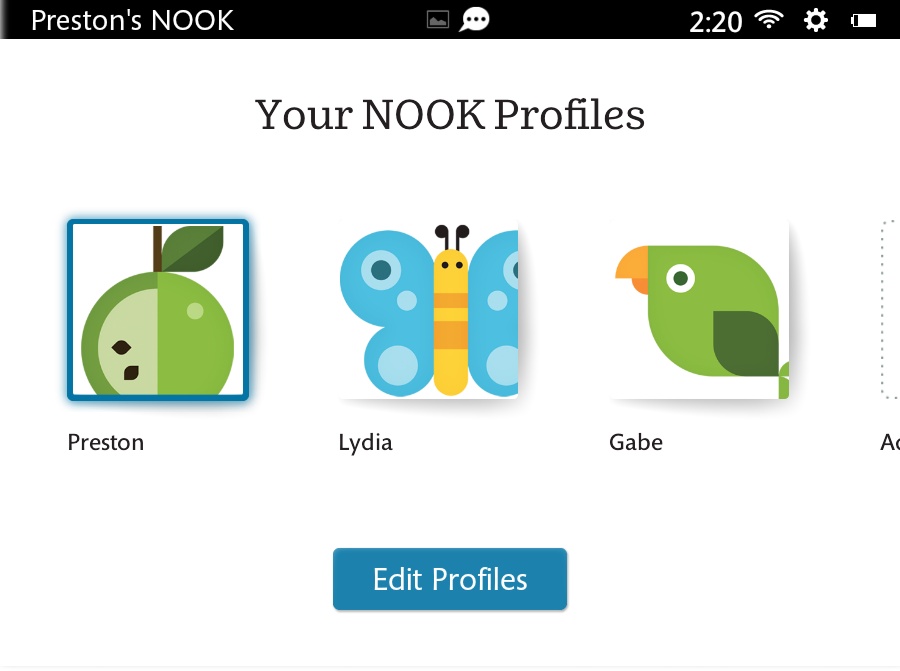
On the Home screen, tap the icon in the upper-left corner. That icon represents the current profile. When you tap it, a screen opens, showing all of your existing profiles.
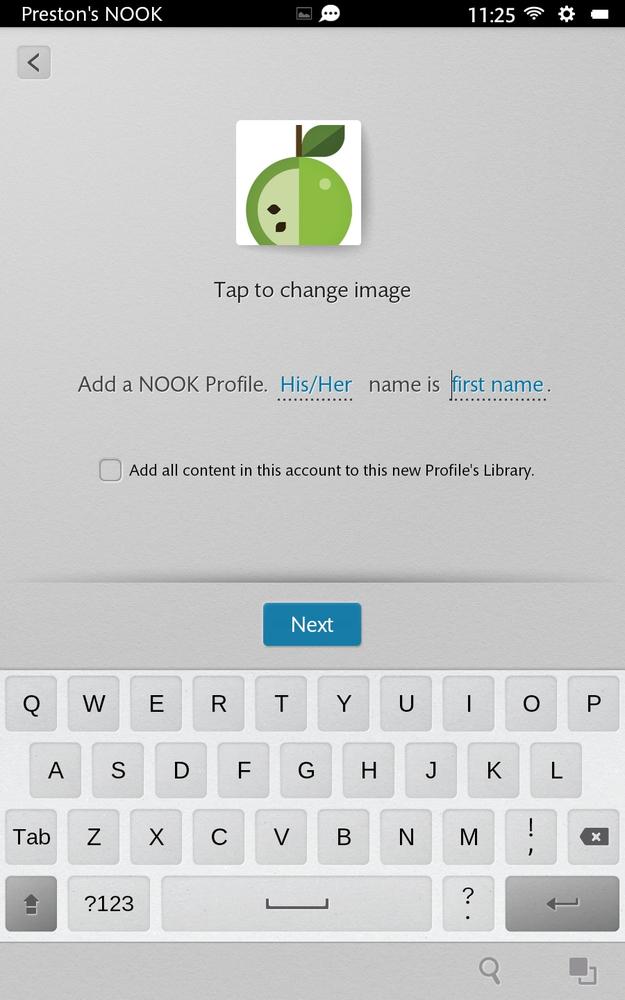
Tap the icon for creating an adult profile. Tap the icon at the top of the screen to give the new profile its own unique icon. Below that, type the person’s first name and choose a gender. If you’d like all the existing content on the NOOK to be available in the new profile’s Library, turn on the “Add all content in this account to this new Profile’s Library” checkbox. Otherwise, the person will start out with an empty Library. Tap Next.
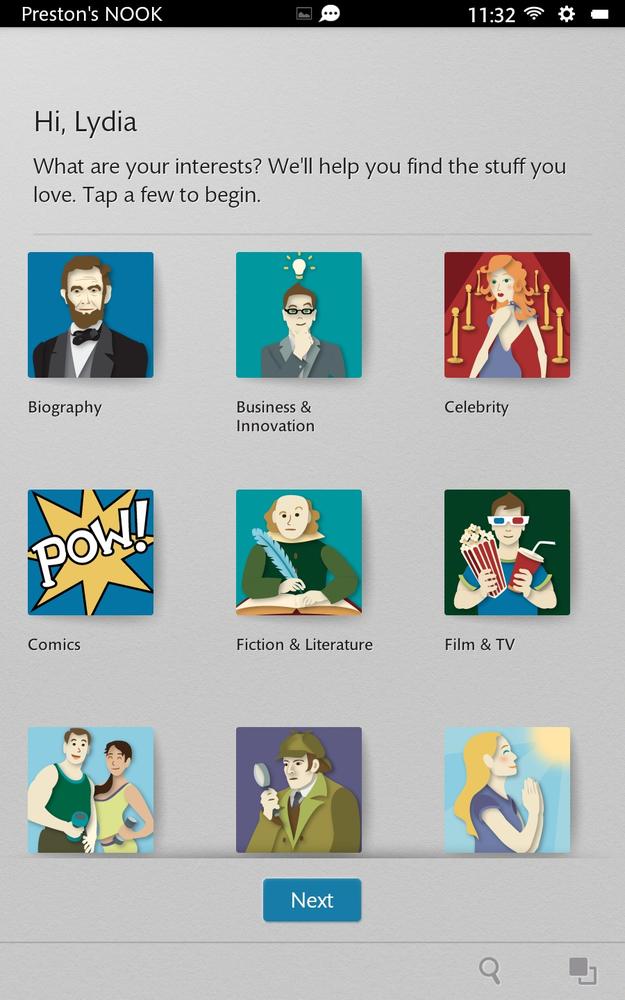
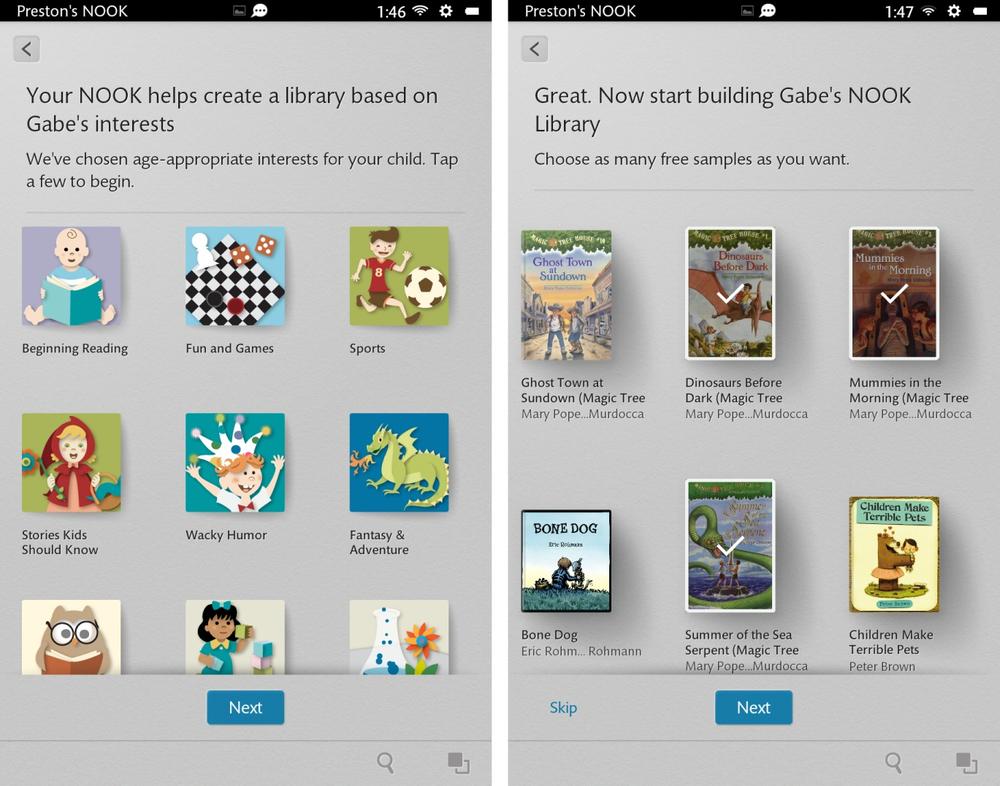
On the screen that appears, choose the types of content that would interest the owner of the new profile. Tap Next.
On the next screen, select sample content that might interest the owner of the profile. Then tap Next.

That’s all it takes. After a moment, the NOOK returns to the Home screen, with the new profile logged in. The profile will include any sample content you just selected.

Setting up a child profile is quite similar to setting up an adult profile, with only a few changes:
On the Home screen, tap the icon in the upper-left corner. That icon represents the current profile. When you tap it, a screen opens, showing all of your existing profiles.
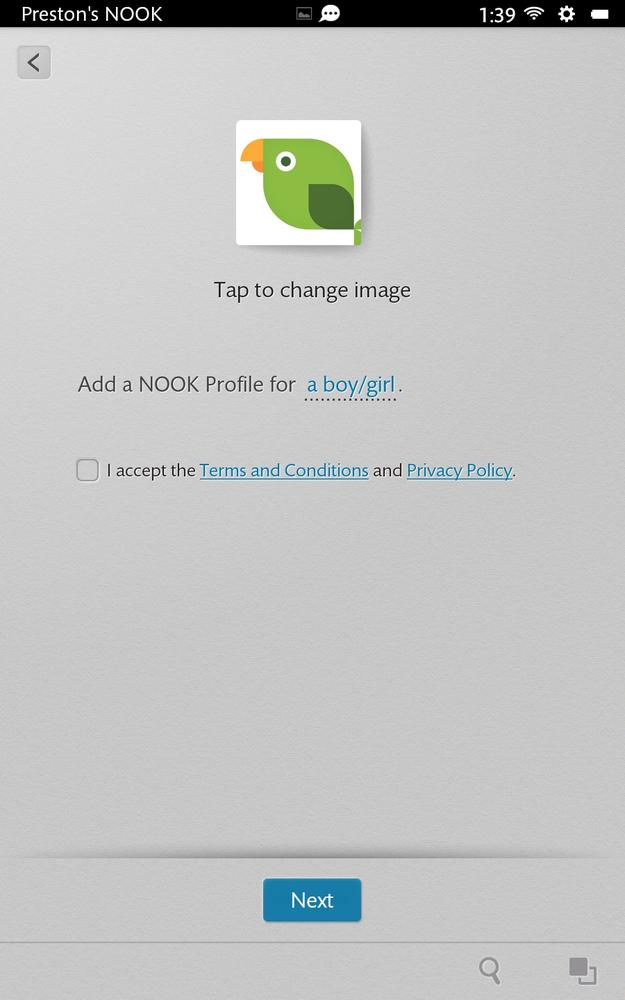
Tap the icon for creating a child profile. Tap the icon at the top of the screen to give the new profile its own unique icon. Below that, choose whether the profile is for a boy or for a girl, and fill in the child’s name and age. Tap the box to accept the terms and conditions. Then tap Next.
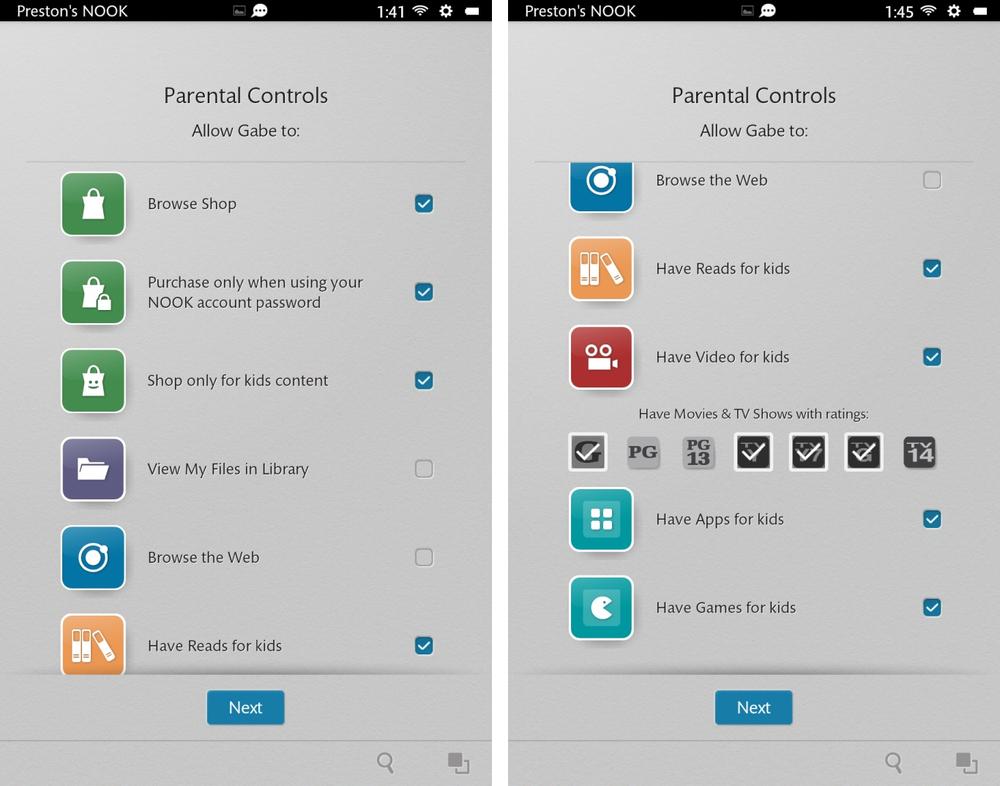
Make your selections on the parental controls screen. You can choose a variety of settings, such as whether to allow the child to browse the NOOK Shop, use video for kids, apps for kids, games for kids, and so on. In some instances there are subchoices—for example, if you check “Browse Shop,” you’ll have subchoices for whether to allow the child to shop only for kids content. Make sure that you scroll to the bottom of the screen and make all the choices. Especially important is the section that lets you choose what kinds of ratings to apply when filtering viewing movies and TV shows. When you’re done, tap Next.
On the next screen, select sample content that might interest the child. Then tap Next.
After a moment, the NOOK returns to the Home screen. You’re asked whether you want to create a password for your other profiles. That way, the child won’t be able to log into any other profiles (which is, after all, the whole point of having different profiles).
When you’re done creating the password (or if you decided to bypass it) the NOOK shows a Home screen with the child profile logged in. The profile will include any sample content you just selected.

Once you’ve got your profiles set up, you’ll find it easy to switch between them. Tap the Profile button at the upper left of the Home screen, and a screen appears with icons for all of the profiles on the NOOK. Tap any to log in with that profile. If you’ve set a password for the profile (only adult or primary profiles can have them), you’ll need to first type the password.
Note
Profiles have separate email accounts. So an email account set up for one profile will not be visible in another profile’s email account.

Profiles are also available when you wake up the NOOK. When you wake it up, icons and names for all the profiles appear in a circle around the lock. Drag a profile’s icon to the lock to log in with it. If the profile has a password, you’ll have to tap it in. When you’re logged in, you can use NOOK just as you normally would.
When you have multiple profiles on your NOOK, not all of its content is visible to all profiles. So some books, movies, and apps for one profile might not be visible in another. However, there’s a way for adult profiles and the primary profile to view content from other profiles.
First open the Library or the listing of Apps, depending on whether you want to view content from the library or get apps for your profile from another profile’s content. The procedure is the same technique whether you’re sharing books, apps, or movies.
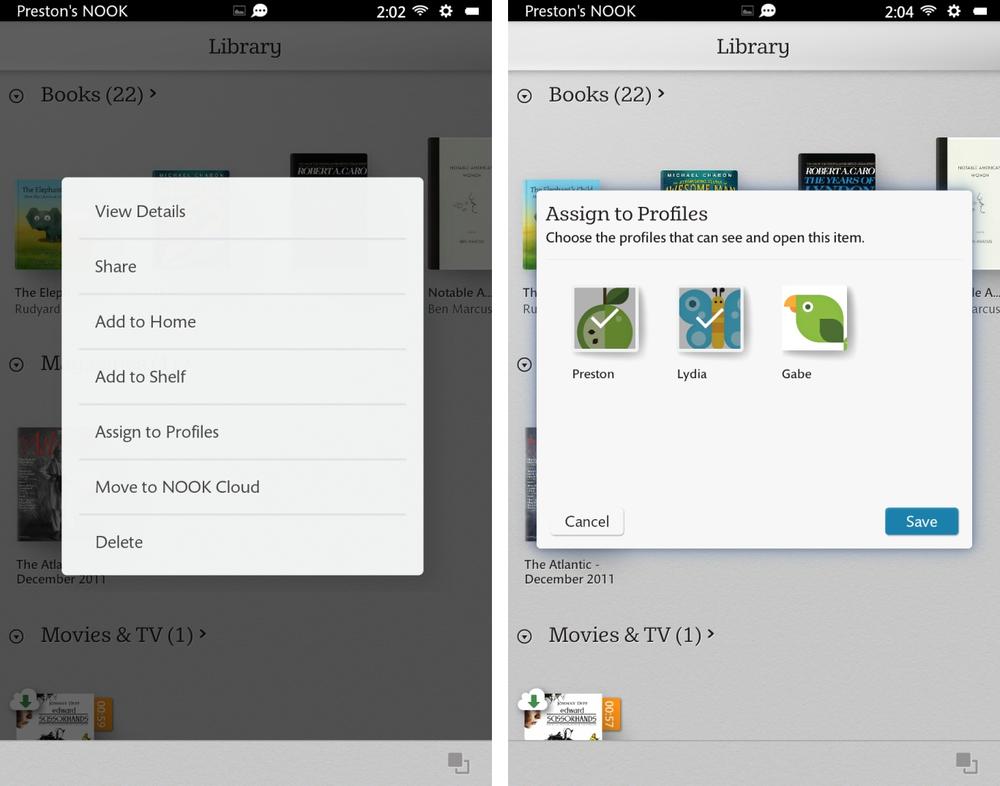
In the Library, for example, hold your finger on the book you want to add to your profile or another profile. From the screen that pops up, select “Assign to Profiles.” Then tap all the profiles that you want to share the content and tap Save. That content will now be available to all of those profiles.
That works quite well on a onesy-twosy basis. But if you want to assign lots of content, there’s a much less tedious way.
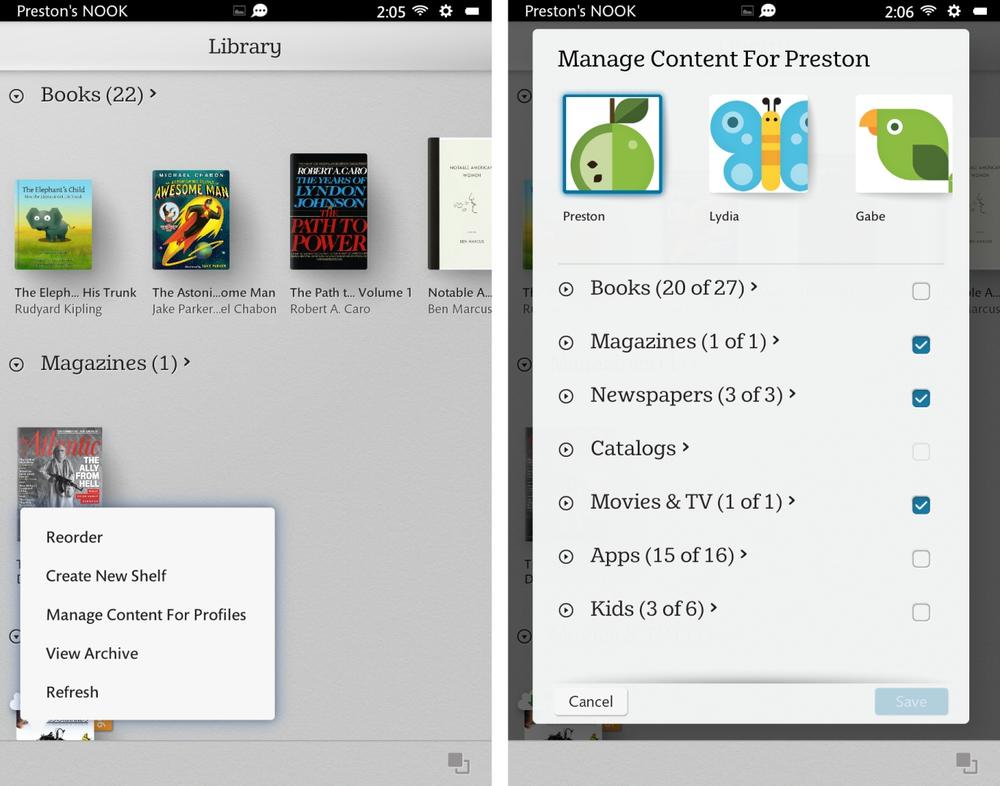
In the Library, tap the Contents icon at lower-left (it’s a stack of horizontal lines). A menu pops up. Tap Manage Content for Profiles. A screen appears with various categories of content—Books, Magazines, Newspapers, Catalogs, Movies & TV, Apps, and so on. Next to each category, you see how much content is in that category and how much of that content is available to the current profile, for example, “20 of 27 books.” If all the content in any category is in the current profile, there’s a checkbox next to that category.
To add all the content from any category to your profile, simply tap the box next to the category, and then tap Save.
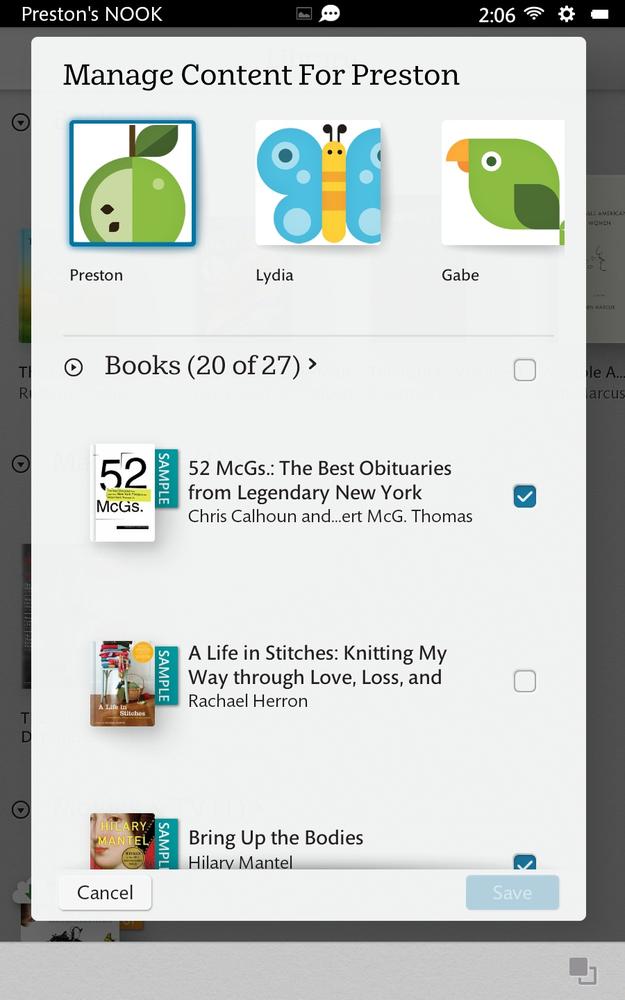
If you prefer to have only some of the content visible, tap the small arrow next to any category, and you’ll see a list of everything that’s available. Checkmarks appear next to the content visible in your profile. Turn on the checkboxes next to any content you want available in your profile, and then tap Save.
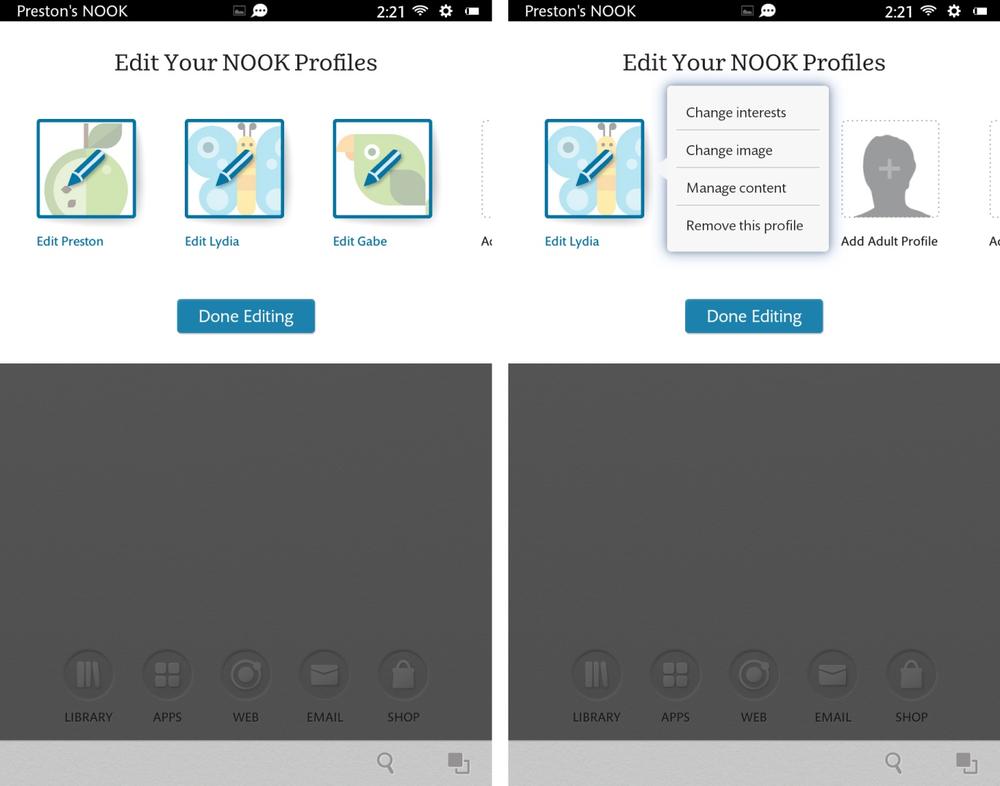
Once you create a profile, it’s easy to edit or even delete it. On the Home screen, tap the Profile icon. On the screen showing all of the NOOK’s profiles, tap the Edit Profiles button.
A pencil icon appears next to each profile. Tap the icon of the profile you want to edit.
A menu pops up with between three to five choices, depending on what profile you’re using. Here’s what each does:
Change Interests. Tap here to change the interests associated with the profile. The current interests have checkmarks next to them. Tap all the interests you want to add, just as you did when setting up the profile (Setting Up Profiles). To take away an interest, tap it so the checkmark disappears. When you’re finished, tap Done.
Change Image. Tap here to choose a new icon for the profile. Follow the same steps you took when you first created a profile to choose an image for it.
Manage Content. This section lets you add or take away content visible to the profile. The screen that appears is the same as the one that lets you add entire categories of content, or choose individual content from categories, as described on Assigning Content to Profiles. Follow those same instructions. When you’re done, tap Save.
Remove this Profile. Removes the profile from the NOOK. Don’t worry about losing its content, though, because the content will still be available to other profiles. Note that you can’t delete the profile you’re currently using. If you want to delete it, log into a different profile, and delete it from there. (Note: Only the Primary Profile can remove other adult profiles.)
Change Parental Controls. Lets you change the parental controls for a child profile. For details, see Setting Up a Child Profile.
Get NOOK HD: The Missing Manual, 2nd Edition now with the O’Reilly learning platform.
O’Reilly members experience books, live events, courses curated by job role, and more from O’Reilly and nearly 200 top publishers.

