Chapter 1. The Guided Tour
Your Xoom is a powerful multimedia, productivity, and communications marvel, and the first time you hold it in your hands, you’ll immediately want to put it through its paces, browsing the Web, downloading and trying out apps, playing games, watching videos, gathering the news, checking your email, and more.
That’s as it should be: Your Xoom can do many remarkable things.
To help you unlock all those powers, though, it’s a good idea to get a solid understanding of how the Xoom works, and a look at all its different parts. You’ll want to know where all of its buttons, ports, and cameras are located, for example—not to mention how to get to your Home screen panes, or to a location that will become one of your best friends, the App Menu.
Power/Lock Key
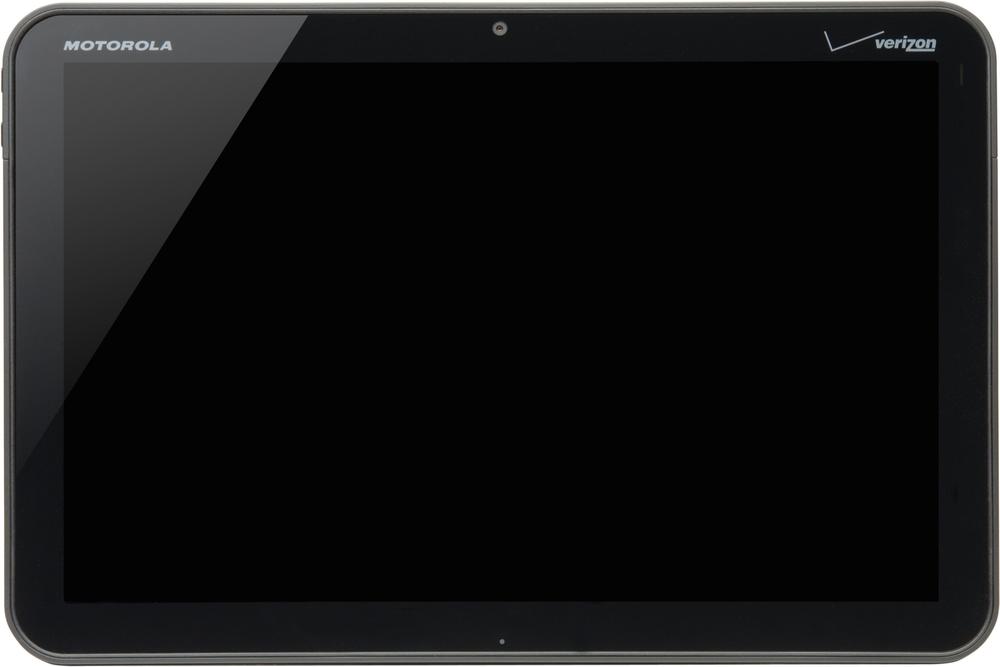
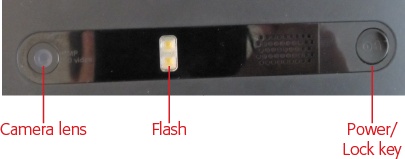
On the upper-left rear of your Xoom as you hold the Xoom horizontally, with the Motorola logo on the upper left, you find a small, black button. It may be only a single button, but it’s a hard-working one, and it performs several functions:
Sleep/Wake. When your Xoom is turned on, pressing and releasing the button puts your Xoom into Sleep mode, a state in which the display is turned off and the device uses only a minimum amount of power, in order to save battery life. When the Xoom is in dreamland, it also doesn’t register any taps, so that you can’t accidentally send an email or delete every picture on your Xoom. When your Xoom is asleep, pressing and releasing this button wakes up the Xoom into its locked mode—you’ll see how to unlock it a little later.
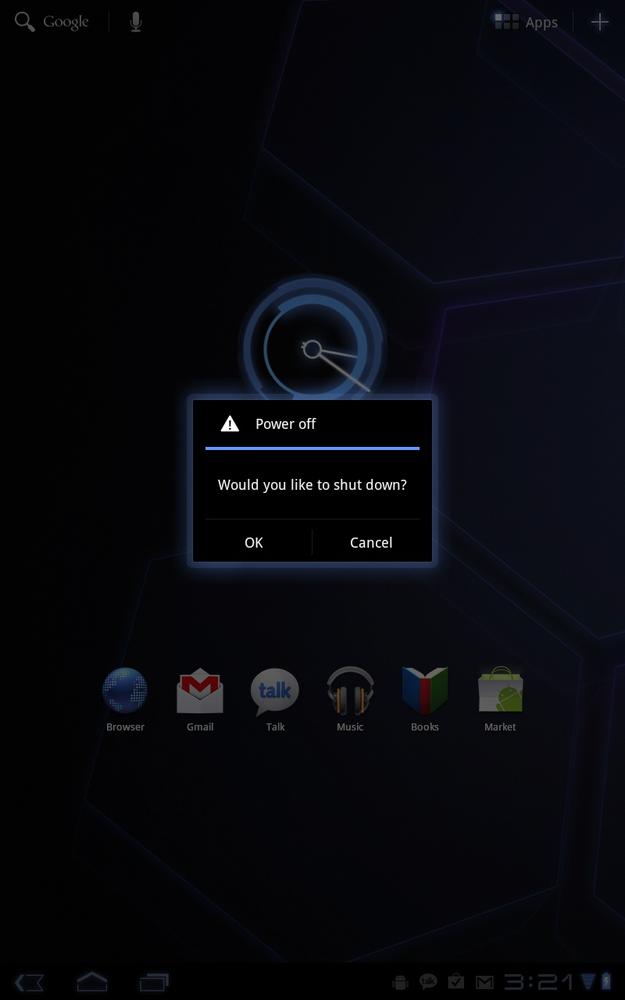
On/Off. If your Xoom is turned off, hold down the button, and it springs to life. Simple, yes? If, on the other hand, it’s turned on, holding down the button turns it off. When you do so, though, it doesn’t immediately shut down. Instead, a screen appears asking if you want to turn it off. Tap OK to turn it off; tap cancel to keep using your Xoom.
Locking the Screen
As described on Power/Lock Key, when you put the Xoom to sleep, the screen stops responding to touch. It blacks out, indicating that the screen is locked. Always lock the screen before putting your Xoom somewhere like in a bag or backpack to avoid accidental screen taps. In fact, every time you leave the Xoom untouched for two minutes, the screen automatically locks itself.
Note
Your Xoom may be Wi-Fi-only, or also have the ability to connect to a cellular network and get a connection that way. Either way, the device looks the same.
While the screen is locked, the Xoom still operates behind the scenes, checking email and Facebook on schedule. It still receives text messages while the screen is locked. You get all the usual notifications for all the things you’ve asked it to notify you about. In fact, in many ways your Xoom works just as hard when it’s locked as when it’s not.
When you again want to use the Xoom, you need to unlock it. Simply put your fingertip on the lock icon on the screen and slide it in any direction. Your Xoom is now ready to do your bidding.

Tip
You can adjust the amount of time it takes for the Xoom to lock itself. And for added security, you can also require that a password be used to unlock your Xoom, or even that a specific finger-swiping motion be performed on the keyboard before it can be unlocked. For details, see Location & Security.
About the Screen
The screen is Xoom’s center stage—it’s where it displays web pages, apps, games, and more, and because it’s a touch screen, it’s also where you’ll tell the Xoom what you want to do next. The screen is a roomy 10.1 inches measured diagonally (technically, that’s 1280 x 800 pixels with a resolution of 150 pixels to the inch). For the tech-inclined, its HD screen is 720p. When you turn it sideways, it switches to a widescreen TV and movie format.
But there’s a lot going on behind that pretty display.
Tip
Since you’re going to be touching the display with your fingers, it’s going to get dirty and streaky. Simply wipe it clean with a soft, lint-free cloth or tissue. The screen is scratch-resistant, but if you’re worried about scratches, get a case or screen protector. See Appendix A for ideas.
Built-in Sensors
Underneath its flat black screen, the Xoom has four sensors that perform a lot of its magic:
Proximity sensor. The Xoom has a proximity sensor, just like most smartphones do. You might think this somewhat odd, because the primary purpose of one on a phone is to automatically turn off and blank the touchscreen when your face is close to a phone during a phone call. It does this to the screen to save power, and so you don’t accidentally touch the screen while talking and perform some unwanted task. As to why you would need one on a tablet…no one’s quite sure why yet. But Motorola put it there, and maybe some day a clever app developer will come up with a use for a proximity sensor on a tablet.
Ambient light sensor. This senses the light level, and adjusts your screen’s brightness, as a way to save battery power. So in bright light, it makes the screen brighter so that it can be more easily seen, and in dim light, it makes the screen dimmer, because bright light is not needed.
3-axis accelerometer. As its name implies, this measures acceleration and motion. The Xoom uses the accelerometer to sense the orientation of the screen and turn it to either landscape or portrait mode. But clever app makers use it for other things as well. There’s even an app that works with the Xoom’s magnetometer and detects potholes as you drive, and creates a log about their locations which you can then email to your local department of public works. (It’s called Pothole Agent. Search the Android Marketplace app for it.)
Magnetometer. This measures the strength and direction of the Earth’s magnetic field. It’s used for compass apps and can also work with the accelerometer, as it does in Pothole Agent.
Barometer. You read that right—it’s got a barometer built into it. Expect app developers to find all kinds of creative uses for it.
Gyroscope. Yes, it’s got one of these as well, for games and all kinds of motion-sensing apps.
Home Screen
When you turn on your Xoom, you see its big, beautiful screen, which you can hold in either a horizontal or vertical position.
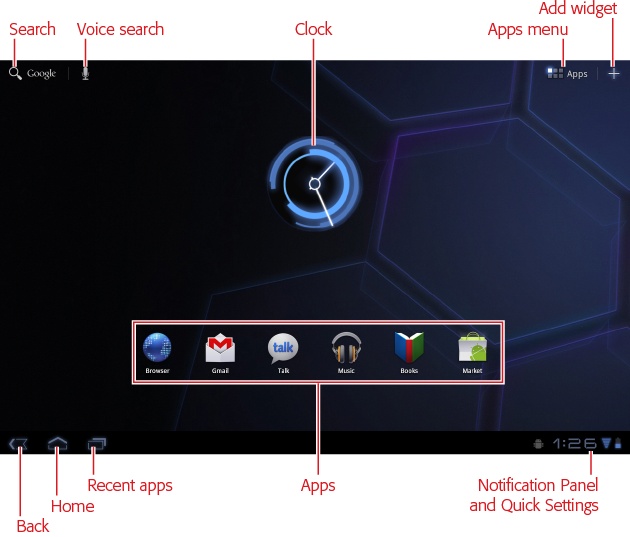
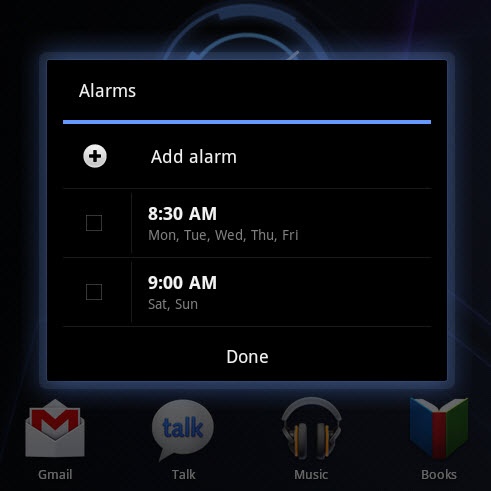
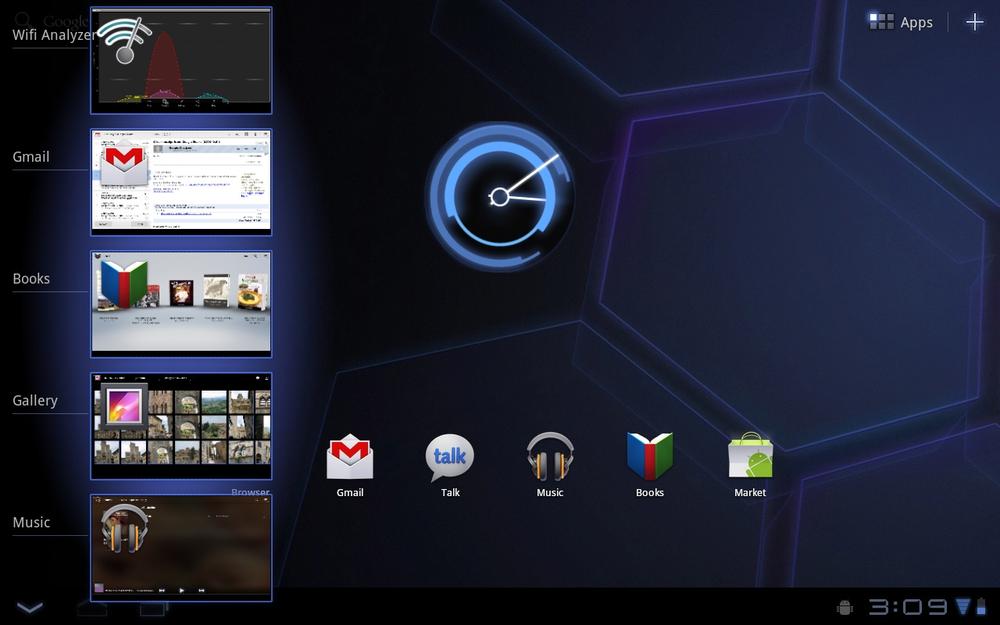
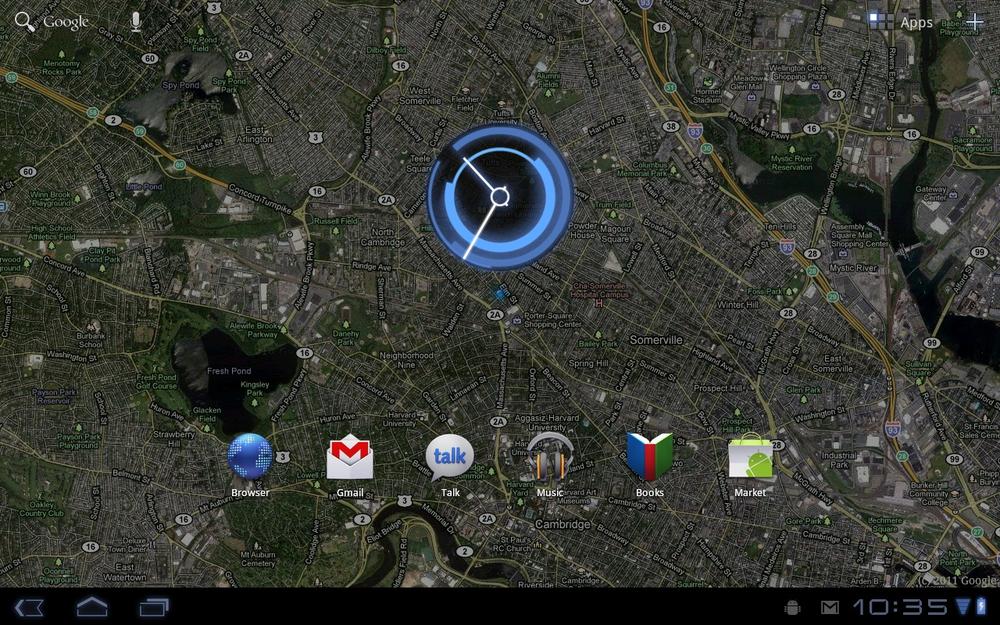
Right in the center you find a clock. Tap it and you can add an alarm—yes, it’s true, your Xoom doubles as an alarm clock.
The upper-left portion of the screen is your central location for search. Type a search term or tap the microphone icon, and then speak your search. Either way, you search the Internet as well as your Xoom. Over on the upper right, tap the Apps button and you’ll open the App Menu, displaying all of the apps you’ve got on the Xoom—those preloaded as well as any you’ve installed.
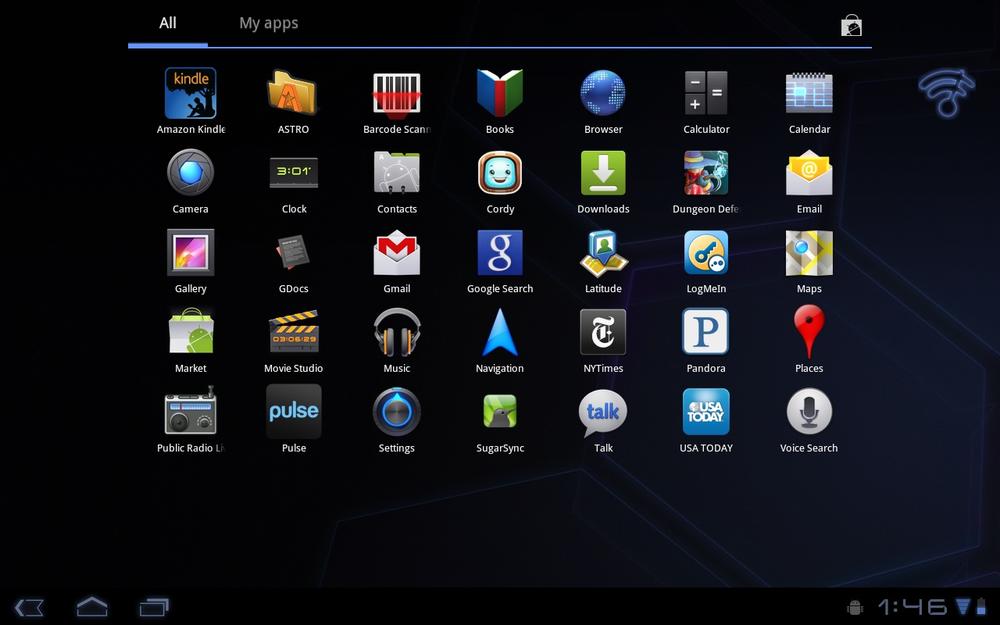
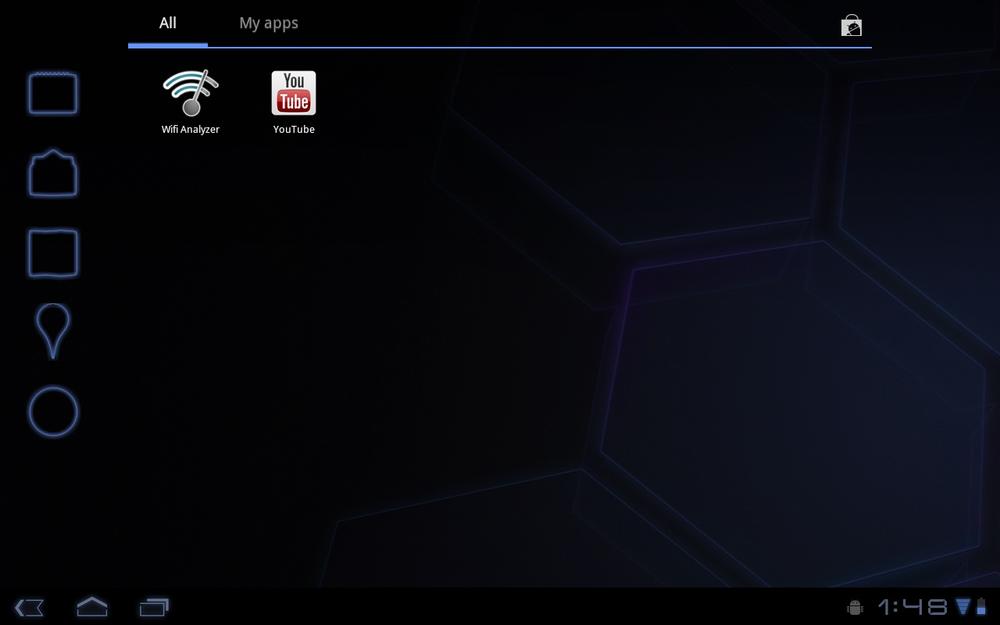
If you’ve got more apps than can fit on one screen, notice one or more outlines of icons on the right-hand side of the screen. That tells you that you’ve got more apps over there. Flick your finger toward the left, and you go to that screen. You see whatever apps you’ve got there—and if you look to the left of the screen, you see outlines if icons showing you that you’ve got icons back on the main Apps Menu screen. Flick over to it.
Back on the Home screen, just to the right of the App Menu button is a small + button. That’s the button you use to add widgets to your Home screen and any of its five—that’s right, count ′em, five—panes. More on that later, though. See Putting Widgets and App Shortcuts on the Home Screen for details.
Down at the bottom of the screen are several areas that stay with you no matter where you go, the combination Notification Panel/Quick Settings area on the right, and the three soft buttons—onscreen, not physical buttons—on the right. The soft buttons are used for navigation, and the Notification Panel/Quick Settings area sends any notifications and alerts your way, and lets you change some important Xoom settings.
Now it’s time to look at some of the Home screen’s features in more detail.
Notification Panel and Quick Settings
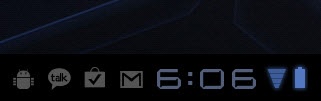
The Xoom makes sure to always keep you updated with information about its current status, and with any news, updates, and information it thinks is important. It does this by displaying a variety of icons in the Notification Panel at the bottom right of the Xoom’s screen. You’ll find a variety of icons there, such as those that give information about the current state of the Xoom, such as Wi-Fi signal strength, 3G or 4G connection status, battery life, and so on. There are also notifications about events, such as a new email or chat message received, a calendar event reminder, and so on.
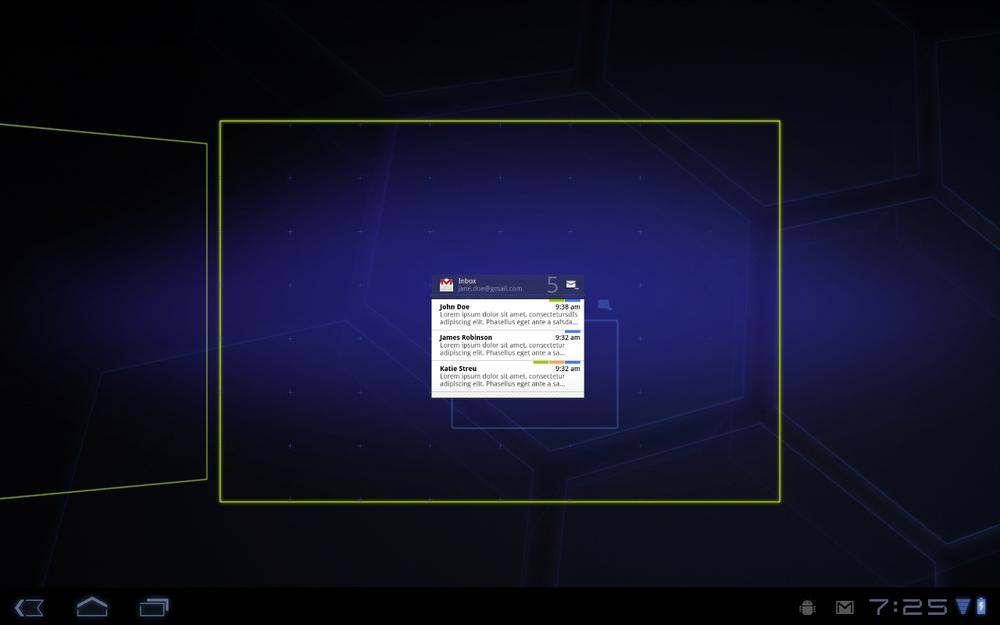
When a new notification comes in, it briefly appears in a pop-up window with information about it—part of all of a chat message, for example. Tap the notification, and you launch the app that sent the notification, for example, Gmail or your email software if the notification is about incoming messages.
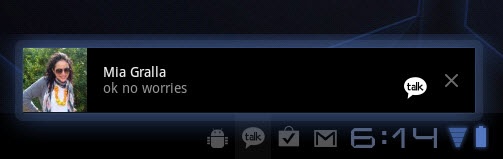
If you miss the notification pop-up, don’t worry—the small icon showing you’ve received a notification stays in the Notification Panel. Tap the icon, and the pop-up appears again. You can then tap the pop-up to head to the app. If you want the notification icon to vamoose, tap the X next to it.
Note
Even when your Xoom’s screen is locked, you can see all the notifications you have. But don’t try tapping them when the screen is locked—they don’t respond. You have to unlock the screen first.
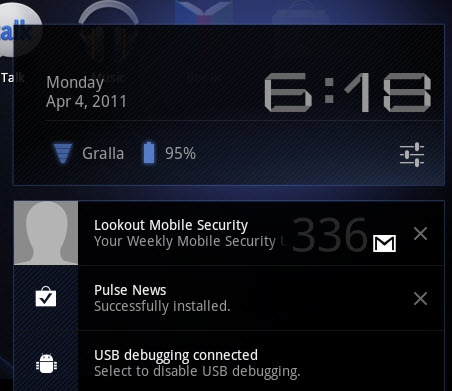
You can also see every one of your notifications in one fell swoop, rather than tapping them one at a time. Tap the right side of the Notification Panel, and the Panel expands, showing every one of your notifications. It shows not just the notifications about events, but also gives more information about the state of your Xoom, such as how much battery life you’ve got left, the name of the Wi-Fi network to which you’re currently connected, and so on.
Here are the most common icons you come across in the Notification Panel:
Cell signal
 . If you’ve got a Xoom tablet with 3G or 4G, you see a notification about your cell signal. The more bars you see, the stronger the signal.
3G
 . This one appears when you’re connected via 3G, Verizon’s high-speed, broadband service, which should be most of the time. It means that download and upload speeds are fast. The little arrows underneath the symbol show when data is being sent and received. Notice that the arrows may turn black even when you think you’re not sending or receiving data. That’s because the Xoom may be checking for email, updates, and so on.
Bluetooth connection
 . This icon indicates that you’ve turned on Bluetooth, for making a connection to a headset or some other device.
Airplane mode
 . When you use Airplane mode, you turn off Wi-Fi and cellular communications, so you can still keep using your Xoom’s apps, but it doesn’t interfere with navigation equipment. See Connecting Via Wi-Fi for more details.
Wi-fi
 . Shows that you’re connected to a Wi-Fi network, or a Wi-Fi network is within range.
Downloading
 . When you’re downloading an app or media file, you see this icon.
Download complete
 . Congratulations—your download was successful.
Update available
 . One or more of your apps has an update available. Tap the icon to download and install the update.
New email message
 . You’ve got mail! See Reading Mail for reading new email.
New Gmail message
 . You’ve got Gmail! See Reading Mail in Gmail for reading new email messages in Gmail.
GPS
 . Your GPS radio is turned on. See Buzz and Latitude for information about GPS.
Upcoming event
 . Now you’ll never forget your anniversary—or your dentist appointment. The Xoom alerts you via this icon when you’ve got an event about to happen.
Time
 . Shows you what time it is. Say goodbye to your watch.
Battery
 . Get to know this little icon—it shows you how much battery life you’ve got. If it’s charging, it plays a battery-filling animation and displays a small lightning bolt.
USB or USB tethering
 . This shows that you’ve connected a USB device to your Xoom, or else you’ve turned on USB tethering in order to give an Internet connection to your PC via the Xoom.
Google Talk
 . You’ve got a message from someone who wants to chat with you via Google Talk.
Music
 . You’re playing music. Tap the icon and you get a set of minicontrols for using the Xoom’s music player.
Quick Settings
As explained earlier, when you tap the Notification Panel, it expands to show you all of your notifications, plus also gives more information such as how much battery life you’ve got left, the name of the Wi-Fi network to which you’re currently connected, and so on. Tap that expanded notification panel one more time, and you see the Quick Settings panel, which lets you change a variety of Xoom settings:

Airplane mode. Tap this to turn on (and off) Airplane mode. Your Wi-Fi, cellular communications, and Bluetooth radios are turned off, so you can still keep using your Xoom’s apps, but they won’t interfere with navigation equipment. See Connecting Via Wi-Fi for more details.
Wi-Fi. Turns Wi-Fi on and off.
Lock screen orientation. Normally when you switch your Xoom from vertically to horizontally and vice versa, the Xoom switches its screen orientation to match the move. Tap this, though, and it stays locked in its current orientation.
Brightness. Use the slider to make your screen brighter or dimmer. Or just leave it to the Xoom to figure out the correct brightness based on your current lighting conditions, and leave it at Auto.
Settings. Tap here to change approximately two zillion Xoom settings. See Chapter 16 for the rundown on them all.
The Three (and Sometimes Four) Soft Buttons
Down at the bottom left of your screen, you see three soft buttons, which stay with you wherever you go on the Xoom. From left to right, here’s what they do:
Back Button
Wherever you are, tap this button, and you return to where you just were. The Back button works inside apps as well as in menus. So when you’re browsing the Web, for example, it acts as your Back button. Tapping the Back button also makes the virtual keyboard or a menu disappear if one is currently displayed.
Home Button
Repeat after me, Dorothy: There’s no place like home, there’s no place like home…. Wherever you are on the Xoom, tap the Home button and you come back to the familiar Home screen. You don’t even need to tap your ruby slippers together.
Recent Apps
Here’s an amazingly useful button. Tap it, and you see thumbnails of the four most recent apps you were running—you even see what was on the screen the last time you were using them. Tap any and you switch right to it, even if it’s closed down.
The Mysterious Menu Buttons
Every once in a while, when you’re inside an app, a fourth button appears at the bottom of the screen, to the right of the other three ![]() . It’s the Menu button, and it gives you access to more features and options. Tap it to reveal options for the app—and they’re for every app. The options pictured here are for an app called Wi-Fi Analyzer, which shows you a variety of information about any Wi-Fi networks near you.
. It’s the Menu button, and it gives you access to more features and options. Tap it to reveal options for the app—and they’re for every app. The options pictured here are for an app called Wi-Fi Analyzer, which shows you a variety of information about any Wi-Fi networks near you.

Other times, the Menu button appears in the far right upper-right portion of the screen, such as in the Gmail and Email apps ![]() . Tap it, and you see options for the current app, and these options often change depending on what you’re doing in the app—they’re what geeks call context-sensitive. The options pictured here are what appear when you tap the top Menu button when reading a message in Gmail.
. Tap it, and you see options for the current app, and these options often change depending on what you’re doing in the app—they’re what geeks call context-sensitive. The options pictured here are what appear when you tap the top Menu button when reading a message in Gmail.

Searching
Remember that Search button up at the top left of the screen? Tap it, and a box appears that lets you type in a search term, and the keyboard displays as well. As you tap the text you’re searching for, your Xoom displays matching results. Those on the left are suggested and matching results from the Web, for searching Google, and those on the right are for matching results on your Xoom, or in your browser’s bookmarks. Tap a term on the left, and you search the Internet; tap one on the right, and you launch the appropriate Xoom app—an app, say, or a contact, or a website, and so on.
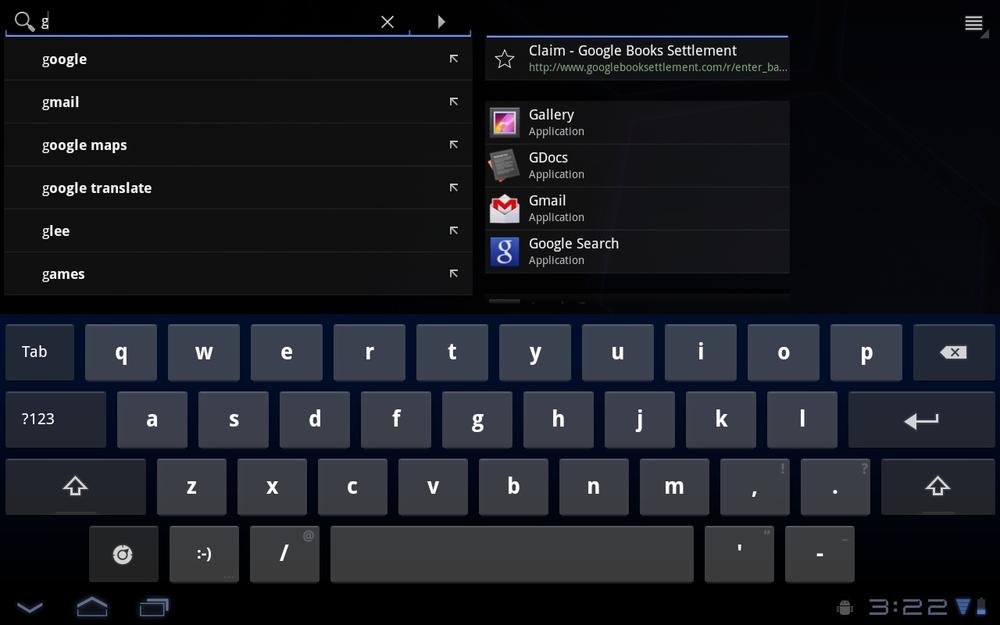
If no matches appear, tap your entire search term, and then tap the triangle at the right of the search box. To delete all the text in the search box so you can launch another search, tap the X.
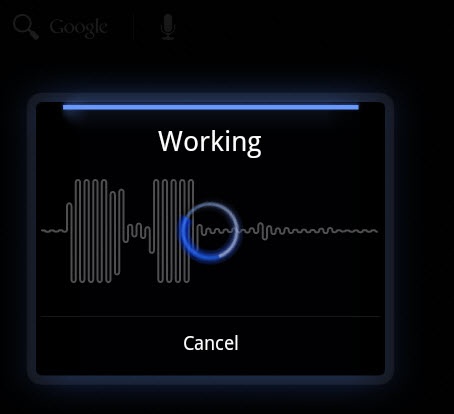
Your Xoom also lets you do a voice search—instead of tapping in your search terms, you can speak them. To do a voice search, hold down the Search key instead of just pressing it, and then speak. The Xoom does its best to interpret what you say, and it generally does a good job of it. For more details, see Using the Magic of Voice Actions.
Customizing the Home Screen and Panes
Here’s one of the many nice things about the Xoom—it’s easy to put your personal mark on it. Wish there were a few more apps on the Home screen? No problem; you can easily add them. Want to change the location of apps, or move around widgets and add new ones to each of your panels and the Home screen? It’s a breeze. The rest of this section shows you how. Think of yourself as Picasso, and the Home screen as your canvas.
First, a bit of explanation. Your Home screen is actually a whole lot bigger than it looks. At first glance, it appears to be a single panel. In fact, though, there are five panels. To see them, swipe your finger to the left or right along the Home screen. You see two panels to the left of the main Home panel, and two panels to the right of them. This section shows you how to customize any or all of those five panels.
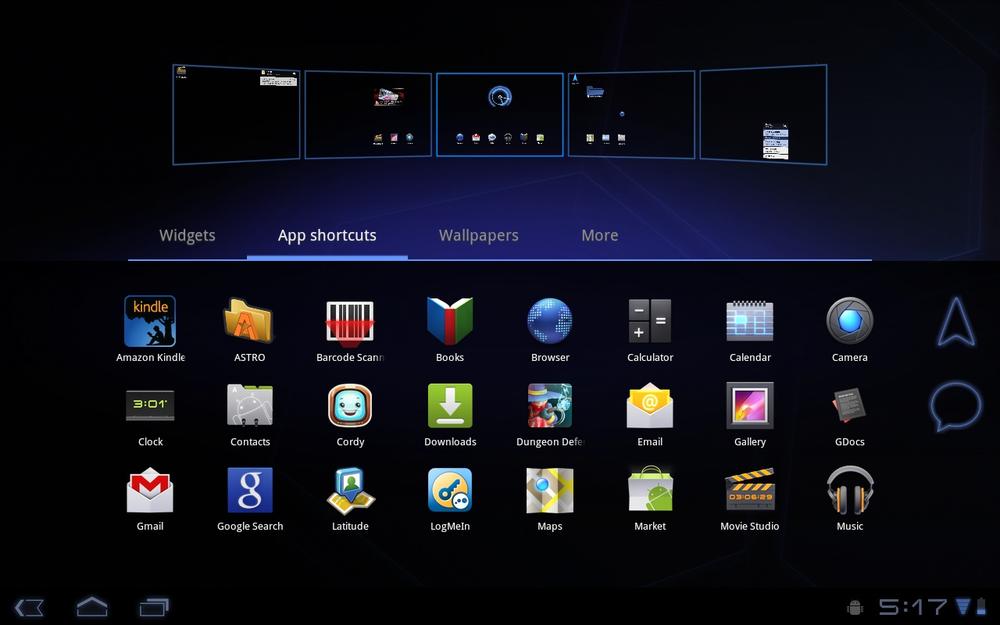
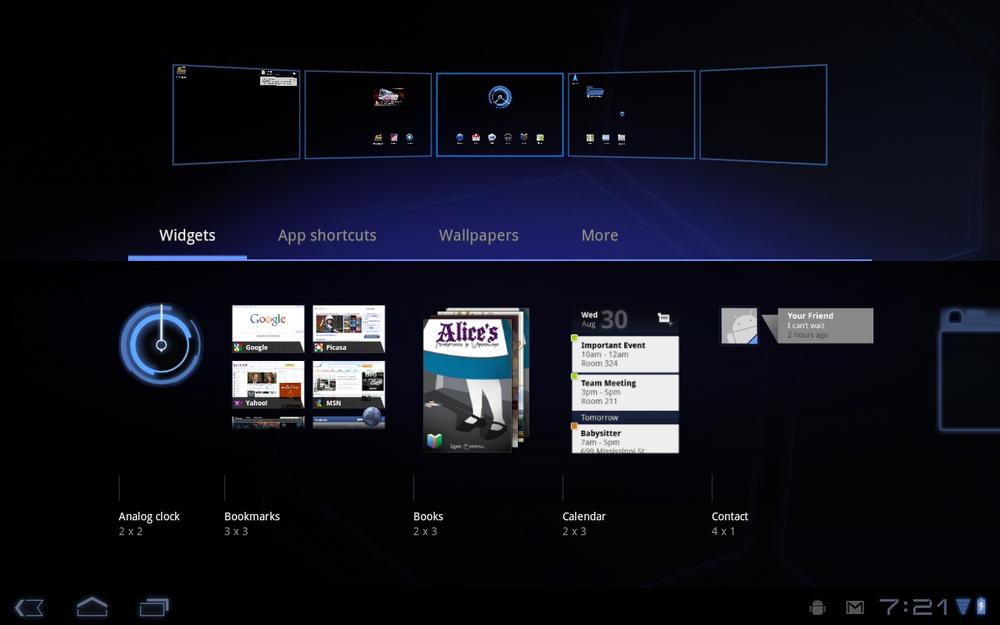
To start, tap the + button on the upper right of the Xoom’s screen. You see all five of your panels on the top part of the screen. On the bottom part of the screen you see buttons for Widgets, App shortcuts, Wallpapers, and more.
Tip
Don’t like the idea of tapping the + button? Then simply press your finger against the Xoom screen, and the same thing happens.

Tap any of those buttons, and you see all the objects you can add to any of the panels. You’ll learn how to add them shortly. But first, here’s what each of those buttons mean and what they let you add:
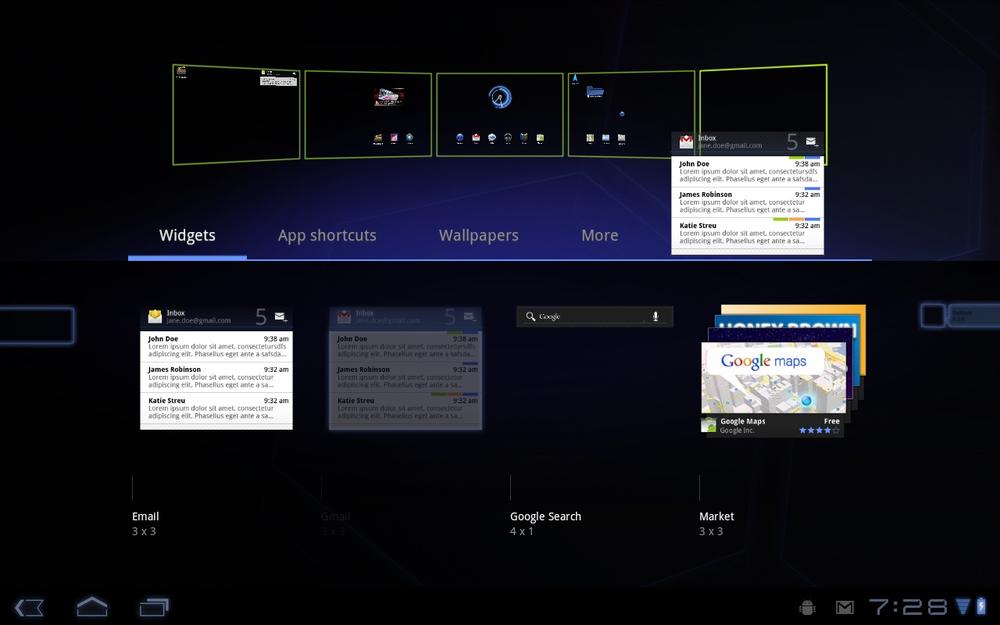
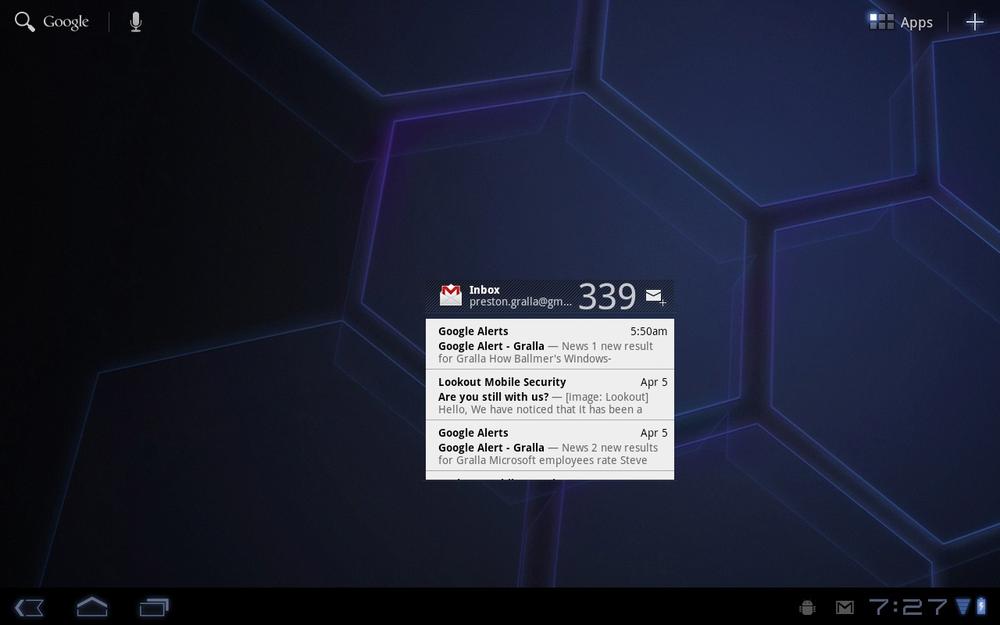
Widgets. A widget is an applet that performs a specific task, often grabbing and displaying information from the Xoom, a Xoom app, or the Internet. The Xoom has all kinds of nifty widgets you can add—for example, a widget to display the latest events in your calendar, one to display the latest emails to hit your inbox, a picture frame that displays pictures from your Xoom, and changes them regularly, and so on.
App shortcuts. A shortcut is a quick link to an app or specific task. So, for example, you could put a shortcut to the Pandora Internet radio app, or to your browser. When you tap the shortcut, the app launches.
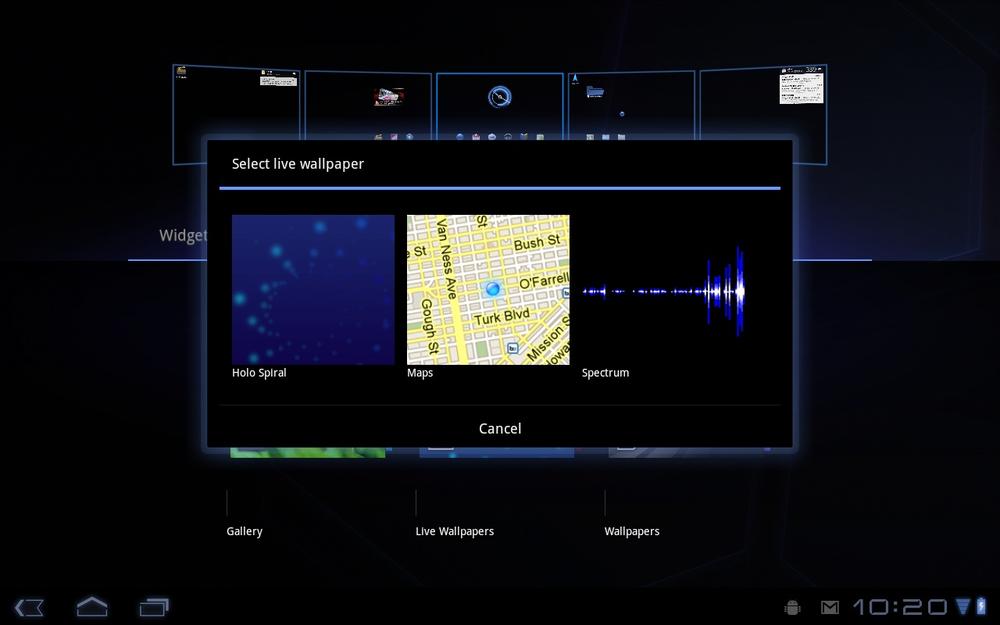
Wallpapers. Here’s where the Picasso part comes in. You can add a wallpaper to the background of any panel, just as you can add wallpaper to your computer. There are three choices here: Gallery, Live wallpapers, Wallpapers. Live wallpapers are changing backgrounds, either because they’re animated, or because they grab information from somewhere, and then display it as part of the wallpaper background. The Map live wallpaper, for example, shows your current location on a Google Map as your wallpaper. If you instead choose Gallery, you can take any of your photos and use it as wallpaper. The Wallpaper choice lets you use a static wallpaper. No matter what you choose, you get to preview the wallpaper first.
More.You find a hodgepodge of choices here, including app shortcuts, your browser’s bookmarks, and more.
Note
When you add wallpaper to your Home screen, it also shows up as the background on all your panes.
OK, time to go crazy. You can now trick out your Home screen in countless ways. Read on to see how to do it.
Putting Widgets and App Shortcuts on the Home Screen
It’s a breeze to put a widget or app shortcut on any of the Home screen’s five panels. Here’s how to do it:
On any of the Home screens, press your finger and hold it, or else tap the + button in the upper-right portion of your screen.
The top of your screen changes to show thumbnails of all of your five home screens, and the bottom shows either widgets, App shortcuts (icons) or wallpapers you can add to any screen.
Tap Widgets to show available widgets, App shortcuts to show app shortcuts, and More for a mix of both of them.
The bottom of your screen shows all of the widgets or app icons you can add to a home screen. Flick left and right through the list to see what’s available.
When you find the widget or app icon you want to add, drag it to any panel.
As you drag, the widget or app icon in the bottom panel becomes grayed out.
When you’ve moved the widget or app icon to the position on the panel you want it to be, release your finger.
Tap the panel to where you’ve just moved the widget or app icon. There it is, in all of its Xoom-like glory!
Deleting and Moving Widgets and App Shortcuts
Once you’ve added widgets and shortcuts to your Home screen, you’re not stuck with them, or with where you’ve placed them:
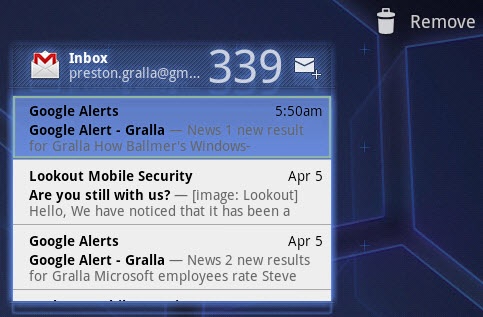
To move a widget or folder, press your finger on it and hold it. A glow appears around it. Drag it to its new location and take your finger off it—that’s where it stays. You can move it to a different location on the same panel, or to a different panel.
To delete a widget or shortcut, press your finger on it and hold it for a second or two until a glow appears around it. The Apps button at the top of the screen turns into a Trash button
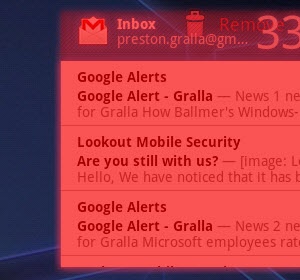
 and the word Remove appears next to it. Drag the widget or app shortcut to the Trash can. When you see it turn red, release it—it’s gone. Keep in mind, though, that when you delete it, it’s gone forever. It’s not like the PC’s Recycle Bin or the Mac’s Trash where it’s kept for a while. It’s gone, baby, gone.
Changing the Home Screen’s Wallpaper
To change your home screen’s wallpaper, you take slightly different steps. Follow the same first two steps as for putting widgets and app shortcuts on the Home screen, and then:
Tap Wallpaper. You’ll see the three types of wallpaper you can add, Gallery, Live Wallpapers, and Wallpapers.
Tap the type of wallpaper you want to add. For this example, choose Live Wallpapers.
Flick through the list until you see one you want to add. Tap it.
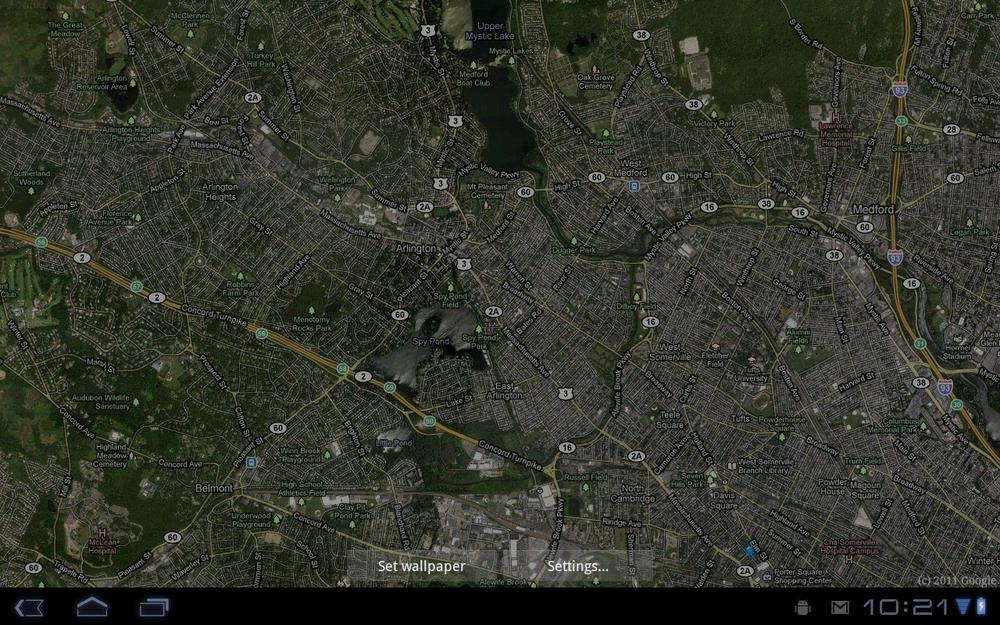
Your Xoom’s screen fills with the wallpaper. Since you’ve chosen a live wallpaper, you can change its options by tapping the Settings button. For example, on the Maps live wallpaper, you can choose whether the map should also display traffic and weather.
If you decide you don’t want to use the wallpaper, tap the Back button to return to the previous screen. If you want to use the wallpaper, tap “Set wallpaper.”
That’s it—you’ve just set your wallpaper. Tap any panel to see it. Note that the same wallpaper will be on all of your Home screen panels. You can have only one wallpaper on all five panels; you can’t set different ones for individual panels.

Controlling the Xoom with Your Fingers
With the Xoom, your fingers do the walking. They do all the work that you do on a computer with a mouse or keyboard. Here are the eight finger strokes you can use on the Xoom’s screen.
Tap
Tapping is as basic to the Xoom as clicking is to a mouse. This one simple gesture is how you press onscreen buttons, place the cursor for text entry, and choose from menus.
Touch and Hold
Touch an object and hold it for several seconds, and depending on what you’re holding, you may perform an action. (For example, when you touch and hold the Home screen, you get sent to the screen that lets you customize your Home screen.) You also touch and hold an object as a way to grab onto it if you then want to drag the object somewhere.
Drag
After you’ve grabbed something, you can drag it with your finger, such as dragging an icon to the trash.
Slide
Slide your finger across the screen to perform some specific tasks, like unlocking your Xoom after it’s been put into Sleep mode. You also use the sliding motion to move through all of the Home screen’s panels.
Flick
Think of the flick as a faster slide, done vertically when scrolling through a list, such as a list of your contacts. The faster you make the flicking motion, the faster your screen scrolls—sometimes too fast. You can stop the motion, though, by touching the screen again.
Note
Flicks seem to actually obey the laws of physics, or at least as much as virtual movement can. When you flick a list, it starts off scrolling very quickly, and then gradually slows down, as if it were a ball set in motion that gradually loses momentum.
To scroll through large lists quickly, you can flick multiple times.
Pinch and Spread
In many apps, such as Google Maps, Mail, the Web, and Photos, you can zoom in by spreading your fingers—placing your thumb and forefinger on the screen and spreading them. The amount you spread your fingers will determine the amount you zoom in.
To zoom out, put your thumb and forefinger on the screen and pinch them together. The more you pinch, the more you zoom out.
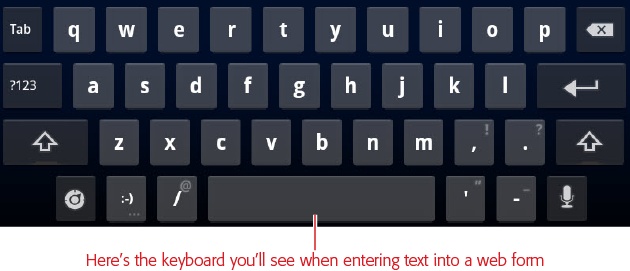
Using the Keyboard
Tap wherever you can enter text, and the keyboard appears. When you tap in the text-entry box, a blinking cursor appears, indicating that you can start typing text. You can hold the tablet either horizontally or vertically to use the keyboard.
After you use the keyboard several times you may be confused because sometimes the keyboard seems to be different than other times—sometimes you see an @ symbol right there on the keyboard, for example, and other times you have to press a special key to get to that symbol. And there are other differences as well.
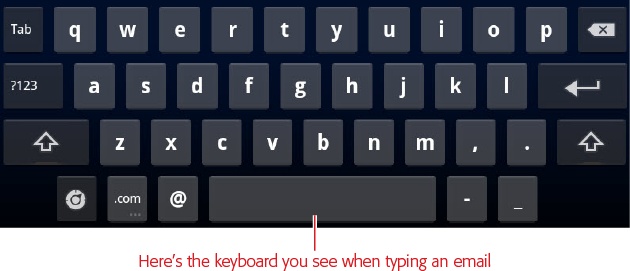
Depending on what you’re doing, the Xoom shows you either one keyboard or another. So when you’re typing an email message, for example, it shows the keyboard with the @ symbol right there in front of you, because you’re likely to need it when typing an email address. At other times, when you’re typing text into a web page or when you’re texting, it displays a slightly different keyboard.
Whichever keyboard appears, when it pops up, the Back button at the bottom left of your screen changes from a sideways arrow ![]() to a down arrow
to a down arrow ![]() . To make the keyboard disappear, tap the down arrow. The keyboard vanishes, and the back button turns sideways again.
. To make the keyboard disappear, tap the down arrow. The keyboard vanishes, and the back button turns sideways again.
Differences Between the Keyboards
The keyboards are essentially identical and work exactly the same except for their bottom rows.
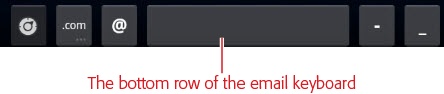
On the email keyboard to the left of the space bar, you find one key for entering the @ symbol, and one for entering .com with a single tap. That way, you can easily enter an email address.

On the Web and texting keyboard, to the left of the space bar, you find a smiley key—great for texters who favor sending that ubiquitous little emoticon—and the slash key, which is great for when you need to type in a URL. In addition, the Web and texting keyboard has a key that when tapped performs voice recognition so that you can speak your text instead of enter it.
Note
There’s another slight difference between the keyboards—on the Web and texting keyboard, the two keys to the right of the space bar on the bottom row, and the two keys on the row directly above them let you type in symbols when you press the space bar.
Whichever keyboard you use, you find five special keys:
Shift
 . Tap this key, and the letters all change to uppercase on the keyboard. Tap any key, and it gets entered in uppercase. After you type the key, though, the keyboard changes back to lowercase. If you want to type multiple uppercase characters in a row, there’s a nifty way around the problem: Keep your finger on the Shift key as you type. As long as you hold your finger there, you type in upper case. Remove your finger, tap a key, and you’re back to lower case.
Del
 . This is the Delete key. Mac fans will feel right at home with it, since it deletes letters to the left of the insertion point, like a Backspace key. If you use a PC, where the Delete key is a forward delete key, you may find this behavior confusing at first. Just use the direction of the arrow icon on the key as a guide: think backspace.
Tap Del once, and it deletes the letter to the left of the insertion point. Hold it down, and it keeps deleting letters to the left, until you let it go. Hold the key down long enough, and it deletes entire words at a time, not just letters.
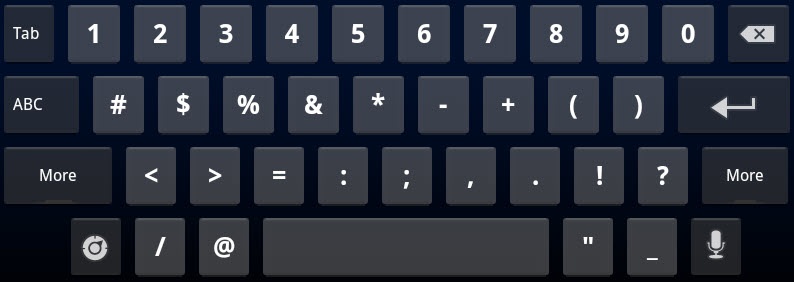
?123
 . As the label implies, this key reveals punctuation marks and numbers. When you tap it, you see a whole keyboard full of them, and the same key now reads ABC. Tap it to return to alphabetic typing.
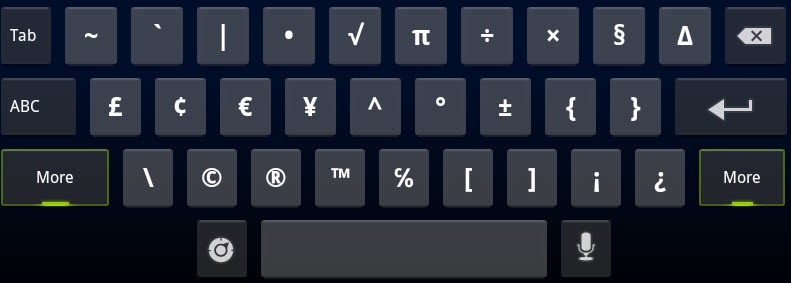
When you switch to the numbers and punctuation keyboard, the Shift key turns into a More key
 . Tap it, and you can then display yet one more keyboard—one with special characters and symbols such as the trademark symbol, several types of brackets, the symbol for euros, and so on. Tap the More key to get back to the numbers and punctuation keyboard.
Return
 . This key works exactly as you would expect: Tap it, and you move on to the next line, just as on a computer.
Settings
 . Tap here to change a variety of settings, such as the input language and how to handle autocorrection. For details, see Storage.
Moving the Insertion Point
Once you get the hang of entering text, you have another challenge—how to move the insertion point if you want to go back and edit, delete, or add words or letters. You can tap where you want to place the insertion point, but that’s not always effective. Even with fine-tuned hand-eye coordination, it can be difficult to tap in the precise spot where you want the insertion point.
There’s a better way: Tap anywhere in the text, and a green upward-facing arrow appears, just underneath a blinking insertion point. Drag the arrow and you move the insertion point along with it. When you have the insertion point where you want it, remove your finger.
Copying and Pasting Text
What’s a computer without the ability to cut, copy, and paste? A computer at heart, the Xoom lets you do all that, even though it has no mouse. For example, you can copy directions from Google Maps into an email to send to a friend, paste contact information into a note to yourself, and so on. You copy and paste text using the same basic techniques you use on a PC or a Mac. You select it, and then copy, cut, or paste it.
Note
This technique works only in areas where you enter or edit text, such as in email messages you’re composing, text messages you’re creating, contact information, and similar locations. You can’t copy and paste text from an incoming email. You can, however, copy and paste text from a web page, although using a different technique. See Copying Text, Finding Text, Getting Page Information, and More for how to do it.
There are several ways to select text in an input box, depending on how much text you want to cut or copy:
Double-tap. Double-tap the first or last word in a selection of text that you want to cut or copy. The word is highlighted and bracketed by polygons—those are the handles. Drag each to include all the text you want to select, and then release.
Hold. Press your finger on a word and hold it there. Just as in double-tapping, the word is highlighted and bracketed by polygons.
Select all. Whenever you select text a “Text Selection” toolbar appears at the top of your screen. Tap “Select all” to select all the text in the text book, body of an email message, and so on.


Once you’ve selected text, it’s time to do something with it. That’s what the Text Selection toolbar is for:
Select all. Selects all the text in the text box. It overrides you if you’ve selected only some of the text in the text box.
Cut. Cuts the text you’ve selected, and puts it into the Xoom’s clipboard, so you can later paste it somewhere if you want. The clipboard works just like the one on your PC or Mac—it holds things you’ve copied until you want to later paste them. Unlike the PC or Mac, though, this clipboard holds multiple clips, not just a single one.
Copy. Copies the last piece of text you’ve put into the clipboard, so that you can paste it somewhere.
Paste. Pastes the last piece of text you’ve put on the clipboard and replaces whatever text you’ve selected. So if you’ve selected all text in the text box, Paste deletes all that text, and replaces it with the last thing you put on the clipboard. If you’ve selected only a word or a few words, it deletes them and replaces them with the latest from the clipboard.
Accented and Special Characters
You can easily type in accented characters (such as é, Ö, Ü, and so on) with the Xoom keyboard. Press any one of a number of keys, and keep your finger on it for a second or so. A palette of accented characters appears. Tap the one you want to use, or tap the x to make the palette of characters vamoose. The following chart shows which keys let you enter special characters.

Headphone Jack
If you hold your Xoom horizontally, with the Motorola logo on the upper left, you find a 3.5-millimeter headset jack right smack dab on top. You can plug in headphones or even external speakers, and enjoy the Xoom as a music machine (it offers full stereo). Notice that it’s a headset jack, not just a garden variety headphone jack. It doesn’t just let you listen; it can send outgoing sound as well. That’s so you can plug an earbud headset (or other kind of headset) into it and use it along with a voice- or videochat program like Google Chat. (See Using Video Chat Options for more details.)
SD Card and 4G SIM Card
Just to the left of the headset jack, as the Xoom faces you, you find a clever little slot that serves double duty, as both the place where you insert a MicroSD card for additional storage, and where you insert a special SIM card you need if you want your Xoom to use a high-speed 4G network connection.
Note
When the Xoom first came out, MicroSD cards could not work with it because the Xoom’s underlying operating system, Android 3.0 Honeycomb, did not yet support MicroSD cards. As you read this, though, support might have been added via an update to the operating system. The same holds true for 4G—the Xoom did not yet support it. For details about how to update the Xoom’s operating system, see Fixing a Frozen Xoom.

There’s a small cover on the slot with a notch behind it. Slip your fingernail into the notch and pull off the cover. You find slots for both the SIM card and the MicroSD card, which is about the size of a fingernail, and much smaller than the normal SD memory cards used in cameras. The card may be small, but it can hold gigabytes worth of data—the Xoom lets you slip in a card with 32 GB worth of storage. The larger slot is for the SIM card, and the smaller one for the MicroSD card.
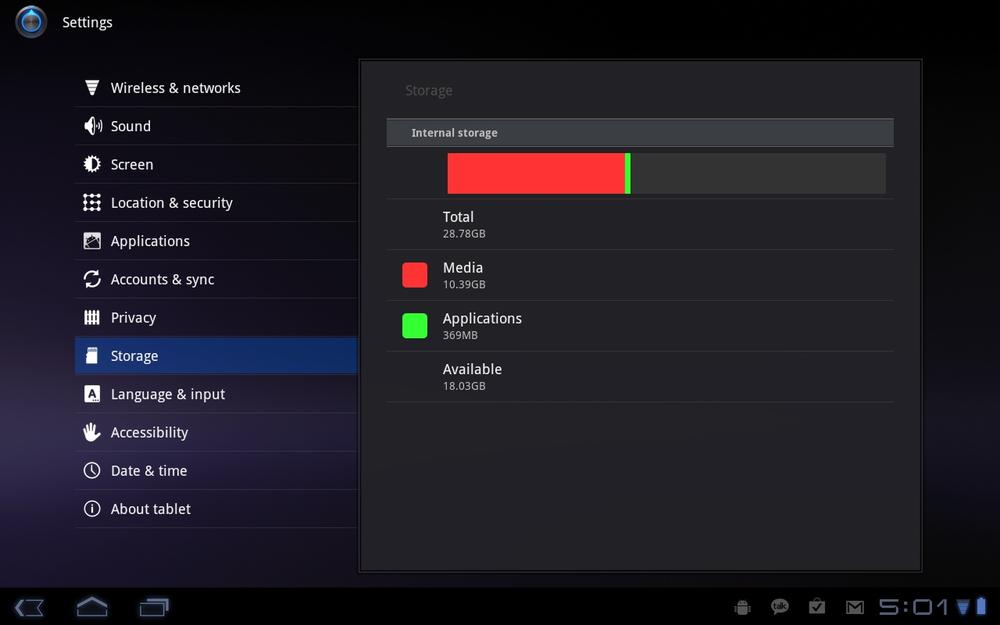
The Xoom can have memory in two places—in the tablet itself, and on the MicroSD card. To see how much memory you’ve got left in both, tap the Apps button at the top of the Home screen, tap Settings, and then choose Storage. The Xoom comes with 32 GB of built-in memory. It doesn’t have a MicroSD card included; you have to buy one separately.
To install an SD card, turn off the Xoom, slip the MicroSD card into the small slot, and then turn on the Xoom. Your Xoom should automatically recognize the new card and storage. Again, though, keep in mind that the Xoom might not yet have gotten the update that lets it use MicroSD storage, so you may have to wait.
If you were an early purchaser of the Xoom, then you can’t turn on the 4G connection. You have to ship it back to Motorola and have the company do it for you.
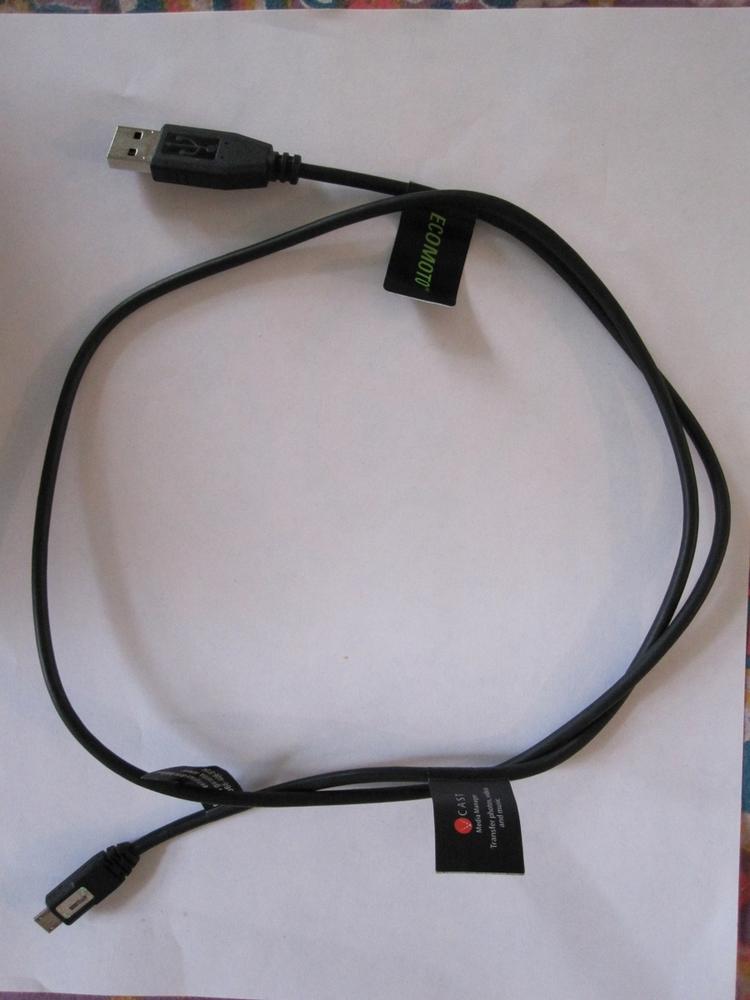
Micro USB Port
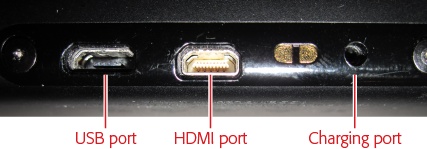
Down at the bottom edge of the Xoom if you’re holding it with the Motorola logo on the left, you find three ports—a Micro USB port, an HDMI port, and a port for charging the Xoom.
Use the leftmost of the three, the Micro USB port, for transferring files, music, and video between your computer and the Xoom. (For details, see Transferring Files from Your PC and Mac to Your Xoom.) A micro USB port is much smaller than the normal one on devices such as printers. To connect the Xoom to your computer, you need a micro USB cable, one of which comes in the Xoom’s box. The Xoom can connect to both Macs and PCs.
Note
Unlike with Motorola smartphones such as the Droid X and the Droid 2, when you connect your Xoom to your computer with a USB cable, your Xoom doesn’t get any power from the computer. You must use the AC charger for that, as detailed on HDMI Port.
How about connecting other USB devices to your Xoom, like external USB storage? When the Xoom was launched, the only USB device it worked with was an external keyboard. Motorola says that at some point, when the Xoom’s Android software is updated, it’ll work with other devices as well. So as you read this, your Xoom may or may not work with other devices, depending on whether the update has arrived.
Note
When you connect your Xoom to a PC for the first time, your PC may not recognize it. That’s because your PC may need special drivers (small pieces of software) to communicate with the Xoom. Windows tries its mightiest to find the drivers, but it might not be able to locate them. If it doesn’t, you can go over to the Motorola website (www.motorola.com) and search for Xoom drivers. Then download them and follow the instructions for installing them. You can also download the drivers directly from http://bit.ly/brh0YH.
HDMI Port
Your Xoom, with its big high-definition widescreen and fast processor, is a big-time entertainment machine. And a key part of that is its geeky-sounding HDMI (High-Definition Multimedia Interface) port built into it next to the mini USB port. What does this port do? With it, you can watch videos and photos taken on your Xoom right on your computer or TV screen, as long as they have HDMI ports. Plug one end of the cable into your Xoom, the other into your PC or TV, and you’re ready to go.
Charging Port and Cable
See that tiny port next to the HDMI port? That’s where you plug in your charging cable. There’s nothing fancy about this. Plug one end into an outlet, and the other end into this port. Your Xoom gets juice. If you’ve just taken you Xoom out of the box, plug it in now and give it a full charge before using it.
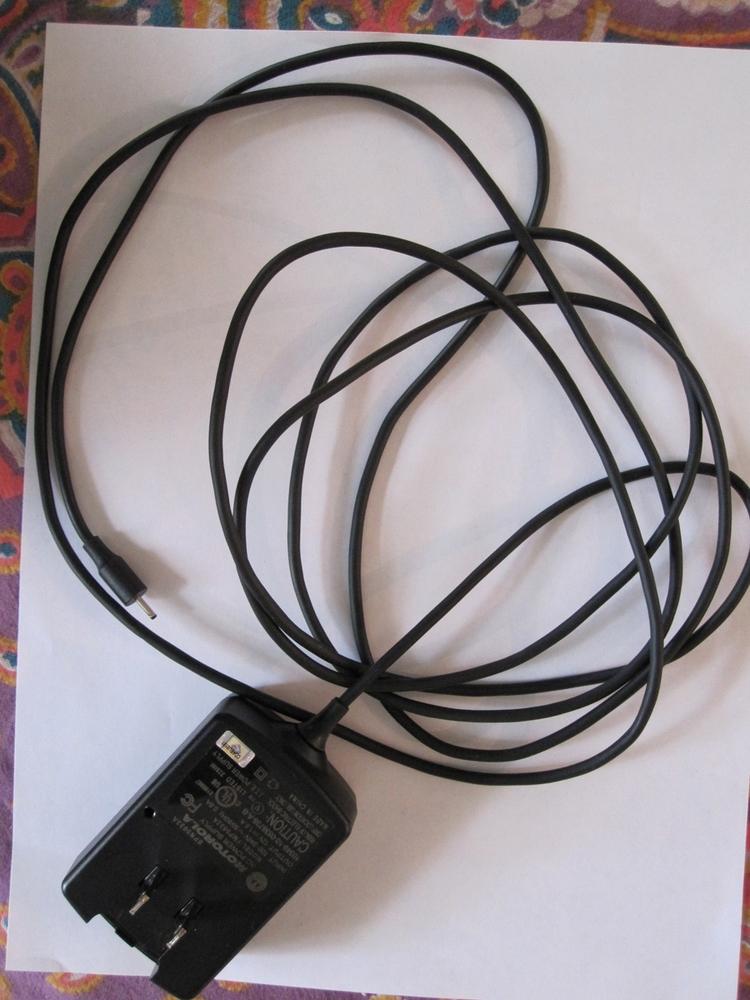
If you often use power-hungry features like video and GPS, you may have to charge your Xoom every night. If you use it less often, you might be able to get by with every other day.
Microphone
That tiny little hole to the right of the power port if you’re holding the Xoom horizontally with the Motorola logo on the left is the Xoom microphone. Yes, it’s small, but it does the job very nicely.
Ringer Volume
Is your ringer too loud? Too soft? Get it just right by using these keys. They’re just around the corner from the Motorola logo, on the side of the Xoom—two small black keys. Press the top one as you’re holding the tablet horizontally to make the volume louder, and the bottom one to make it softer. When you press either key, a ringer volume app pops up on your screen, showing you how much louder or softer you’re making the ring.

Cameras
Your Xoom includes not just one but two cameras—one facing front, and the usual back-facing one as well. Why two cameras? One you use for taking photographs, and the other you use as a webcam, for videochatting, for example. The one for taking photographs is a five-megapixel one. Its lens is located on the back of the Xoom and there’s a flash right next to it. As you’ll see on Taking Still Photos, there’s no physical button for taking photographs; instead you press a button on the Xoom screen itself.
The webcam lens is right at the top of the Xoom in the middle as you hold it horizontally with the Motorola logo on the right. It’s a 2-megapixel camera.
Get Motorola Xoom: The Missing Manual now with the O’Reilly learning platform.
O’Reilly members experience books, live events, courses curated by job role, and more from O’Reilly and nearly 200 top publishers.

