Most applications will need to do more with dataâtypically, at least, theyâll store the data and present it back as appropriate. Itâs time to extend this simple application so that it keeps track of who has stopped by, as well as greeting them. This requires using models. (The complete application is available in ch04/guestbook002.)
Warning
As the next chapter on scaffolding will make clear, in most application development you will likely want to create your models by letting Rails create a scaffold, since Rails wonât let you create a scaffold after a model with the same name already exists. Nonetheless, understanding the more manual approach will make it much easier to work on your applications in the long run.
Keeping track of visitors will mean setting up and using a database.
In Heroku and Instant Rails, the databases should set up at the
beginning, requiring no further intervention. Otherwise, in Rails
2.0.2 and later, this should be easy when youâre in development mode,
as Rails now defaults to SQLite, which doesnât require explicit
configuration. (Earlier versions of Rails required setting up MySQL,
which does require configuration.) To test whether SQLite is installed on your system, try issuing the
command sqlite3 -help from the
command line. If itâs there, youâll get a help message. If not, youâll
get an error, and youâll need to install SQLite.
Once the database engine is functioning, itâs time to create a
model. Once again, itâs easiest to use script/generate to lay a foundation, and then add details to that
foundation. This time, weâll create a model instead of a controller
and call the model entry:
ruby script/generate model entry
      exists  app/models/
      exists  test/unit/
      exists  test/fixtures/
      create  app/models/entry.rb
      create  test/unit/entry_test.rb
      create  test/fixtures/entries.yml
      create  db/migrate
      create  db/migrate/20080718193908_create_entries.rb
For our immediate purposes, two of these files are critical. The first is app/models/entry.rb, which is where all of the Ruby logic for handling a person will go. The second, which defines the database structures and thus needs to be modified first, is in the db/migrate/ directory. It will have a name like [timestamp]_create_entries.rb, where [timestamp] is the date and time when it was created. It initially contains whatâs shown in Example 4-4.
Example 4-4. The default migration for the entry model
1  class CreateEntries < ActiveRecord::Migration
2    def self.up
3      create_table :entries do |t|
4
5        t.timestamps
6      end
7    end
8
9    def self.down
10     drop_table :entries
11   end
12 end
Thereâs a lot to examine here before we start making changes.
First, note on line 1 that the class is called CreateEntries. The model may be for a
person, but the migration will create a table for more than one
person. Rails names tables (and migrations) for the plural, and can
handle most common English irregular pluralizations. (In cases where
the singular and plural would be the same, you end up with an
s added for the plural, so deer become deers and
sheep become sheeps.) Many people find this natural, but other people
hate it. For now, just go with itâfighting Rails wonât make life any
easier.
Also on line 1, you can see that this class inherits most of its
functionality from the Migration
class of ActiveRecord. ActiveRecord is the Rails library that handles all the
database interactions. (You can even use it separately from Rails, if
you want to.)
There are two methods defined here, on lines 2 (self.up) and 9 (self.down).
The self.up method will be called
when you order the migration run, and will create tables and columns
your application needs. The self.down method will be called if you roll
back the migrationâeffectively it provides you with âundoâ
functionality.
Both of these operate on a table called Peopleâself.up creates it on line 3, while self.down destroys (drops) it on line 10.
Note that the migration is not concerned with what kind of database it
works on. Thatâs all handled by the configuration information. Youâll
also see that migrations, despite working pretty close to the
database, donât need to use SQLâthough if you really want to use SQL,
itâs available.
Storing the names people enter into this very simple application requires adding a single column:
create_table :entries do |t|
  t.string :name
  t.timestamps
end
The new line refers to the table (t) and creates a column of type string, which will be accessible as :name.
Note
In older versions of Rails, that new line would have been written:
t.column :name, string
The old version still works, and youâll definitely see migrations written this way in older applications and documents. The new form is a lot easier to read at a glance, though.
The t.timestamps line is
there for housekeeping, tracking âcreated atâ and âupdated atâ
information. Rails also will automatically create a primary key, :id, for
the table. Once youâve entered the new line (at line 4 of Example 4-4), you can run
the migration with the Rake tool:
$ rake db:migrate
(in /Users/simonstl/rails/guestbook)
== 20080814190623 CreateEntries: migrating =====================
-- create_table(:entries)
   -> 0.0041s
== 20080814190623 CreateEntries: migrated (0.0044s) ============
Rake is Rubyâs own version of the classic command-line Unix
make tool, and Rails uses it for a
wide variety of tasks. (For a full list, try rake --tasks.) If youâre using Heroku,
instead of using the command line, bring up Rake from the gear menu,
and just enter db:migrate into the
field that it brings up.
In this case, the db:migrate task runs
all of the previously unapplied self.up migrations in your applicationâs
db/migrate/ folder. (db:rollback runs the self.down migrations corresponding to the
previous run, giving you an undo option.)
Now that the application has a table with a column for holding names, itâs time to turn to the app/models/entry.rb file. Its initial contents are very simple:
class Entry < ActiveRecord::Base
end
The Entry class inherits from
the ActiveRecord libraryâs Base
class, but has no functionality of its own. For right now,
it can stay that wayâRails provides enough capability that nothing
more is needed.
Warning
Remember that the names in your models also need to stay away from the list of reserved words presented at http://wiki.rubyonrails.org/rails/pages/ReservedWords.
As you may have guessed, the controller is going to be the key component transferring data that comes in from the form to the model, and then it will be the key component transferring that data back out to the view for presentation to the user.
To get started, the controller will just blindly save new names to the model, using the code highlighted in Example 4-5.
Example 4-5. Using ActiveRecord to save a name
class EntriesController < ApplicationController

  def sign_in
       @name = params[:visitor_name]
       @entry = Entry.create({:name => @name})

  end

end
The highlighted line combines three separate operations into a single line of code, which might look like:
       @myEntry = Entry.new
       @myEntry.name = @name
       @myEntry.save
The first step creates a new variable, @myEntry, and declares it to be a new
Entry object. The next line sets
the name property of @myEntryâeffectively setting the future
value of the column named ânameâ in the People tableâto the @name value that came in through the form.
The third line saves the @myEntry
object to the table.
The Entry.create approach assumes youâre making a new object, takes the
values to be stored as named parameters, and then saves the object
to the database.
Note
Both the create and the
save method return a boolean value indicating whether or
not saving the value to the database was successful. For most
applications, youâll want to test this, and return an error if
there was a failure.
These are the basic methods youâll need to put information
into your databases with ActiveRecord. (There are many shortcuts and
more elegant syntax, as the next chapter will show.) This approach
is also a bit too simple. If you visit http://localhost:3000/entries/sign_in/, youâll see
the same empty form that was shown in Figure 4-1. However,
because @entry.create was called,
an empty name will have been written to the table. The log data that
appears in the serverâs terminal window (unless youâre running
Heroku, unfortunately)
shows:
Entry Create (0.000522)   INSERT INTO "entries" ("name", "updated_at",
"created_at") VALUES(NULL, '2008-08-14 19:13:58', '2008-08-14 19:13:58')
The NULL is the problem here because it really doesnât make sense to add a blank name every time someone loads the form without sending a value. On the bright side, we have evidence that Rails is putting information into the People table, and if we enter a name, say âZaphod,â we can see the name being entered into the table:
Entry Create (0.000409)   INSERT INTO "entries" ("name", "updated_at",
"created_at") VALUES('Zaphod', '2008-08-14 19:15:06', '2008-08-14 19:15:06')Itâs easy to fix the controller so that NULLs arenât storedâthough as weâll see in Chapter 7, this kind of validation code really belongs in the model. Two lines, highlighted in Example 4-6, will keep Rails from entering a lot of blank names.
Example 4-6. Keeping blanks from turning into permanent objects
class EntriesController < ApplicationController

  def sign_in
       @name = params[:visitor_name]
     if !@name.blank?
       @entry = Entry.create({:name => @name})
     end
  end

end
Now Rails will check the @name variable to make sure that it has a
value before putting it into the database. !@name.blank? will test for both nil values and blank entries.
(blank is a Ruby method of
String objects. The ! at the beginning means ânot,â which
ensure that only values that are not blank will be accepted.)
If you want to get rid of the NULLs you put into the database,
you can run rake db:rollback and rake db:migrate (or rake db:migrate:redo to combine them) to drop
and rebuild the table with a clean copy.
== 1 CreateEntries: reverting =======================================
-- drop_table(:entries)
   -> 0.0029s
== 1 CreateEntries: reverted (0.0031s) ==============================

== 1 CreateEntries: migrating =======================================
-- create_table(:entries)
   -> 0.0039s
== 1 CreateEntries: migrated (0.0041s) ==============================
If you want to enter a few names to put some data into the new table, go ahead. The next example will show how to get them out.
Storing data is a good thing, but only if you can get it out again. Fortunately, itâs not difficult for the controller to tell the model that it wants all the data, or for the view to render it. For a guestbook, itâs especially simple, as we just want all of the data every time.
Getting the data out of the model requires one line of additional code in the controller, highlighted in Example 4-7.
Example 4-7. A controller that also retrieves data from a model
class EntriesController < ApplicationController

  def sign_in
       @name = params[:visitor_name]
     if !@name.blank? then
       @entry = Entry.create({:name => @name})
     end

     @entries = Entry.find(:all)

  end

end
The Entry object includes a
find methodâlike new and
save, inherited from its parent
ActiveRecord::Base class without
any additional programming. If you run this and look in the logs,
youâll see that Rails is actually making a SQL call to populate the
@entry array:
Entry Load (0.000633) SELECT * FROM "entries"
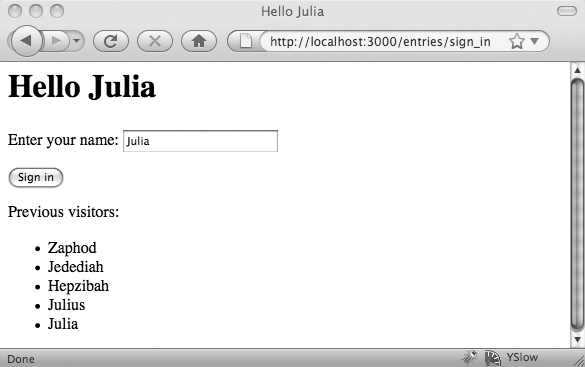
Next, the view, still in views/entries/sign_in.html.erb, can show the contents of that array, letting visitors to the site see whoâs come by before, using the added lines shown in Example 4-8.
Example 4-8. Displaying existing users with a loop
<html> <head><title>Hello <%=h @name %></title></head> <body> <h1>Hello <%=h @name %></h1> <% form_tag :action => 'sign_in' do %> <p>Enter your name: <%= text_field_tag 'visitor_name', @name %></p> <%= submit_tag 'Sign in' %> <% end %><p>Previous visitors:</p><ul><% @entries.each do |entry| %><li><%=h entry.name %></li><% end %></ul></body> </html>
The loop here iterates over the @entries array, running as many times as
there are entries in @entries.
@entries, of course, holds the
list of names previously entered, pulled from the database by the
model that was called by the controller in Example 4-7. For each
entry, the view adds a list item containing the name value, referenced here as entry.name. The result, depending on
exactly what names you entered, will look something like Figure 4-5.
Itâs a lot of steps, yes, but fortunately youâll be able to skip a lot of those steps as you move deeper into Rails. Building this guestbook didnât look very much like the âcomplex-application-in-fiveâminutesâ demonstrations that Railsâ promoters like to show off, but now you should understand whatâs going on underneath the magic. After the apprenticeship, the next chapter will get into some journeyman fun.
Get Learning Rails now with the O’Reilly learning platform.
O’Reilly members experience books, live events, courses curated by job role, and more from O’Reilly and nearly 200 top publishers.

