We will start by installing JBoss and getting the server up and running. You’ll be surprised by how easy it is to work with JBoss. It doesn’t matter whether you’re on Linux, Mac, or Windows; you can get the full JBoss application server running in just a few minutes. So, let’s get going.
Installing JBoss is so easy that new users often think they are missing something. But don’t mistake this simplicity for lack of power or configurability. Before we get started, you’ll need to make sure you have either Java 1.4 or Java 1.5 installed on your machine. That’s the only prerequisite for JBoss 4, so if you are all set we’ll get started.
You can download the latest JBoss version, currently 4.0.2, from the JBoss download page at http://www.jboss.org/downloads/index. Once you choose the version of the JBoss application server you want, you’ll be taken to the SourceForge.net page to do the actual download. When you get there select one of the prebuilt binary distributions. For JBoss 4.0.2 look for a file named jboss-4.0.2.zip. You’ll also see jboss-.4.0.2.tar.gz and jboss-4.0.2.tar.bz2 archives. If either of those formats works better for your platform, feel free to use it instead.
Note
We use Java 1.4 in most examples, but there should be no differences if you use Java 1.5. JRE install.
Before JBoss 4.0.2, JBoss required a full JDK installation to compile JSP files. As of Version 4.0.2, Tomcat ships with its own Java compiler, so JBoss only requires a JRE install.
Many of the releases have service packs, which are marked with the sp designation. Always choose the latest service pack release for the version you are downloading. You might also see source code releases marked with the -src suffix, as well as RC (release candidate) and DR (developer release) versions of the server. Ignore those for now and stick to the production binaries. In this book we will work from the jboss-4.0.2.tar.gz release.
Note
If you are on a Unix machine, we suggest sticking with the .tar.gz release to make sure file permissions are preserved accurately.
Uncompress the download into the directory where you want JBoss installed, using the appropriate tool for your platform. We put the server into /Users/samjr/jboss-4.0.2; here’s the bin directory of the installed server:
    [bin]$ pwd
    /Users/samjr/jboss-4.0.2/bin
    [bin]$ ls
    classpath.sh          jboss_init_suse.sh     run.sh              twiddle.bat
    deployer.bat          run.bat                shutdown.bat        twiddle.jar
    deployer.sh           run.conf               shutdown.jar        twiddle.sh
    jboss_init_redhat.sh  run.jar                shutdown.sh
You just installed one of the most powerful application servers available today. Really powerful tools usually need much more setup and configuration, but not JBoss. Now, you’re ready to start it up.
...if I installed JBoss on another box on my network?
You will want to check the firewall settings on that machine. Specifically, you’ll want to make sure that port 8080 is open so that you’ll be able to access the JBoss web server to test it out. If you installed JBoss locally you shouldn’t have to worry about this.
You might expect it to be complicated and time consuming to configure the server and get it running for the first time. JBoss is indeed a complex server, but it’s simple to run, configure, and maintain. Later in the book we will see the different kinds of configuration and maintenance options, but for now let’s just get JBoss up and running.
To start JBoss, you’ll need to use the run script in the bin directory of the server. There is a run.sh script for use on Unix machines and a run.bat file for Windows. When you run the script, you’ll see something like the following output:
Note
If your run.sh file isn’t executable, you should chmod the script or invoke it using the sh run.sh command.
    [bin]$ ./run.sh
    =========================================================

      JBoss Bootstrap Environment

      JBOSS_HOME: /Users/samjr/jboss-4.0.2RC1

      JAVA: java

      JAVA_OPTS: -server -Xms128m -Xmx128m -Dprogram.name=run.sh

      CLASSPATH: /Users/samjr/jboss-4.0.2RC1/bin/run.jar:/lib/tools.jar

    =========================================================

    05:02:58,197 INFO  [Server] Starting JBoss (MX MicroKernel)...
    05:02:58,230 INFO  [Server] Release ID: JBoss [Zion] 4.0.2RC1 (build:
    CVSTag=JBoss_4_0_2_RC1 date=200503140913)
    05:02:58,232 INFO  [Server] Home Dir: /Users/samjr/jboss-4.0.2RC1
    05:02:58,233 INFO  [Server] Home URL: file:/Users/samjr/jboss-4.0.2RC1/
    05:02:58,235 INFO  [Server] Library URL: file:/Users/samjr/jboss-4.0.2RC1/lib/
    05:02:58,238 INFO  [Server] Patch URL: null
    05:02:58,256 INFO  [Server] Server Name: default
    05:02:58,258 INFO  [Server] Server Home Dir: /Users/samjr/jboss-4.0.2RC1/
    server/default
    05:02:58,259 INFO  [Server] Server Home URL: file:/Users/samjr/jboss-4.0.
    2RC1/server/default/
    05:02:58,261 INFO  [Server] Server Data Dir: /Users/samjr/jboss-4.0.2RC1/
    server/default/data
    05:02:58,262 INFO  [Server] Server Temp Dir: /Users/samjr/jboss-4.0.2RC1/
    server/default/tmp
    05:02:58,264 INFO  [Server] Server Config URL: file:/Users/samjr/jboss-4.0.
    2RC1/server/default/conf/
    05:02:58,265 INFO  [Server] Server Library URL: file:/Users/samjr/jboss-4.0.
    2RC1/server/default/lib/
    05:02:58,267 INFO  [Server] Root Deployment Filename: jboss-service.xml
    05:02:58,324 INFO  [Server] Starting General Purpose Architecture (GPA)...

        [Lots of startup output removed for brevity]

    05:04:05,834 INFO  [TomcatDeployer] deploy, ctxPath=/quote, warUrl=file:/
    Users/samjr/jboss-4.0.2RC1/server/default/tmp/deploy/tmp14739quote.war/
    05:04:06,348 INFO  [Http11Protocol] Starting Coyote HTTP/1.1 on http-0.0.0.0-8080
    05:04:06,868 INFO  [ChannelSocket] JK2: ajp13 listening on /0.0.0.0:8009
    05:04:06,956 INFO  [JkMain] Jk running ID=0 time=0/199  config=null
    05:04:07,092 INFO  [Server] JBoss (MX MicroKernel) [4.0.2RC1 (build:
    CVSTag=JBoss_4_0_2_RC1 date=200503140913)] Started in 1m:7s:977ms
Note
Most of the services in JBoss log output as they start up. Additional log output is available in the server.log file.
That’s it! JBoss is up and running. Right there on that last line we have full confirmation that it’s up. But just to make sure, go to http://localhost:8080/ in your browser. You should see the JBoss welcome page that looks similar to Figure 1-1.
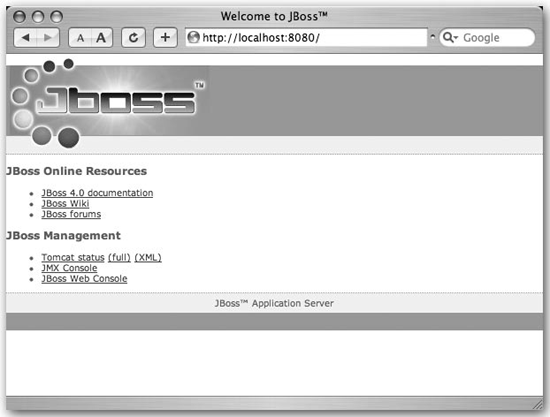
Congratulations! Your JBoss server is now running.
The JBoss application server provides a management application that lets you see and manage the services that are deployed and running inside the server. JBoss itself is implemented as a microkernel composed of managed beans (MBeans). The MBeans that are visible provide you a way to manage the resources and applications that are deployed on your application server. This allows you to monitor and modify applications and their usage. You can see what MBeans you have through the JMX Console. The JMX Console organizes the MBeans by the domain, as well by type (service, database, etc.). When you select an MBean you are taken to a page where you can view and edit attributes or invoke the operations of that MBean.
Note
You can manage all the JBoss services through the JMX Console. If you provide MBeans for your own services, you will see them here too.
You can get to the JBoss JMX Console by going to the main web page (http://localhost:8080) and choosing the JMX Console link. This will take you to the jmx-console web application at http://localhost:8080/jmx-console. When you’re there, you’ll see something like Figure 1-2.
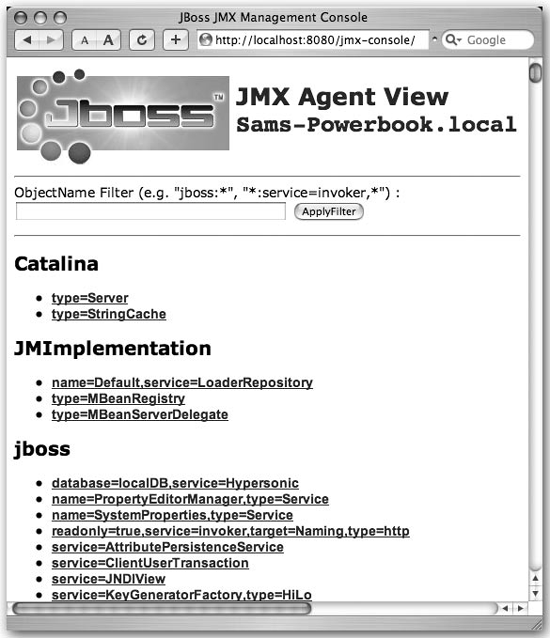
JBoss provides an MBean that allows you to look at your server information. To do that now, scroll down in your browser until you get to the section for the jboss.system domain. You should see a link for this: type=ServerInfo. Choose that link and you’ll see the ServerInfo MBean page. It will look something like Figure 1-3.
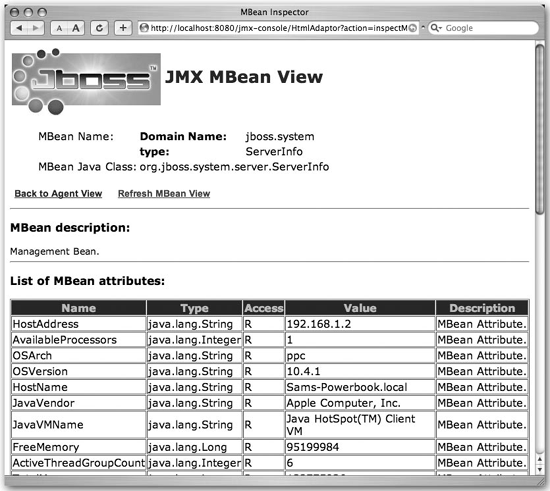
You can see what JVM JBoss is running on top of, what operating system it is running on, etc. That’s useful information, especially if you are doing remote monitoring.
Now that you know how to start the server and look at it using the JMX Console, you need to know how to shut it down properly. It’s really pretty simple, so let’s get to it.
You can shut down the server in three ways:
Use the JMX Console to go to the
jboss.systemdomain and choose thetype=ServerMBean link. On the MBean page, scroll down to the operations section and click the “Invoke” button for theshutdown()operation.Run the shutdown script for your platform in the same directory where you found the run script.
Type Ctrl-c in the same console window where you started JBoss.
When JBoss is stopped, you’ll see the following message:
03:50:02,412 INFO [Server] Shutdown complete
You can verify that JBoss has stopped by trying to access the server in your web browser. You won’t be able to connect because the server is not running anymore.
Just as you would expect, the application server shut down. You also learned three different ways to stop JBoss, and you got to see another useful MBean. Of those three ways, when should you use one or the other?
Note
The shutdown script is in the bin directory with the startup script! The twiddle script is a program for “twiddling” with a remote JBoss server.
In development, the Ctrl-c option is the easiest because you will likely have an open terminal window running JBoss. However, if JBoss is running as a service, especially on a remote machine, you’ll need to use one of the other options. If you have shell access to the machine, the shutdown script will work fine. You can also use the shutdown command to shut down a remote JBoss instance, but this requires a local JBoss installation and a few extra command-line arguments. For remote machines, it’s often more convenient to just use the JMX Console. If you keep a bookmark set to the ServerInfo MBean, it can be a very quick process. In the end, each option serves the needs of different types of users, so just choose whatever is most convenient for you.
JBoss is not only powerful, it’s also very configurable. At the center of JBoss is a JMX microkernel that manages the MBeans that control the various services in the server. The JBoss documentation describes the microkernel as a spine, and the analogy fits well. JBoss in its minimum configuration is like the brainstem sitting at the top of the spine. It provides all the core autonomic features (to steal some thunder from IBM’s autonomic computing initiative). The spinal column is the attachment point for all the MBeans that want to talk to the brainstem and to each other over the spinal cord. This architecture provides a strong backbone to build on, but at the same time it can work at its most minimal state and still do amazing things. It makes JBoss useful for everything from very small, embedded applications all the way up to full-blown enterprise server applications, all on the same spinal column.
Having a flexible architecture is pointless unless you can make use of that flexibility. JBoss provides several different configurations that range from a barebones server with no J2EE capabilities to a superserver with more services than any single application could possibly use. Figure 1-4 shows the three standard server configurations.
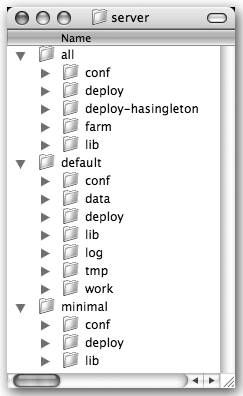
Here are descriptions of the server configurations:
Note
There is a huge difference in the size of these configurations. The minimal configuration can start up in just a few seconds, whereas it can take nearly a minute for the all configuration to completely start on a typical developer machine.
- minimal
This configuration provides the bare services you might need in the simplest application: logging, JNDI naming services, and URL deployment scanning. You’d use this setup in tight memory situations, or when you want to use JMX to control exactly which MBeans are loaded, and when and how they are loaded. This configuration doesn’t provide support for EJBs, web applications, JMS, or any other high-level services. It’s just a raw microkernel waiting to be molded.
- default
This is a lightweight J2EE configuration; it’s the one most people use. It provides most of the common J2EE services, but it doesn’t include IIOP, JAXR, or clustering services, for example. These services can be added easily to this configuration.
- all
This configuration includes everything in JBoss. If you need any extra services not provided in the
defaultconfiguration, this is the place to start. It’s often easier to start from theallconfiguration and take out unwanted services than to start with the default configuration and add the desired services.
You aren’t limited to the three configurations JBoss provides. In fact, instead of having unneeded services loaded, wasting memory and CPU space, you can create your own JBoss configuration that has exactly what you need. It’s actually quite easy to create a custom configuration.
The easiest way to create your own configuration is to copy an existing one and then rename the folder to something that describes your configuration options. Once you’ve done that you can add any new JARs and resources to that new server configuration folder.
Let’s say you want to create a new configuration based on minimal that you can add other services to later. You can copy the minimal server configuration folder to a new folder in the server folder and call it my_server_config. On Unix this would be cp -R minimal my_server_config.
You can run your new configuration like this:
[bin]$ ./run.sh -c my_server_configThe server will start up using your new configuration, and you’ll see console output that looks like this:
    =========================================================

      JBoss Bootstrap Environment

      JBOSS_HOME: /Users/samjr/jboss-4.0.2RC1

      JAVA: java

      JAVA_OPTS: -server -Xms128m -Xmx128m -Dprogram.name=run.sh

      CLASSPATH: /Users/samjr/jboss-4.0.2RC1/bin/run.jar:/lib/tools.jar

    =========================================================

    05:49:22,213 INFO  [Server] Starting JBoss (MX MicroKernel)...
    05:49:22,217 INFO  [Server] Release ID: JBoss [Zion] 4.0.2RC1 (build:
    CVSTag=JBoss_4_0_2_RC1 date=200503140913)
    05:49:22,220 INFO  [Server] Home Dir: /Users/samjr/jboss-4.0.2RC1
    05:49:22,221 INFO  [Server] Home URL: file:/Users/samjr/jboss-4.0.2RC1/
    05:49:22,223 INFO  [Server] Library URL: file:/Users/samjr/jboss-4.0.2RC1/lib/
    05:49:22,226 INFO  [Server] Patch URL: null
    05:49:22,244 INFO  [Server] Server Name: my_server_config
    05:49:22,246 INFO  [Server] Server Home Dir: /Users/samjr/jboss-4.0.
    2RC1/server/my_server_config
    05:49:22,247 INFO  [Server] Server Home URL: file:/Users/samjr/jboss-4.0.
    2RC1/server/my_server_config/
    05:49:22,249 INFO  [Server] Server Data Dir: /Users/samjr/jboss-4.0.2RC1/server/my_
    server_config/data
    05:49:22,250 INFO  [Server] Server Temp Dir: /Users/samjr/jboss-4.0.2RC1/
    server/my_server_config/tmp
    05:49:22,251 INFO  [Server] Server Config URL: file:/Users/samjr/jboss-4.0.
    2RC1/server/my_server_config/conf/
    05:49:22,285 INFO  [Server] Server Library URL: file:/Users/samjr/jboss-4.0.
    2RC1/server/my_server_config/lib/
    05:49:22,287 INFO  [Server] Root Deployment Filename: jboss-service.xml
    05:49:22,294 INFO  [Server] Starting General Purpose Architecture (GPA)...

        [More startup information]

    05:50:44,641 INFO  [Server] JBoss (MX MicroKernel) [4.0.2RC1 (build:
    CVSTag=JBoss_4_0_2_RC1 date=200503140913)] Started in 1m:21s:849ms
And with that, the new configuration is started.
...adding or removing services from the configuration?
While new configurations are nice simply as a way to work in an isolated sandbox, the original premise for creating a new configuration was to customize the set of services available. We’ll need a bit more background to do that type of serious customization. But as we learn how to customize the services throughout this book, you’ll be able to come back and apply those changes to your own configuration.
We hope you’ve seen how easy it is to get up and running and how easy it is to create new configurations of the JBoss server. The power is provided in a simple and configurable way. Congratulations for getting this far. Now let’s move on to the next chapter and see how to package and deploy a simple application.
Get JBoss: A Developer's Notebook now with the O’Reilly learning platform.
O’Reilly members experience books, live events, courses curated by job role, and more from O’Reilly and nearly 200 top publishers.

