Photo Sharing on the Network
One of the coolest features of iTunes is the way you can “publish” certain playlists on your home or office network, so that other people in the same building can listen to your tunes. Why shouldn’t iPhoto be able to do the same thing with pictures?
In fact, it can. Here’s how it works.
For this example, suppose that you’re the master shutterbug who has all the cool shots.
On your Mac, choose iPhoto → Preferences and click Sharing. Turn on “Share my photos” (Figure 9-16).
You might be tempted to turn on “Share entire library, " so that no crumb of your artistry will go unappreciated—but don’t. Even the fastest Macs on the fastest networks will grind to a halt if you try to share even a medium-sized photo library. You are, after all, attempting to cram gigabytes of data through your network to the other Macs.
It’s far more practical to turn on the checkboxes for the individual albums you want to share, as shown in Figure 9-16.
Unless you also turn on “Require password” (and make up a password), everyone on the network with iPhoto 4 or 5 can see your shared pictures.
Finally, close the Sharing window.
At this point, other people on your network will see your albums show up in their Source lists, above the list of their own albums; see Figure 9-17. (Or at least they will if they have “Look for shared photos” turned on in their iPhoto Preferences.)
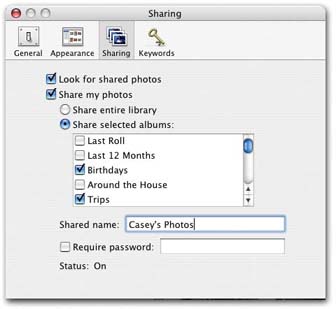
Figure 9-16. If ...
Get iPhoto 5: The Missing Manual, Fourth Edition now with the O’Reilly learning platform.
O’Reilly members experience books, live events, courses curated by job role, and more from O’Reilly and nearly 200 top publishers.

