Every so often a piece of technology can become a lever that lets people move the world, just a little bit. The Arduino is one of those levers. While it started off as a project to give artists access to embedded microprocessors for interactive design projects, I think itâs going to end up in a museum as one of the building blocks of the modern world. It allows rapid, cheap prototyping for embedded systems. It turns what used to be fairly tough hardware problems into simpler software problems.
The Arduino, and the open hardware movement that has grown up with it and to a certain extent around it, is enabling a generation of high-tech tinkers to prototype new ideas with fairly minimal hardware knowledge.
While there are many other microcontroller platforms available, for a newcomer to physical computing, the simplest to work with is probably the Arduino (see Figure 1-1). This is in part due to the large community surrounding the platform, but also because the Arduino was designed from the ground up to be simple for newcomers.
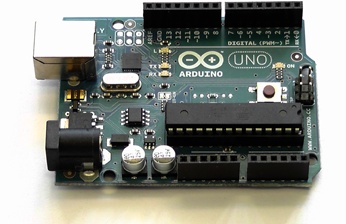
The current revision of the Arduino board is known as the Arduino Uno. This board is based on the ATmega328 microcontroller. It has fourteen digital input/output pins, six of which can be used as Pulse Width Modulation (PWM) outputs, along with six more analog input pins. See Table 1-1.
Table 1-1. Technical specifications of the Arduino Uno board
Arduino Uno | |
|---|---|
Microcontroller | ATmega328 |
Operating Voltage | 5 V |
Input Voltage (recommended) | 7â12 V |
Input Voltage (limits) | 6â20 V |
Digital I/O Pins | 14 (6 provide PWM) |
Analog Input Pins | 6 |
DC Current per I/O Pin | 40 mA |
DC Current for 3.3 V Pin | 50 mA |
Flash Memory | 32 KB |
SRAM | 2 KB |
EEPROM | 1 KB |
Clock Speed | 16 MHz |
The Arduino platform has everything needed to support the on-board microcontroller. It is attached directly to your Mac for programming using a USB connection, and it can be powered via the same USB connection or with an external power supply if you want to detach the board from your Mac once youâve programmed it.
Note
To keep things short, this tutorial will assume youâre using a recent Arduino board such as the Arduino Uno, Duemilanove, or Diecimila. However, if youâre working with an older board, or one of the many Arduino-compatible clones, itâs likely that little needs to be changed. See http://arduino.cc/en/Main/Hardware for links to the getting started guides for various other boards.
The Arduino Uno can be powered via the USB connection or with an external power supply. Unlike with previous generations of the Arduino, the power source is selected automatically. If youâre using an earlier model, you will have to manually change between USB and external power sources using a jumper on the board itself. This jumper is usually located between the USB and power jacks.
The board can operate on an external supply of 6 to 20 volts. The easiest option is to use a 9V battery or power adaptor, as these are commonly available.
Each of the 14 pins on the Uno can be used as an input or output. They operate at 5 V with a maximum current of 40 mA. Each pin also has an internal pull-up resistor of 20â50 kOhms, although this is disconnected by default.
Note
Some pins have specialized functions. Perhaps the most important of these to us for this book are pins 0 and 1. These pins can be used to receive (RX) and transmit (TX) TTL serial data. These pins are connected to the corresponding pins of the ATmega8U2 and hence to the USB-Serial connection to your Mac.
The ATmega328 provides UART TTL serial communication at 5 V, which is available on digital pins 0 (RX) and 1 (TX). The Arduino Uno has an ATmega8U2 chip on board that redirects this serial communication over USB, allowing the Arduino to appear as a virtual serial port to software on your Mac. If youâre using an older board, such as the Duemilanove or Diecimila, these boards make use of the FTDI USB-to-serial driver chip to accomplish the same task, although unlike with the newer Uno board, you will be required to install a driver so that your Mac can see the board correctly.
Download the latest version of the development environment from the Arduino.cc website.
Note
The latest version of the Arduino development environment is available at http://arduino.cc/en/Main/Software. At the time of this writing, it was Arduino 022.
Like most Mac applications, the development environment comes as a disk image (.dmg file) that should mount automatically after you have downloaded it. If it doesnât, double-click on it to open it manually. After it is open, just click and drag the Arduino.app application into your /Applications folder. If youâre using an older board that requires that you install the FTDI USB-to-serial drivers, you should also double-click on the FTDIUSBSerialDriver.mpkg file included in the disk image to install the necessary drivers.
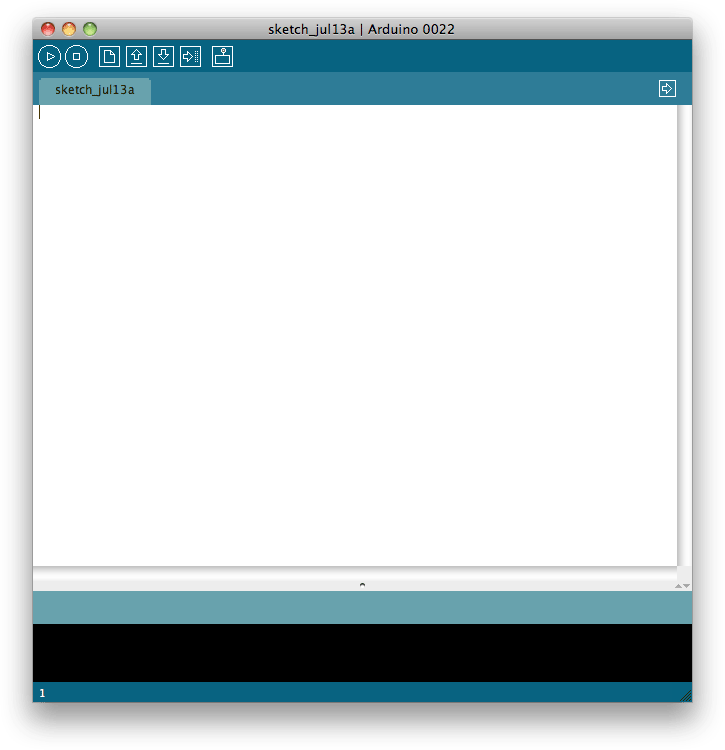
Once youâve installed the development environment, eject the disk image by dragging it to the trash can and double-click on the Arduino.app application icon to start the IDE. You should see something that looks a lot like Figure 1-2.
Connect the Arduino to your Mac with an appropriate USB cable. In
the case of an Arduino Uno, Duemilanove, or Diecimila, youâll need a
USB-A (Mac) to USB-B (Arduino) cable, the same sort needed for most USB
printers. The green power LED (labeled PWR) should go
on, and if youâre using the Arduino Uno, a dialog box will appear
telling you that a new network interface has been detected. Just hit the
Apply button. While the new interface will claim to be âNot Configuredâ
if you inspect it in System Preferences, it is working correctly.
After connecting your board to your Mac, go to the ToolsâBoard menu item in the Arduino development environment and select your board from the list of supported boards in the drop-down menu (see Figure 1-3).

Then go to the ToolsâSerial Port menu and select the correct serial port for your board (see Figure 1-4). On the Mac, the name will start with /dev/tty.usbmodem for the Uno or /dev/tty.usbserial for older boards.
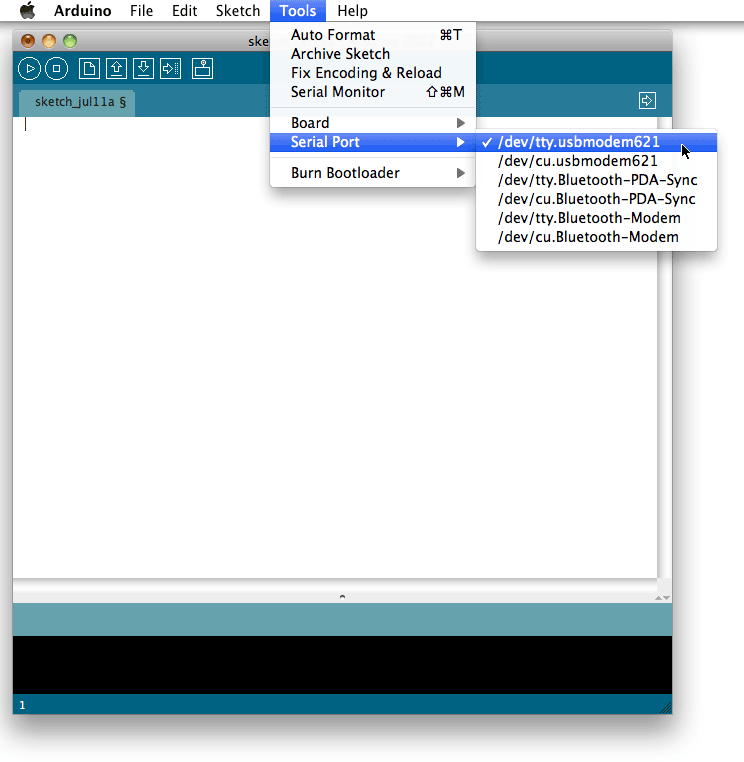
If youâre unsure which serial port corresponds to your board, you can always unplug and then replug the USB cable connecting your Mac to the Arduino board to see how the menu changes.
Get iOS Sensor Apps with Arduino now with the O’Reilly learning platform.
O’Reilly members experience books, live events, courses curated by job role, and more from O’Reilly and nearly 200 top publishers.

