Recording a Live Audio Track
Once you’re hooked up, recording a voice or electronic instrument is a lot like recording from a MIDI instrument as described in Chapter 26. In general, though, you’ll spend a lot more time in the New Track (or Track Info) dialog box, telling GarageBand about the nature of the sound you’re about to record.
Phase 1: Create the Track
What you want is a track that turns bluish when you click it. That’s a Instrument Real track, as opposed to the green Software tracks described so far in this book.
Note
When you record digital audio, you create purple regions in the timeline. They’re the same digital audio as GarageBand’s blue, digital audio loops, and you work with them the same way; a single track can contain both blue and purple regions.
Still, the color-coding is a handy means of helping you tell your creations apart from Apple’s canned ones. (Yours can’t be transposed, sped up, or slowed down, for example.)
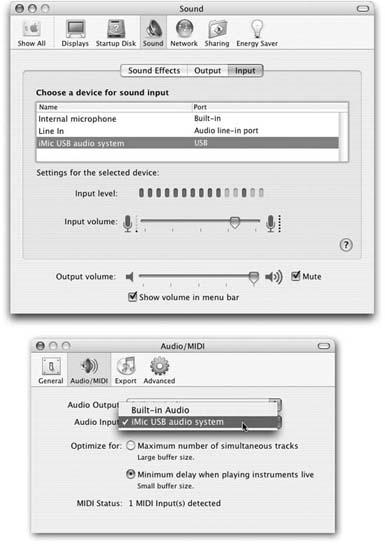
Figure 27-2. Top: From the ![]() menu, choose System Preferences. Click the Sound icon; then click the Input tab. Specify which sound source you want to record (in this case, a microphone connected to the iMic adapter). Before you close this window, drag the slider to adjust the general volume level for your singing or playing. Ideally, the loudest notes should ...
menu, choose System Preferences. Click the Sound icon; then click the Input tab. Specify which sound source you want to record (in this case, a microphone connected to the iMic adapter). Before you close this window, drag the slider to adjust the general volume level for your singing or playing. Ideally, the loudest notes should ...
Get iLife '04: The Missing Manual now with the O’Reilly learning platform.
O’Reilly members experience books, live events, courses curated by job role, and more from O’Reilly and nearly 200 top publishers.

