
Web pages are a dish best served on the Internet. So far you’ve only created HTML pages that live on your own computer. You’ve also only linked to pages that are on your own computer. We’re about to change all that. In this chapter we’ll encourage you to get those Web pages on the Internet where all your friends, fans, and customers can actually see them. We’ll also reveal the mysteries of linking to other pages by cracking the code of the h, t, t, p, :, /, /, w, w, w. So, gather your belongings; our next stop is Webville.
WARNING: once you get to Webville, you may never come back. Send us a postcard.
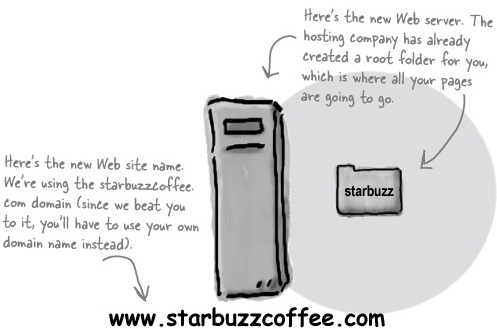
You’re closer to getting Starbuzz – or even better, your own site – on the Web than you might think. All you need to do is find a “Web Hosting Company” (we’ll call this a “hosting company” from now on) to host your pages on their servers, and then copy your pages from your computer to one of those servers.
Of course it helps to understand how your local folders are going to “map” to the server’s folders, and once you put your pages on the server, how you point a browser to them. But we’ll get to all that. For now, let’s talk about getting you on the Web. Here’s what you’re going to need to do:
Find yourself an hosting company.
Choose a name for your site (like “www.starbuzzcoffee.com”).
Find a way to get your files from your computer to a server at the hosting company (there are a few ways).
Point your friends, family, and fans to your new site and let the fun begin.
We’re going to take you through each of these steps, and even if you’re not going to set up a Web site online right now, follow along because you’ll learn some important things you’ll need to know later. So, get ready for a quick detour from HTML...
A Web Detour
To get your pages on the Web, you need a server that actually lives on the Web full-time. Your best bet is to find a hosting company and let them worry about the details of keeping a server running. No worries, though; finding a hosting company is fairly straightforward and inexpensive.
Which company? Well, we’d love to sign you up for Web hosting at Head First Hip Web Hosting, Inc., but that doesn’t really exist. So, you’re going to have to do a little homework on your own. While finding a company to host your pages isn’t difficult, it’s kind of like choosing a cable TV company: there are lots of options and plans. You really have to shop around for the best deals and for the service that works for you.
The good news is that you should be able to get started for almost nothing out of your pocket, and you can always upgrade later if you need additional features. While we can’t suggest a particular provider, we can tell you a few things to look for in a provider, and we also list a few of the more popular providers at: http://www.headfirstlabs.com/providers.html
Relax
You don’t have to get your pages on the Web to finish this book.
While it’s a lot more fun if your pages are actually on the Web, you can finish the rest of this book by working on your own computer.
In either case, follow along for the next few pages so you know how everything fits together.
A Web Detour
Even if you’ve never heard of a domain name, you’ve seen and used a zillion of them; you know... google.com, yahoo.com, amazon.com, disney.com, and a maybe a few you wouldn’t want us to mention.
So what is a domain name? Just a unique name that is used to locate your site. Here’s an example:

There are a couple of reasons you should care about domain names. If you want a unique name for your site, you’re going to need your own domain name. Domain names are also used to link your pages to other Web sites (we’ll get to that in a few pages).
There is one other thing you should know. Domain names are controlled by a centralized authority (called ICANN) to make sure that only one person at a time uses a domain name. Also (you knew it was coming), you pay a small annual registration fee to keep your domain name.
The easy answer is to let your hosting company worry about it. They’ll often throw in your domain name registration with one of their package deals. However, there are hundreds of companies that would be glad to help – you can find a list of them at
http://www.internic.net/regist.htmlAs with finding a hosting company, we’re afraid we’ll have to leave you to find and register your own domain name. You’ll probably find that going through your hosting company is the easiest way to get that done.
Congratulations! You’ve got your hosting company lined up, you’ve found a domain name, and you’ve got a server all ready for your Web pages. (Even if you don’t, keep following along because this is important stuff.)
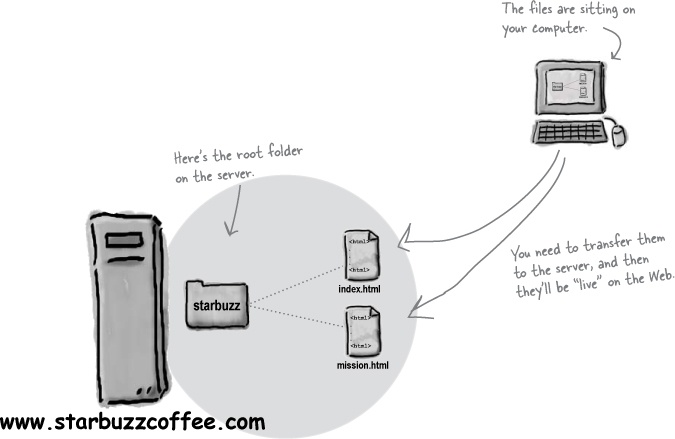
Now what? Well, it’s time to move in, of course. So, take that For Sale sign down and gather up all those files, we’re going to get them moved to the new server. Like any move, the goal is to get things moved from, say, the kitchen of your old place to the kitchen of your new place. On the Web, we’re just worried about getting things from your own root folder to the root folder on the Web server. Let’s get back to Starbuzz and step through how we do this. Here’s what things look like now:
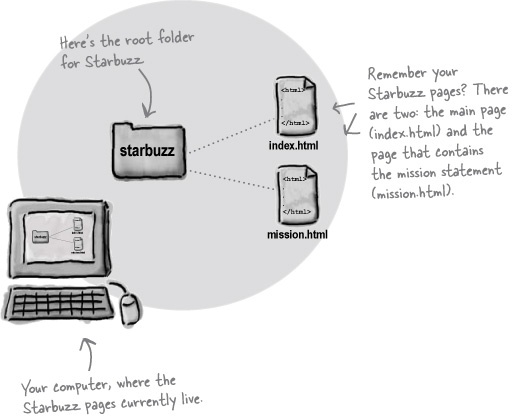
You’re now one step away from getting Starbuzz Coffee on the Web: you’ve identified the root folder on your hosting company’s server and all you need to do is copy your pages over to that folder. But how do you transfer files to a Web server? There are a variety of ways, but most hosting companies support a method of file transfer called FTP, which stands for File Transfer Protocol. You’ll find a number of applications out there that will allow you to transfer your files via FTP; we’ll take a look at how that works on the next page.
Seriously, this really is an HTML and CSS book, but we didn’t want to leave you up a creek without a paddle. So, here’s a very quick guide to using FTP to get your files on the Web. Keep in mind your hosting company might have a few suggestions for the best way to transfer your files to their servers (and since you are paying them, get their help). After the next few pages, we’re off our detour and back to HTML and CSS until we reach the end of the book (we promise).
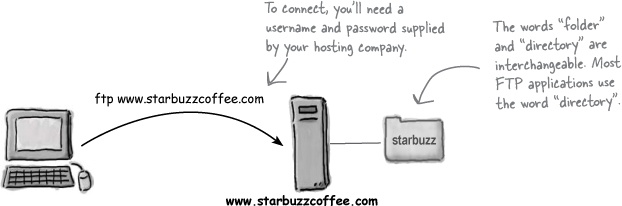
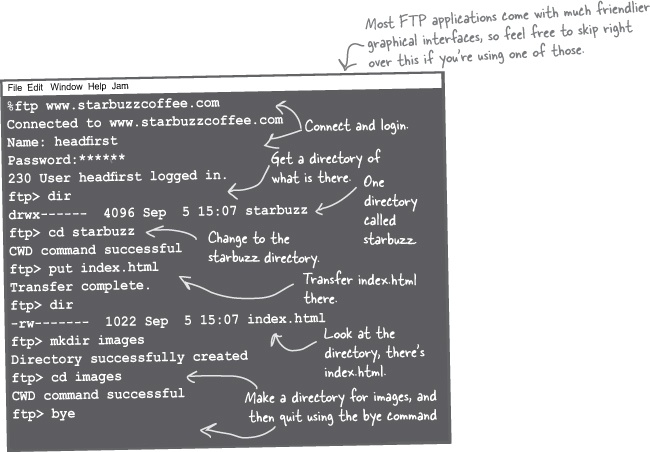
We’ll assume you’ve found an FTP application. Some are command-line driven, some have complete graphical interfaces, and some are even built into applications like Dreamweaver and GoLive. They all use the same commands, but with some applications you type them in yourself, while in others you use a graphical interface. Here’s how FTP works from 10,000 feet:
First connect to your server using FTP.
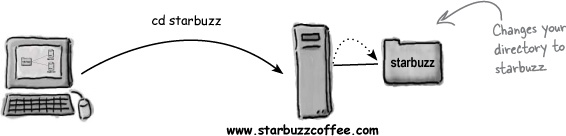
Use the “cd” command to change your current directory to the directory where you want to transfer files.
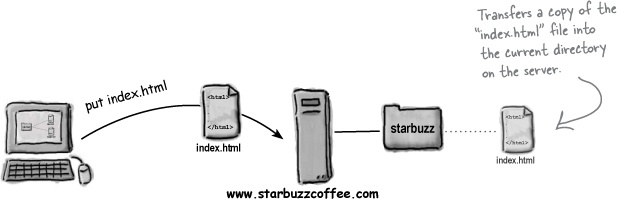
Transfer your files to the server using the “put” command.
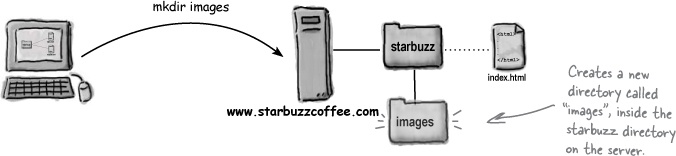
You can also make a new directory on the server with the “mkdir” command.
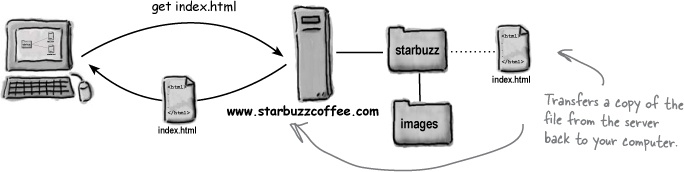
You can retrieve files too, with the “get” command.
Let’s put all that together. Here’s an example of FTP being used from a command-line application:
DO try this at home
It’s another homework assignment for you (check each item as you do it):
Make sure you know where your root folder is on the server at your hosting company.
Figure out the best way (and the best tool to use) to transfer files from your computer to the server.
For now, go ahead and transfer the Starbuzz “index.html” and “mission.html” files to the root folder of the server.
End of Web Detour
That’s the end of the detour and we’re back on the Web superhighway. At this point you should have the two Starbuzz pages, “index.html” and “mission.html”, sitting under your root folder on a server (or if not, you’re at least following along).
After all this work, wouldn’t it be satisfying to make your browser retrieve those pages over the Internet and display them for you? Let’s figure out the right address to type into your browser...
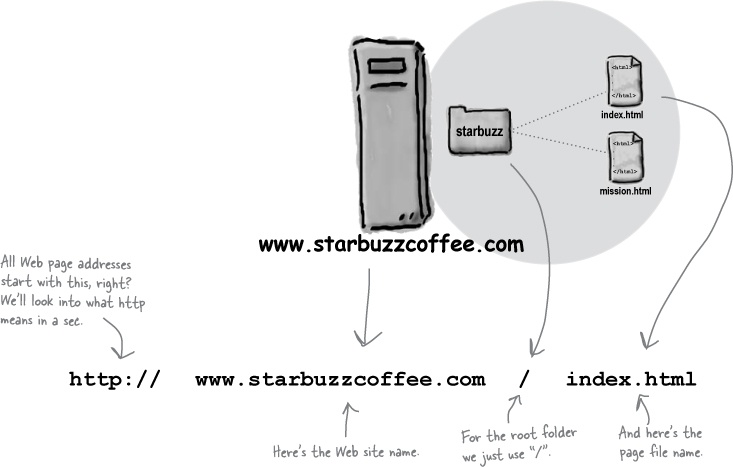
You’ve probably heard the familiar “h” “t” “t” “p” “colon” “slash” “slash” a zillion times, but what does it mean? First, of all, the Web addresses you type into the browser are called URLs or Uniform Resource Locators.
If it were up to us we would have called them “Web addresses,” but no one asked, so we’re stuck with Uniform Resource Locators. Here’s how to decipher a URL:
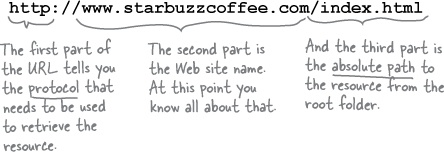
A Uniform Resource Locator (URL) is a global address that can be used to locate anything on the Web, including HTML pages, audio, video, and many other forms of Web content.
In addition to specifying the location of the resource, a URL also names the protocol that you can use to retrieve that resource.
To locate anything on the Web, as long as you know the server that hosts it, and an absolute path to the resource, you can create a URL and most likely get a Web browser to retrieve it for you using some protocol – usually HTTP.

HTTP is also known as the HyperText Transfer Protocol. In other words, it’s an agreed-upon method (a protocol) for transferring hypertext documents around the Web. While “hypertext documents” are usually just HTML pages, the protocol can also be used to transfer images, or any other file that a Web page might need.
HTTP is a simple request and response protocol. Here’s how it works:

So each time you type a URL into your browser’s address bar, the browser asks the server for the corresponding resource using the HTTP protocol. If the server finds the resource, it returns it to the browser and the browser displays it. What happens if the server doesn’t find it?
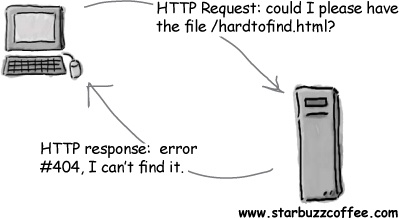
If the resource can’t be found, you’ll get the familiar “404 Error”, which the server reports back to your browser.
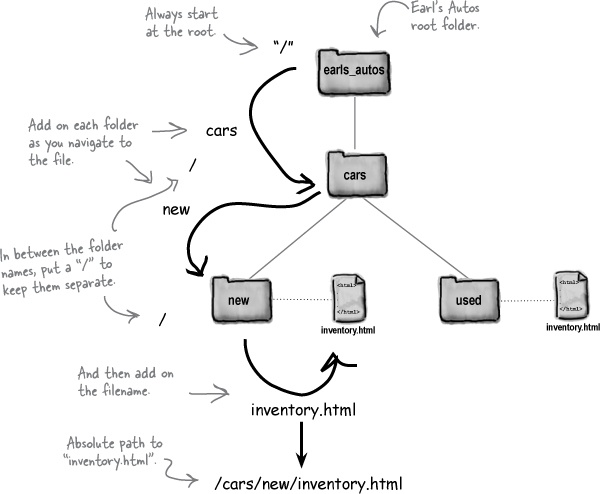
The last time we talked about paths we were writing HTML to make links with the <a> element. The path we’re going to look at now is the absolute path part of a URL, the last part that comes after the protocol (http) and the Web site name (www.starbuzzcoffee.com).
An absolute path tells the server how to get from your root folder to a particular page or file. Take Earl’s Autos site, for example. Say you want to look in Earl’s inventory to see if your new Mini Cooper has come in. To do that, you’ll need to figure out the absolute path to the file “inventory.html” that is in the “new” folder. All you have to do is trace through the folders, starting at the root, to get to the “new” folder where his “inventory.html” file is located. The path is made up of all the folders you go through to get there.
So, that looks like root (we represent root with a “/”), “cars”, “new”, and finally, the file itself, “inventory.html”. Here’s how you put that all together:
Sharpen your pencil
You’ve waited long enough. It’s time to give your new URL a spin. Before you do, fill in the blanks below and then type in the URL (like you haven’t already). If you’re having any problems, this is the time to work with your hosting company to get things sorted out. If you haven’t set up an hosting company, fill in the blanks for www.starbuzzcoffee.com, and type the URL into your browser anyway.


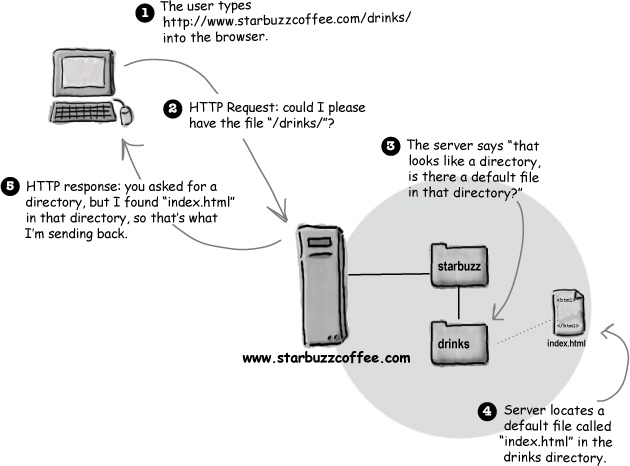
Yes, there is. One thing we haven’t talked about is what happens if a browser asks for a directory rather than a file from a Web server. For instance, a browser might ask for:
Note
Remember, when we’re talking about Web servers or FTP, we usually use the term “directory” instead of “folder.” But they’re really the same thing.
http://www.starbuzzcoffee.com/images/or
http://www.starbuzzcoffee.com/When a Web server receives a request like this, it tries to locate a default file in that directory. Typically a default file is called “index.html” or “default.htm” and if the server finds one of these files, it returns the file to the browser to display.
So, to return a file by default from your root directory (or any other directory), just name the file “index.html” or “default.htm”.
Note
But, you need to find out what your hosting company wants you to name your default file, because it depends on the type of server they use.
Oops, you sure did. When a server receives a request like yours without the trailing “/” and there is a directory with that name, then the server will add a trailing slash for you. So if the server gets a request for:
http://www.starbuzzcoffee.comit will change it to:
http://www.starbuzzcoffee.com/which will cause the server to look for a default file, and in the end it will return the file as if you’d originally typed:
http://www.starbuzzcoffee.com/index.html
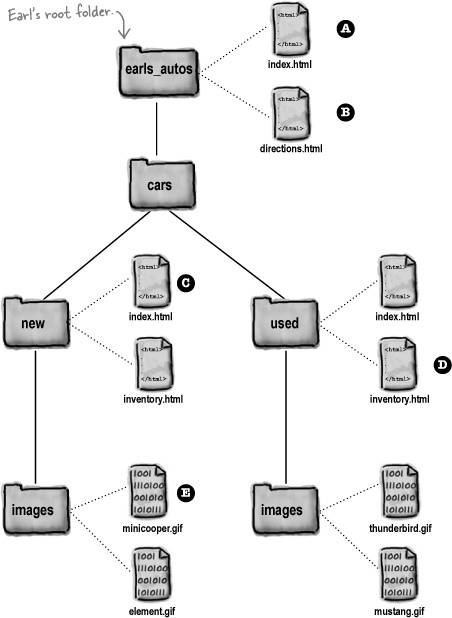
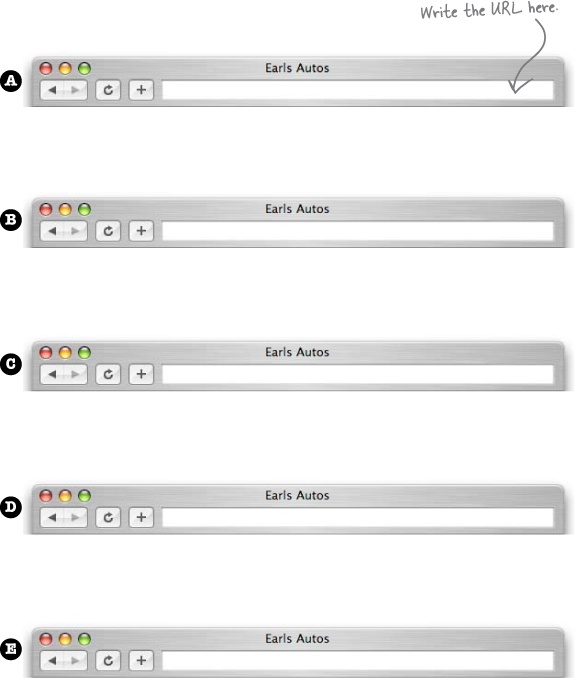
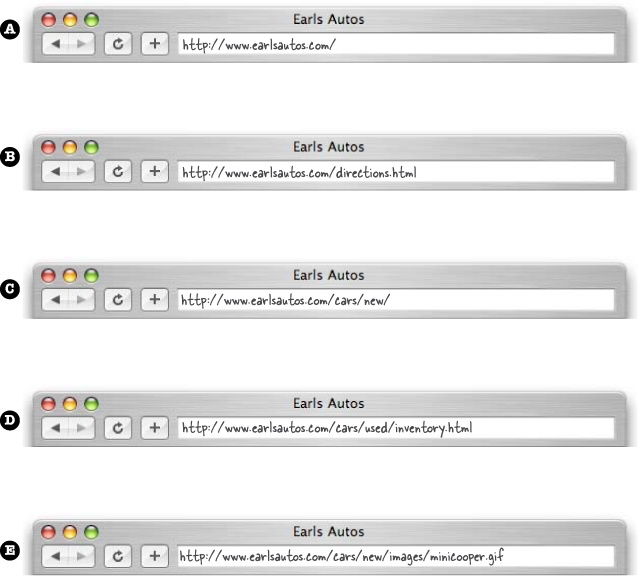
Earl needs a little help with his URLs
Earl may know Earl, but he doesn’t know U-R-L. He needs a little help figuring out the URL for each of the files below, labeled A, B, C, D, and E. On the right, write in the URL needed to retrieve each corresponding file from www.earlsautos.com.

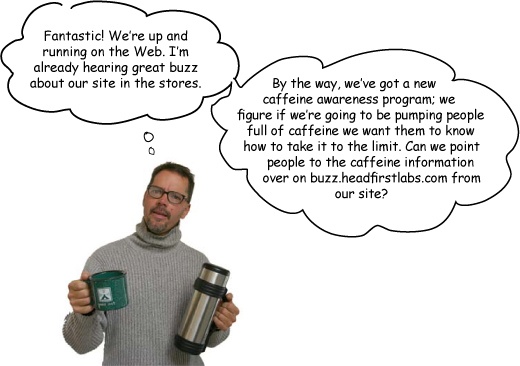
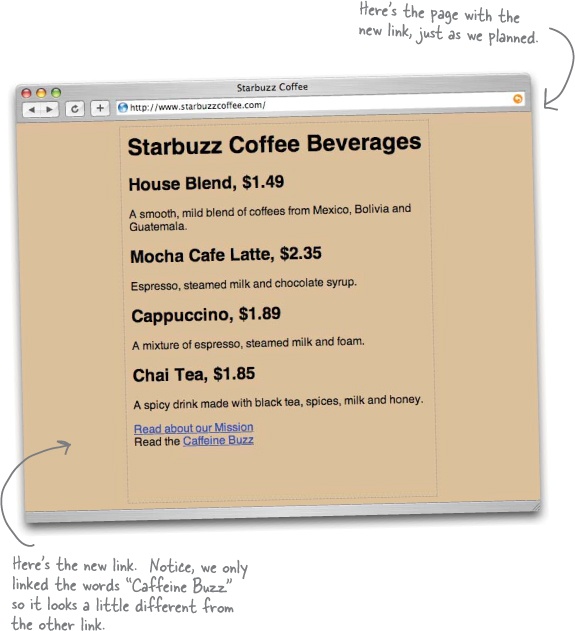
URLs aren’t just for typing into browsers; you can use them right in your HTML. And, of course, right on cue, the Starbuzz CEO has a new task for you: make a link from the main Starbuzz page over to the caffeine information at http://buzz.headfirstlabs.com. As you can probably guess, we’re going to throw that URL right into an <a> element. Here’s how:
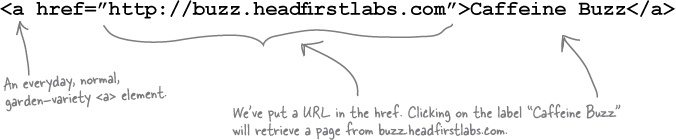
That’s all there is to it. To link to any resource on the Web, all you need is its Uniform Resource Locator, which goes in the <a> element as the value of the href attribute. Let’s go ahead and add this in the Starbuzz “index.html” page.
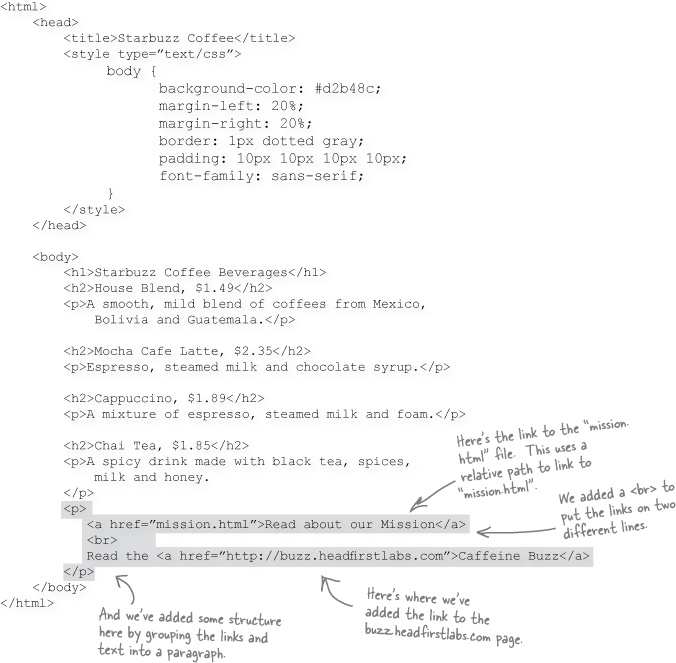
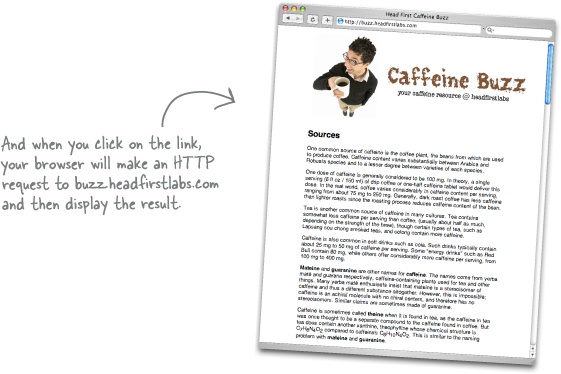
Open your Starbuzz “index.html” file in the “chapter4/starbuzz” folder, and scan down to the bottom. Let’s add two new links: a relative link to the mission statement in “mission.html”, and a link to Caffeine Buzz. Make the changes below, then save and load your “index.html” file in your browser. Click on the link and enjoy the Caffeine Buzz.

Can you say “Web career?” You’ve certainly delivered everything the Starbuzz CEO has asked for, and you’ve now got a high profile Web site under your belt (and in your portfolio).
But you’re not going to stop there. You want your Web sites to have that professional “fit and finish” that makes good sites into great ones. You’re going to see lots of ways to give your sites that extra “polish” in the rest of this book, but let’s start here with a way to improve your links.
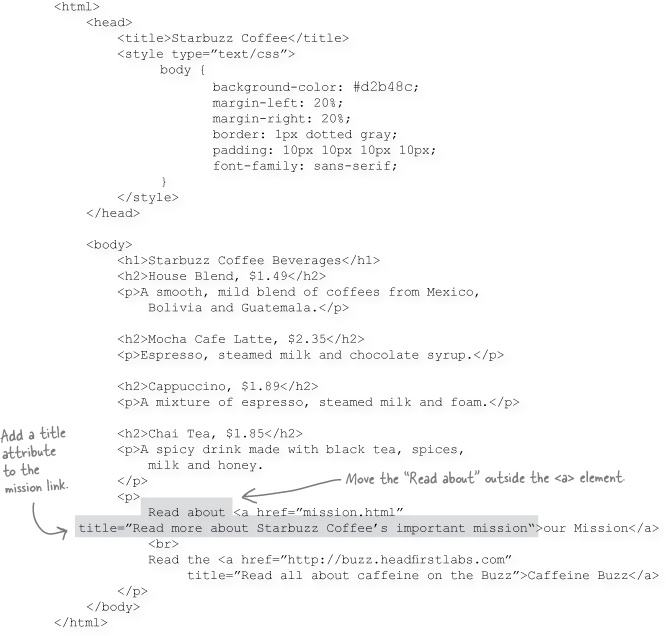
Wouldn’t it be nice if there was a way to get more information about the link you’re about to click on? This is especially important for the visually impaired using screen readers because they often don’t want the entire URL spoken to them: (“h” “t” “t” p” “:” “slash” “slash” “w” “w” “w” “dot”) and yet the link’s label usually only gives a limited description, like “Caffeine Buzz”.
The <a> element has an attribute called title just for this purpose. Some people are confused by this attribute name because there’s an element called <title> that goes in the <head>. They have the same name because they are related – it is often suggested that the value of the title attribute be the same as value of the <title> element of the Web page you are linking to. But that isn’t a requirement and often it makes more sense to provide your own, more relevant description in the title attribute.
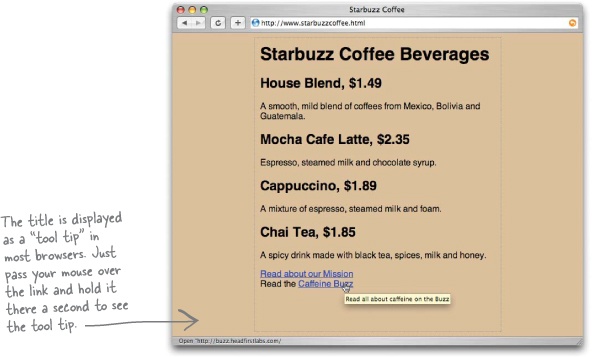
Here’s how you add a title attribute to the <a> element:

For most browsers, the title is displayed as a “tool tip” when you pass the mouse over a link. Remember that browsers for the visually impaired may read the link title aloud to a visitor.
The Head First Guide to Better Links

Here are a few tips to keep in mind to further improve the fit and finish of your links:
Keep your link labels concise. Don’t make entire sentences or large pieces of text into links. In general, keep them to a few words. Provide additional information in the title attribute.
Keep your link labels meaningful. Never use link labels like “click here” or “this page”. Users tend to scan pages for links first, and then read pages second. So, providing meaningful links improves the usability of your page. Test your page by reading just the links on it; do they make sense? Or do you need to read the text around them?
Avoid placing links right next to each other; users have trouble distinguishing between links that are placed closely together.
So far, whenever you’ve linked to another page, the page loads and your browser displays it from the top.
But, the CEO’s asking you to link into a particular spot in the page: the Coffee section.
Sound impossible? Come on, this is Head First – we’ve got the technology. How? Well, we haven’t told you everything about the <a> element yet. Turns out the <a> element can play two roles: you’ve already seen it act as the jumping off point for traveling from one page to another, but it can also act as a landing point or destination of a link.
When you use an <a> element to create a destination, we call that a “destination anchor.” Creating a destination anchor is straightforward. Here’s how you can do it in three short steps:
Find the location in the page where you’d like to create a landing spot. This can be any text on the page, but often is just a short piece of text in a heading.
Wrap the text within an
<a>element.Choose a identifier name for the destination, like “coffee” or “summary” or “bio”, and insert an
idattribute into your<a>element.
Let’s give it a try. Say you want to provide a way to link to the Chai Tea item on the Starbuzz page. Here’s what it looks like now:
<h2>Chai Tea, $1.85</h2>
<p>A spicy drink made with black tea, spices, milk and
honey.</p>
Following the three steps above, we get this:
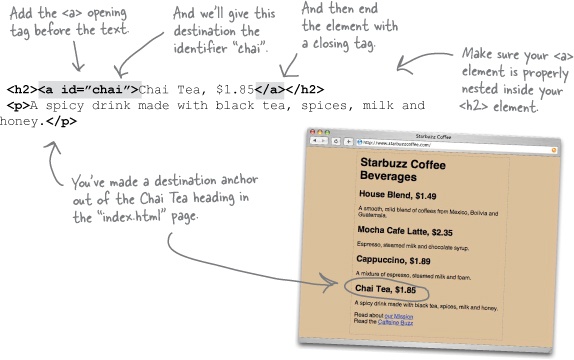
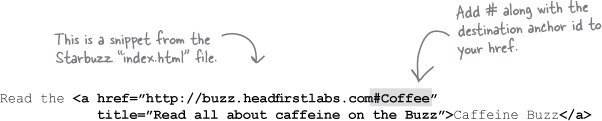
You already know how to link to pages using either relative links or URLs. In either case, to link more specifically to a destination anchor in a page, just add a # on the end of your link, followed by the destination anchor identifier. So if you wanted to link from any Starbuzz Coffee Web page to the “chai” destination anchor you’d write your <a> element link this:
<a href="index.html#chai">See Chai Tea</a>Unfortunately, linking to Chai Tea with a destination anchor isn’t very impressive because the whole page is small enough that it easily fits in the browser. Let’s link to the Coffee section of http://buzz.headfirstlabs.com instead. Here’s what you’re going to do:
Note
The main benefit of destination anchors is to link to locations in long files so your visitors don’t have to scroll through the file looking for the right section.
Figure out the id of the destination anchor.
Alter the existing
<a>element in the Starbuzz Coffee “index.html” file to point to the destination anchor.Reload your “index.html” page and test out the link.
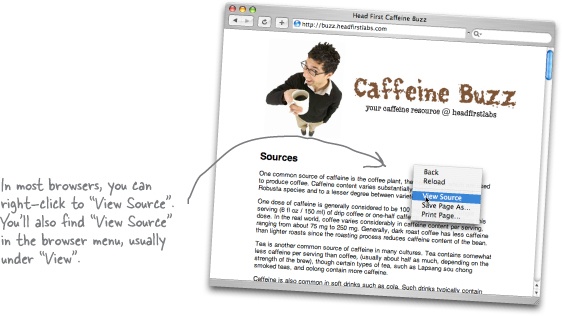
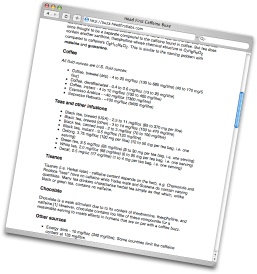
To find the destination anchor, you’re going to have to look at the buzz.headfirstlabs.com page and view their HTML. How? Almost all browsers have a “View Source” option. So, visit the page and when it is fully loaded, choose the “View Source” option, and you’ll see the markup for the page.

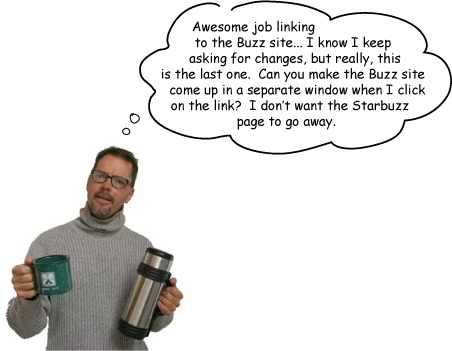
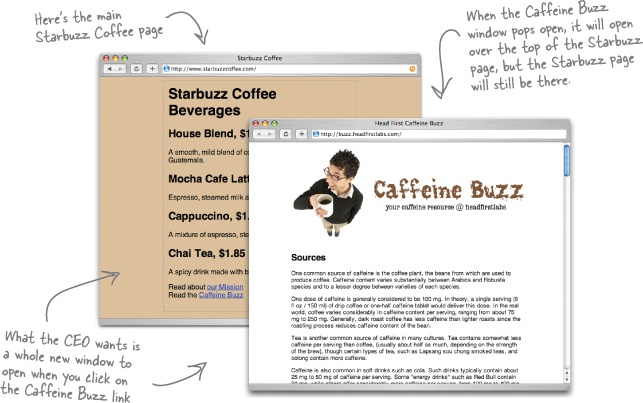
We have another new requirement from the Starbuzz CEO (there are always new requirements for Web sites). What he wants is this: when you click on the “Caffeine Buzz” link in the Starbuzz Coffee page, the Starbuzz Coffee page shouldn’t go away. Instead a whole new window should open up with the Caffeine Buzz page in it, like this:
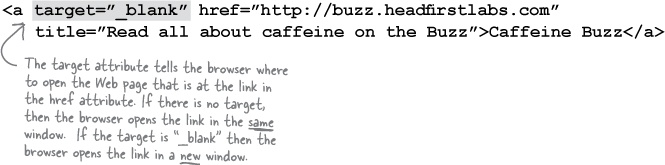
To open a page in a new window, you need to tell the browser the name of the window in which to open it. If you don’t tell the browser a specific window to use, the browser just opens the page in the same window. You can tell the browser to use a different window by adding a target attribute to the <a> element. The value of the target attribute tells the browser the “target window” for the page. If you use “_blank” for the target, the browser will always open a new window to display the page. Let’s take a closer look:
Brain Power
Can you think of some advantages and some disadvantages to using the target attribute to open a page in a new window?
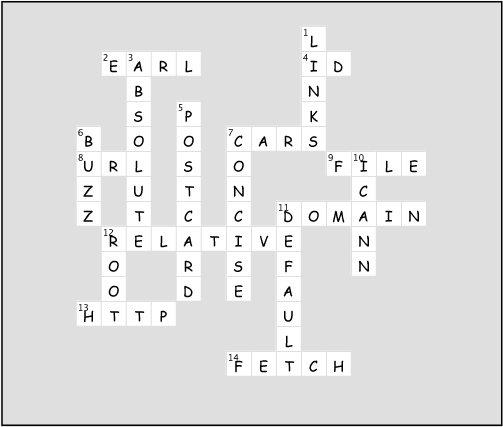
HTMLcross
Here are some mind benders for your left brain.
Across | Down |
|---|---|
2. Wrong way to pronounce URL. 4. Attribute used to anchor an <a> element to a page. 7. Earl sold these. 8. Web address to a resource. 9. Protocol we’ve been using up until this chapter. 11. Unique name on the Web. 12. Always use these kinds of links when linking to pages on the same server. 13. Request/response protocol. 14. Most popular Mac FTP application. | 1. People scan these rather than reading text. 3. Path from the root. 5. What are you supposed to send back from Webville? 6. Informative caffeine site. 7. Keep your link labels ______. 10. Controls domain names. 11. _______ file you get when you ask for a directory. 12. Top directory of your Web site. |

Get Head First HTML with CSS & XHTML now with the O’Reilly learning platform.
O’Reilly members experience books, live events, courses curated by job role, and more from O’Reilly and nearly 200 top publishers.

