Flash has been the gold standard in multimedia creation software for over 10 years. The program has come a long way since the mid-1990s, when professional animators—like those at Microsoft’s MSN and Disney Online—used an early incarnation called FutureSplash. Over the years, Flash earned a following of programming geeks as an alternative to Java for creating vector-based Web graphics. In the 21st century, though, anyone with a desktop computer (or even a laptop) can be a Web animator. With Flash CS4’s easy-to-use panels and toolbars, you can create sophisticated, interactive animations that run on the Web, standalone computers, handhelds, kiosks—virtually anywhere you find a screen (see Figure 1).
Here are just some of the things you can create with Flash:
Drawings and animations. Flash gives you the drawing tools to create original artwork and the animation tools to give it movement and life. Then you can edit your Flash document in another program, add it to a Web page, or burn it to a CD or DVD. Flash recognizes multimedia files created using other programs, so you can enrich your animations with image, sound, and video files you already have (or that you find on the Web).
Multimedia Web sites. You can create original drawings and animations with Flash, add in voice-overs, background music, and video clips, and then publish it all to a Web page with the click of a button. Using Flash’s built-in scripting language, ActionScript, you can add interactive features like hotspots and navigation bars. You can even position elements on the screen precisely and then change the layout at runtime. With Flash, even regular folks can create real-time video blogs and eye-grabbing splash pages. In fact, the most famous multimedia site of them all, YouTube, uses Flash to display videos.
Banner ads. These blinking, flashing, animated strips of Madison Avenue marvelousness are easy to produce in Flash. Typically, banner ads consist of a skinny animation and a link to the sponsor site (see Figure 2).
Figure 2. Over half of the banner ads you see on the Web were produced using Flash. The best ones combine creativity with action. Here, Magritte-like characters float up into the air, suspended from their umbrellas. Clicking the banner zips you to a different Web page, where you can place an order online.
Tutorials. Web-based training courses, which often include a combination of text, drawings, animations, video clips, and voice-overs, are a natural fit for Flash. By hooking Flash up to a server on the back end, you can even present your audience with graded tests and up-to-the-minute product information.
You don’t have to deliver your tutorials over the Web, though; you can publish them as standalone projector files (Chapter 19) and deliver them to your students via CDs or DVDs.
Full-length ads and product presentations. Marketing types can use Flash to create slick, storyboarded, buy-our-stuff-now animations and program mock-ups.
Customer service kiosks. Many of the kiosks you see in stores and building lobbies use Flash to help customers find what they need. For example, photo kiosks walk customers through the process of transferring images from their digital cameras and ordering their own prints; kiosks in banks let customers withdraw funds, check interest rates, and make deposits.
Television and film effects. The Hollywood set has been known to use Flash to create spectacular visual effects for TV shows and even small feature films. But where the TV and film industry is seriously adopting Flash is on promotional Web sites, where they wed Flash graphics to scenes taken from their movies and shows to present powerful trailers, interactive tours of movie and show sets, and teasers. You can find hundreds of them on YouTube alone (Figure 3).
Games and other programs. With support for runtime scripting, back end data transfers, and interactive controls like buttons and text boxes, Flash has everything a programmer needs to create a cool-looking game (check out www.addictinggames.com for a few examples) or other rich Internet applications (Adobe’s fancy term for “Web-based program”).

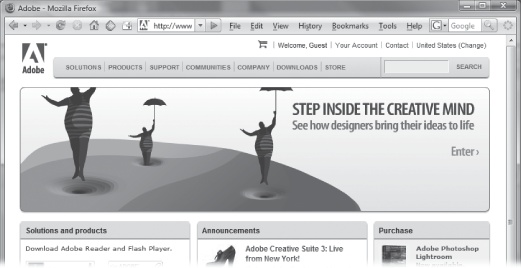

Figure 3. YouTube has made great use of Flash’s video abilities. You can check to see whether any site is using Flash behind the scenes. Just right-click (or ⌘-click) an image that you think might be Flash. If it says About Flash Player at the bottom of the pop-up menu, you guessed right.
Unfortunately, there’s no such thing as a free lunch. If Flash is an incredibly powerful, useful program—and it is—it’s also harder to use than a greased tightrope.
That’s where this book comes in. You don’t have to be a professional artist, animator, or software developer to create useful animations with Flash. All you need are this book and an idea of what you’d like to create. The examples, explanations, and step-by-step instructions in the next 19 chapters show you how to turn that idea into a working animation.
Previous versions of Flash came in two flavors: Professional and Standard. With Adobe Creative Suite 4, there’s just one product: Flash CS4 Professional (Figure 4). Flash Professional has everything for both professional developers and weekend Web mavens. Some of the pro-quality features include:
Additional graphic effects. With Flash CS4 Professional, you get convenient extras like filters (predefined blurs, glows, and drop shadows), blend modes (transparency effects that make compositing, or combining images, easy), and custom easing (the ability to slow down or speed up animated tweens with the click of a button).
Support for mobile authoring. Flash CS4 Professional comes with mobile templates (to help you size your animations for handhelds), an emulator (to let you see how your animations will appear on every handheld that Flash supports), and built-in publishing options.
Support for high-end video manipulation. Flash CS4 Professional gives you extra tools, including the Flash Video Exporter (a QuickTime plug-in that lets you create Flash video files using any Apple QuickTime-compatible video authoring tool) and the Flash Video Encoder (a standalone program that lets you convert regular video files to Flash video files). Using Flash CS4 Professional, you can link to external video files and even layer video clips on top of each other to create sophisticated composite effects.
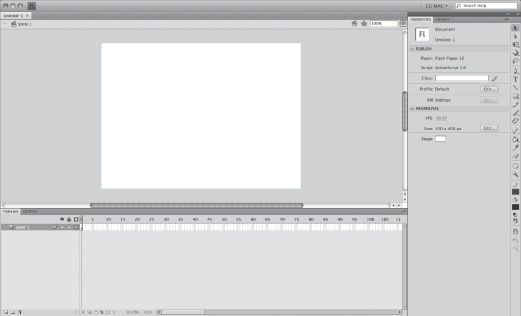
Figure 4. The Flash CS4 workspace looks familiar if you’ve used previous versions of Flash. Look closer and you’ll notice Adobe has tweaked Flash to give it more of the look and feel of other Creative Suite programs. From the tool panels to the tabbed, docking palettes, this version bears resemblance to its Adobe cousins like Photoshop and Illustrator.
When Adobe acquired Macromedia at the end of 2005, graphic artists and Web designers held their breath waiting to learn what this meant for Flash, as well as Dreamweaver (a favorite Web design tool). For the most part, there were sighs of relief when Adobe folded both beloved programs into its high-powered Creative Suite. The big change came with Flash CS3, which introduced a new workspace that was more consistent with other Adobe programs, including Photoshop. For example, without abandoning some of Flash’s idiosyncratic drawing methods, CS3’s pen tool took on Adobe Illustrator characteristics. CS3 was the first version of Flash to include ActionScript 3.0.
With Flash CS4, Adobe continues to update Flash at a rapid pace, adding powerful new features and improving the workspace, like making it easier to arrange and organize windows. If you’ve used other Adobe programs, you’ll also welcome the consistency in drawing, text, and color-choosing tools. By the same token, if you’re new to the Adobe family, the skills you learn in Flash will come in handy if you move on to Photoshop, Illustrator, Dreamweaver, Premiere, or After Effects.
Here’s a short list of the new features in CS4:
Applying tweens directly to objects. When you want something to change in your animation, you show Flash how it looks at the beginning and how it looks at the end. Flash creates all the in-between frames. The process is called tweening. Flash has always had tweens, but Flash CS4 introduces a new way of animating objects. Instead of applying tweens to keyframes, you apply tweens directly to the object you want to move. The new system for working with motion tweens is fast, easy to understand, and easy to use. Once you’ve crafted the perfect tween, it’s easy to apply it to other objects.
New Motion Editor. Adobe gives you more control than ever over your tweens. If you want to control every aspect of an object’s motion, shape, color, and appearance as it changes over time, you’ll love the motion editor that comes in CS4. It gives you the kind of power that video editors have enjoyed using Adobe After Effects.
Motion presets. Flash comes with predesigned motion tweens that you can use in your animation. The presets that come in the box include actions like bounce, fly-in, fly-out, pulse, spiral, and wave. If that’s not enough, you can save the tweens you create yourself and use them as presets.
Animating objects in 3D space. Flash is dipping its graphic toe in 3D waters. You can animate movie clips in three dimensions, which is a great effect for text, still images, and other objects. To be sure, Flash isn’t a full-blown 3D animation tool like 3DStudio, but it does let you do things that you’ve never done before.
IK Bones. Flash’s brand new inverse kinematics feature lets you link things together to create natural movements. The Bones tool and Binding tool will save you tons of time when you animate connected objects. (You may now start singing “The hip bone’s connected to the thigh bone…”) You can use the tools not only on bodies, legs, and feet, but also on machinery with moving parts like steam shovels, cranes, and desk lamps.
Designing Adobe AIR Projects. Adobe AIR is a new Adobe technology for publishing programs for computer desktops and handheld devices like phones and palmtop computers. At the core of AIR are Flash Player and ActionScript 3.0. Using Flash, you can now design programs and animations for a wider audience.
Sound Samples Library. Flash CS4 now includes dozens of sound samples that you can drop into your animations. Most of these are event sounds, like motors running, laughter, bells and the ever-popular gigantic explosion.
Adobe Media Encoder H.264 Support. Flash CS4 shares the same media encoder with Adobe Premiere and After Effects. Translation: You can now create the same high quality video files you see in iTunes movies, AppleTV, and iPod video.
Workspace improvements. Adobe continues to refine the Flash workspace. Flash CS4’s Properties panel and Library are easier to use than ever, and more consistent with other Adobe products. Among dozens of other workspace improvements, the Properties panel is now displayed vertically, which is not only a better use of today’s widescreen monitors, it makes it easier to group with other vertical panels. The Library panel has new search and sorting capabilities. Font selection is easier now that the font menus show previews of the typefaces.
Animation is a complex subject, and Flash is a complex program. You’ll have a much easier time plowing through the rest of the book if you start with a couple of basics under your belt: specifically, what an animation is and how you go about creating one in Flash. This section and the following one give you some background.
Animators used to develop animations in a frame-by-frame sequence, where every frame contained a different image. As the frames sped by on a projector, the hundreds (or hundreds of thousands) of static images created the illusion of moving characters.
Painstaking work? You bet. Before the age of computerized generation—which has really just come into its own in the last 20 years or so, with big names like Pixar—major animation houses employed whole armies of graphic artists, each charged with producing hundreds of drawings that represented a mere fraction of the finished work. What we chuckled at for a scant few minutes took weeks and dozens of tired, cramped hands to produce. One mistake, one spilled drop of coffee, and these patient-as-Job types would have to grab fresh paper and start all over again. When everything was done, the animation would have to be put together—much like one of those flip books where you flip pages real fast to see a story play out—while it was being filmed by special cameras.
Flash brings you the power of a design studio, expert tools, and the equivalent of a staff of highly trained detail people. You still have to come up with an idea for the animation, and you have to draw (or find and import) at least a couple of images. But beyond that, Flash can take over and generate most of the frames you need to flesh out your animation.
It’s pretty incredible, when you think about it. A few hundred bucks and a few hours spent working with Flash, and you’ve got an animation that, just a few years ago, you’d have had to pay a swarm of professionals union scale to produce. Sweet!
Say you work for a company that does custom auto refinishing. First assignment: design an intro page for the company’s new Web site. You have the following idea for an animation:
The first thing you want your audience to see is a beat-up jalopy limping along a city street toward the center of the screen, where it stops and morphs into a shiny, like-new car as your company’s jingle plays in the background. A voice-over informs your audience that your company’s been in business for 20 years and offers the best prices in town.
Across the top of the screen you’d like to display the company logo, as well as a navigation bar with buttons—labeled Location, Services, Prices, and Contact—that your audience can click to get more information about your company. But you also want each part of the car to be a clickable hotspot. That way, when someone clicks one of the car’s tires, he’s whisked off to a page describing your custom wheels and hubcaps; when he clicks the car’s body, he sees prices for dent repair and repainting; and so on.
Here’s how you might go about creating this animation in Flash:
Using Flash’s drawing tools, you draw the artwork for every keyframe of the animation: that is, every important image. For example, you’ll need to create a keyframe showing the beat-up junker and a second keyframe showing the gleaming, expertly refurbished result. (Chapter 2 shows you how to draw artwork in Flash; Chapter 3 tells you everything you need to know about keyframes.)
Within each keyframe, you might choose to separate your artwork into different layers. Like the see-through plastic cels that professional animators used in the old days, layers let you create images separately and then stack them on top of each other to make a single composite image. For example, you might choose to put the car on one layer, your company logo on a second layer, and your city-street background on a third layer. That way, you can edit and animate each layer independently, but when the animation plays, all three elements appear to be on one seamless layer. (Chapter 4 shows you how to work with layers.)
Through a process called tweening, you tell Flash to fill in each and every frame in-between the keyframes to create the illusion of the junker turning slowly into a brand-new car. Flash carefully analyzes all the differences between the keyframes and does its best to build the interim frames, which you can then tweak or—if Flash gets it all wrong—redraw yourself. (Chapter 3 guides you through the tweening process.)
As you go along, you might decide to save a few of the elements you create (for example, your company logo), so you can reuse them later. There’s no sense in reinventing the wheel, and in addition to saving you time, reusing elements actually helps keep your animation files as small and efficient as possible. (See Chapter 6 for details on creating and managing reusable elements.)
Add the background music and voice-over audio clips, which you’ve created in other programs (Chapter 10).
Create the navigation bar buttons and hotspots that let your audience interact with your animation (Chapter 12).
Test your animation (Chapter 18) and tweak it to perfection.
Finally, when your animation is just the way you want it, you’re ready to publish it. Without leaving the comfort of Flash, you can convert the editable .fla file you’ve been working with into a noneditable .swf file and either embed it into an HTML file or create a standalone projector file your audience can run without having to use a browser. Chapter 19 tells you everything you need to know about publishing.
The scenario described above is pretty simple, but it covers the basic steps you need to take when creating any Flash animation.
You’ll find very little jargon or nerd terminology in this book. You will, however, see a few terms and concepts that you’ll encounter frequently in your computing life:
Clicking. This book gives you several kinds of instructions that require you to use your computer’s mouse or trackpad. To click means to point the arrow cursor at something on the screen and then—without moving the cursor at all—to press and release the clicker button on the mouse (or laptop trackpad). To double-click, of course, means to click twice in rapid succession, again without moving the cursor at all. To drag means to move the cursor while pressing the button continuously. To right-click or right-drag, do the same as above, but press the right mouse button.
When you see an instruction like Shift-click or Ctrl-click, simply press the key as you click.
Keyboard shortcuts. Every time you take your hand off the keyboard to move the mouse, you lose time and potentially disrupt your creative flow. That’s why many experienced computer fans use keystroke combinations instead of menu commands wherever possible. Ctrl+B (⌘-B on the Mac), for example, is a keyboard shortcut for boldface type in Flash (and most other programs).
When you see a shortcut like Ctrl+S (⌘-S on the Mac), which saves changes to the current document, it’s telling you to hold down the Ctrl or ⌘ key, and, while it’s down, type the letter S, and then release both keys.
Choice is good. Flash frequently gives you several ways to trigger a particular command—a menu command, or by clicking a toolbar button, or by pressing a key combination, for example. Some people prefer the speed of keyboard shortcuts; others like the satisfaction of a visual command array available in menus or toolbars. This book lists several alternatives, but by no means are you expected to memorize all of them.
Flash CS4 works much the same way in its Mac and Windows incarnations except for a few interface differences. Naturally you may see slight variations in performance on different machines. This book’s illustrations give Mac and Windows equal time, alternating by chapter, so you get to see how all of Flash’s features look, no matter what kind of computer you’re running.
There is one small difference between Mac and Windows software that you need to be aware of, and that’s keystrokes. The Ctrl key in Windows is the equivalent of the Macintosh ⌘ key, and the key labeled Alt on a PC (and on non-U.S. Macs) is the equivalent of the Option key on American Mac keyboards.
Whenever this book refers to a key combination, therefore, you’ll see the Windows keystroke listed first (with + symbols, as is customary in Windows documentation); the Macintosh keystroke follows in parentheses (with - symbols, in time-honored Mac tradition). In other words, you might read, “The keyboard shortcut for saving a file is Ctrl+S (⌘-S).” This book mentions any other significant differences between the Mac and Windows versions of Flash CS4 as they come up.
Flash has gotten more powerful and more sophisticated over the years, but one thing hasn’t changed: woefully poor documentation. If Flash were simple to use, the lack of documentation wouldn’t be such a big deal. But Flash is a complex program—especially if you don’t have a background in programming or multimedia authoring software. Basically, because Flash’s documentation alternates between high-level market-speak and low-level computer engineering jargon, you’re pretty much out of luck if you’re a normal, intelligent person who just wants to use Flash to create a cool animated Web site, and then get on with your life.
Fortunately, there’s an answer—and you’re holding it in your hands.
This is the book that should have come in the Flash box: one that explains all the tools and shows you step-by-step not just how to create animations from scratch, but why you want to do each step—in English, not programmer-ese. You’ll learn tips and shortcuts for making Flash easier to work with, as well as making your animations as audience-friendly as possible.
Flash CS4: The Missing Manual is designed for readers of every skill level except the super-advanced-programmer. If Flash is the first image-creation or animation program you’ve ever used, you’ll be able to dive right in using the explanations and examples in this book. If you come from an animation or multimedia background, you’ll find this book a useful reference for mapping how you created an element in your previous program, to how you do it in Flash. “Design Time” boxes explain the art of effective multimedia design (which is an art unto itself).
The ActionScript programming language is a broad, complex subject. This book isn’t an exhaustive reference manual, but it gives you a great introduction to ActionScript programming providing working examples and clear explanations of ActioScript principles.
Flash CS4: The Missing Manual is divided into five parts, each containing several chapters:
Part One: Creating a Flash Animation guides you through the creation of your very first Flash animation, from the first glimmer of an idea to drawing images, animating those images, and testing your work.
Part Two: Advanced Drawing and Animation is the designer’s feast. Here you’ll see how to manipulate your drawings by rotating, skewing, stacking, and aligning them; how to add color, special effects, and multimedia files like audio and video clips; how to slash file size by turning bits and pieces of your drawings into special elements called symbols; and how to create composite drawings using layers. In this section, you’ll learn about the Motion Editor. New to CS4, it gives you incredible control over motion tweens. There’s a whole chapter that explains how to use the new inverse kinematics (“bones”) feature (Chapter 8).
Part Three: Adding Interactivity shows you how to add ActionScript 3.0 actions to your animations, creating on-the-fly special effects and giving your audience the power to control your animations. This section includes lots of examples and ActionScript code. You can copy and modify some of the practical examples for your own projects. You’ll see how to loop frames and how to let your audience choose which section of an animation to play, and how to customize the prebuilt interactive components that come with Flash. You’ll find specific chapters on using ActionScript with text and using ActionScript to draw.
Part Four: Delivering Your Animation to Its Audience focuses on testing, debugging, and optimizing your animation. You’ll also find out how to publish your animation so that your audience can see and enjoy it and how to export an editable version of your animation so that you can rework it using another graphics, video editing, or Web development program.
Part Five: Appendixes. Appendix A, Installation and Help, explains how to install Flash and where to turn for help. Appendix B, Flash CS4, Menu by Menu, provides a menu-by-menu description of the commands you find in Flash CS4.
Throughout this book, you’ll find instructions like, “Open your Program Files → Adobe → Adobe Flash CS4 folder.” That’s Missing Manual shorthand for much longer sentences like “Double-click your Program Files folder to open it. Inside, you’ll find a folder called Adobe; double-click to open it. Inside that folder is a folder called Adobe Flash CS4; open it, too.” This arrow shorthand also simplifies the business of choosing menu commands, as you can see in Figure 5.
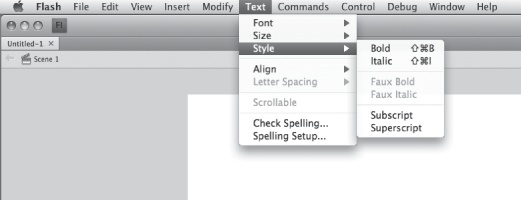
Figure 5. When you see instructions like “Choose Text → Style → Italic,” think, “Click to pull down the Text menu, and then move your mouse down to the Style command. When its submenu opens, choose the Italic option.”
Unlike other programs you may have used, Flash makes extensive use of panels. The really complex panels are divided into subpanels, and this book uses the same arrow shorthand to navigate panels. So, for example, when working with a block of text, you may see an instruction like “Go to Properties → Paragraph → Format → Align Left.” That means go to the Properties panel and find the Paragraph subpanel. In that subpanel, find the Format group of settings, and then click the Align Left button.
As you read the book’s chapters, you’ll encounter a number of step-by-step tutorials. You can work through them using any Flash document of your own, or use the example files provided on this book’s “Missing CD” page. You can download them using any Web browser at http://missingmanuals.com/cds/. You’ll find raw materials (like graphics and half-completed animations) and, in some cases, completed animations with which to compare your work.
At http://missingmanuals.com, you’ll find articles, tips, and updates to Flash CS4: The Missing Manual. In fact, we invite and encourage you to submit such corrections and updates yourself. In an effort to keep the book as up to date and accurate as possible, each time we print more copies of this book, we’ll make any confirmed corrections you’ve suggested. We’ll also note such changes on the Web site, so you can mark important corrections into your own copy of the book, if you like. (Go to http://missingmanuals.com/feedback, choose the book’s name from the pop-up menu, and then click Go to see the changes.)
Also on our Feedback page, you can get expert answers to questions that come to you while reading this book, write a book review, and find groups for folks who share your interest in Flash.
While you’re there, sign up for our free monthly email newsletter. Click the “Sign Up for Our Newsletter” link in the left-hand column. You’ll find out what’s happening in Missing Manual land, meet the authors and editors, see bonus video and book excerpts, and so on.
We’d love to hear your suggestions for new books in the Missing Manual line. There’s a place for that on missingmanuals.com, too. And while you’re online, you can also register this book at www.oreilly.com (you can jump directly to the registration page by going here: http://tinyurl.com/yo82k3). Registering means we can send you updates about this book, and you’ll be eligible for special offers like discounts on future editions of Flash CS4: The Missing Manual.
When you see a Safari® Books Online icon on the cover of your favorite technology book, it means the book is available online through the O’Reilly Network Safari Bookshelf.
Safari offers a solution that’s better than e-books. It’s a virtual library that lets you search thousands of top tech books easily, cut and paste code samples, download chapters, and find quick answers when you need the most accurate, current information. Try it for free at http://safari.oreilly.com.
Get Flash CS4: The Missing Manual now with the O’Reilly learning platform.
O’Reilly members experience books, live events, courses curated by job role, and more from O’Reilly and nearly 200 top publishers.

