Dreamweaver’s Files panel provides a fast way to add blank web pages to your site. With one click, you can create a new page in any folder, saving you several steps compared to using the File menu. In addition, you can use the Files panel to add folders, rename files and folders, and move files into and out of folders on your site.
To create a new, blank web page, open the Files panel using one of the methods described on The Files Panel (for example, choose Window→Files), and then right-click (Control-click) on a file or folder in the Files panel. In the shortcut menu that appears, choose New File. Dreamweaver creates a new, empty page in the folder where the selected page resides or, if you selected a folder, Dreamweaver adds a new page there.
The type of file Dreamweaver creates depends on the type of site you’re creating. For a plain HTML site, Dreamweaver creates a blank HTML page. If you’re building a dynamic, database-driven site, however (like those described in Chapter 21 of this book), Dreamweaver creates a blank page based on the type of server model you select. For example, if you build a site using PHP and MySQL, Dreamweaver creates a blank PHP page (named untitled.php).
Note
The doctype (Document Types) of a new web page created with the Files panel depends on your Dreamweaver Preferences settings: Choose Edit→Preferences (Dreamweaver→Preferences on Macs), select the New Document category, and choose HTML5 (or whichever doctype you prefer) from the Default Document Type menu. You can set other options for new documents in this window as well, such as the file extension you prefer (.html or .html, for instance).
The new file appears in the Files panel with a highlighted naming rectangle next to it; type a name for the page here. Don’t forget to add the appropriate HTML extension (.htm or .html) to the end of the name—if you do forget, Dreamweaver creates a completely empty file, no starter HTML included (and changing the name by adding the .html extension won’t fix the problem). If this happens, delete the file and create a new one. (If you’re creating a PHP file, make sure the file name ends in .php.)
You can add folders to your site directly in Dreamweaver using the Files panel. Just right-click (Control-click) on any file or folder. From the shortcut menu, choose New Folder. If you click a file, Dreamweaver creates the new folder in the same folder as that file; if you click a folder, you get a new folder inside the existing one.
If you crave variety, you can add a folder another way. Select a file or folder in the Files panel and then click the contextual menu button (at the top-right of the Files panel) and select File→New Folder. Finally, in the naming rectangle that appears in the Files panel, type a name for the new folder.
Because the Dreamweaver Files panel looks and acts so much like Windows Explorer and the Macintosh Finder, you may think it does nothing more than let you move and rename files and folders. You may even be tempted to work with your site files directly on the your Windows or Mac desktop, thinking that you’re saving time. Think again. When it comes to moving files and folders in your site, Dreamweaver does more than your computer’s desktop ever could.
In your Web travels, you’ve probably encountered the dreaded “404: File Not Found” error. This “broken link” message doesn’t necessarily mean that the page doesn’t exist; it just means that your web browser didn’t find the page at the location (URL) specified by the link you just clicked. In short, someone working on the website probably moved or renamed a file without updating the link. Because website files are interrelated in such complex ways—pages link to other pages, which include paths to graphics, which in turn appear on other pages—an action as simple as moving one file can wreak havoc on an entire site. That’s why you shouldn’t drag website files around on your desktop or rename them in Windows Explorer or the Macintosh Finder.
In fact, moving and reorganizing website files is so headache-ridden and error-prone that some web designers avoid it altogether, leaving their sites straining under the weight of thousands of poorly organized files. But you can avoid that: Dreamweaver makes reorganizing a site easy and error-free. When you use the Files panel to move files, Dreamweaver looks for actions that could break your site’s links and automatically rewrites the paths of links, images, and other media (see the cautionary note below).
Tip
Note to JavaScript coders: If your custom JavaScript programs include paths to web pages, images, or other files on your site, Dreamweaver can’t help you. When you reorganize your site with the Files panel, the program updates links it created, but not paths in your JavaScript programs.
Just be sure to do your file- and folder-moving from within Dreamweaver, like this: In the Files panel, drag the file or folder into its new folder (see Figure 1-17). To move multiple files, Ctrl-click (⌘-click) each and then drag them as a group; to deselect a file, Ctrl-click or ⌘-click it again. You can also select one file or folder and Shift-click another to select all files and folders in between the two.
Note
Close all your web documents before you reorganize your files this way. Dreamweaver has been known to not always correctly update links in open files. But if you do end up with malfunctioning links, you can always use Dreamweaver’s Find Broken Links tool (see Finding Broken Links on page 765) to ferret out and fix them.
When you release the mouse button, the Update Files dialog box appears (Figure 1-17); just click Update. Dreamweaver updates all the links for you.

Figure 1-17. You can move files and folders within the Files panel just as you would in Windows Explorer or the Macintosh Finder. Simply drag the file into (or out of) a folder. But unlike your computer’s file system, Dreamweaver monitors the links between web pages, graphics, and other files. If you move a file using Windows Explorer or the Finder, you’ll most likely end up breaking links to that file or, if it’s a web page, breaking links within that file. By contrast, Dreamweaver is smart enough to know when moving files will cause problems. The Update Files dialog box lets you update links to and from the files you move so your site keeps working properly.
Renaming files and folders poses the same problems as moving them. Because links include file and folder names, altering a name can break a link just as easily as moving or deleting a file or folder.
For example, say you create a new site with a home page named home.html. You cheerfully continue building the other pages of your site, linking them to home.html as you go along. But after reading this chapter and checking the default file name your web server requires (see Setting Up a Site on page 40), you find you need to rename your home page index.html. If you were to rename the file index.html using Windows Explorer or the Macintosh Finder, every link to home.html would result in a “File not found” error!
Dreamweaver handles this potential disaster effortlessly, as long as you rename the file in the Files panel. To do so, click the file or folder name in the panel. Pause a moment, and click the name of the file or folder. (The pause ensures that Dreamweaver won’t think you just double-clicked the name to edit the file.)
A renaming field appears; type the new name. Be sure to include the proper extension for the type of file you’re renaming. For example, GIFs end with .gif and Cascading Style Sheets end with .css. Although Dreamweaver lets you name files without using an extension, extension-less files won’t work when you move them to a web server, and Dreamweaver itself may not open the file correctly without an extension.
Finally, in the Update Files dialog box, click Update. Dreamweaver updates all the links to the file or folder to reflect the new name.
Warning
It bears repeating: Never rename or move files and folders outside of Dreamweaver. If you use Windows Explorer or the Macintosh Finder to reorganize your site’s files, links will break, images will disappear, and the earth will open underneath your feet. (Well, that last thing won’t happen, but it can feel that way when your boss comes in and says, “What happened to our website? Nothing works!”)
If you move files outside of Dreamweaver by accident, see Finding Broken Links on page 765 to fix the links.
It’s a good idea to clean up your site from time to time by deleting old and unused files. Just as with moving and renaming files, you delete them from the Files panel.
To delete a file or folder, click to select it in the Files panel and press Backspace or Delete. (To select multiple files or folders, Ctrl-click [⌘-click] them.) If no other page references the doomed file or folder, a simple “Are you sure you want to delete this file?” warning appears; click Yes.
However, if other files link to the file or to files within the folder you want to delete, Dreamweaver displays a warning dialog box (Figure 1-18) informing you that you’re about to break links on one or more pages.
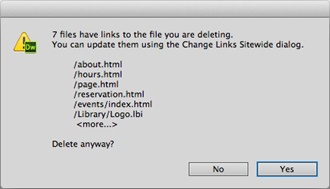
Figure 1-18. When you delete files in the Files panel, Dreamweaver tells you if other pages link to the file. If they do, you need to repair the links. Dreamweaver makes that easy via the Change Links Sitewide command (see “Changing a Link Throughout a Site” on page 771)—and it reminds you of the feature in this dialog box.
The message even lists the first few pages that use the file. If you made a mistake, click No to leave your site untouched.
If you’re sure you want to delete the file or folder, click Yes. And yes, this move does break links in all the pages listed. Repairing those links, which usually means linking them to a new page, requires a separate step: using the Site→Change Links Sitewide command, as described on Changing a Link Throughout a Site.
Note
If you move files into your site folder using Windows Explorer or the Mac Finder, Dreamweaver might not be aware of those files or links between those files and others in your site. If that’s the case, when you move or delete files, Dreamweaver may not correctly update links or warn you of broken links caused by deleting a necessary file. To make Dreamweaver aware of any new files you add, choose Site→Advanced→Recreate Site Cache. Dreamweaver will scan all the files in the local site folder and update the cache (its database of files and links in the site).
Get Dreamweaver CS6: The Missing Manual now with the O’Reilly learning platform.
O’Reilly members experience books, live events, courses curated by job role, and more from O’Reilly and nearly 200 top publishers.

