Float Layout Basics
Float-based layouts take advantage of the CSS float property to position elements side by side and create columns on a page. As you read on Wrapping Text Around an Image, you can float an image to make text wrap around a photograph. But it’s also a powerful layout tool to move a bunch of related page elements (like a list of links that you want to appear in a left-hand column) to one side of the page or the other. In essence, the float property moves a page element to the left or the right. Any HTML that appears after the floated element moves up on the page, and hugs up against the side of the float.
Float is a CSS property, available when you create a CSS style (see Creating Styles for instructions on creating a style). It’s listed in the CSS Rule Definition window’s Box category (see Figure 9-3). Choose the “left” option, and the styled element floats to the left, choose the “right” option and the element moves to the right. For example, if you want to position a sidebar on the left side of a page, you float it to the left.
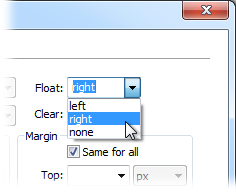
Figure 9-3. You have just three options when you want to float an element: left, right, and none. You might never need the “none” option—it simply positions an element like a normal, unfloated element. Since this is the regular behavior of any element, you’d need this option only if you wanted to turn off a float applied by another style (see ...
Get Dreamweaver CS5: The Missing Manual now with the O’Reilly learning platform.
O’Reilly members experience books, live events, courses curated by job role, and more from O’Reilly and nearly 200 top publishers.

