Printing from iPhoto, Step by Step
Here's the sequence for printing the iPhoto way:
Step 1: Choose the Photos to Print
Just highlight the ones you want, using the techniques on Selecting Photos.
When you're ready, choose File â Print, press â-P, or click Print on the toolbar. The iPhoto Print dialog box appears.
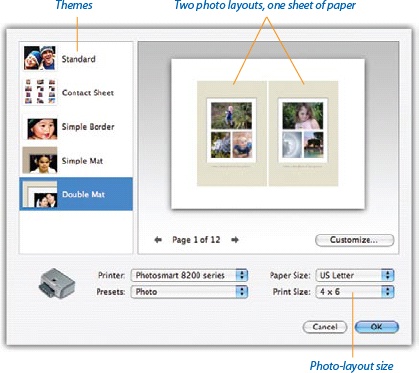
As you examine this dialog box, it's important to understand the difference between a photo layout and a page.
Most people are used to printing one photo per sheetâfor example, one photo on each 4 x 6 page. But in iPhoto, you can place several photos onto one 4 x 6 photo layout, and several layouts on each sheet of paper. For example, in the illustration above, each photo layout holds three pictures. And each letter-sized page holds two of those photo layouts.
No question about it: With great flexibility comes great complexity.
Step 2: Choose a Printing Style (Theme)
iPhoto offers a choice of printing styles called themes, some of which permit colored borders or even captions.
Your options include Standard (no borders, no nothing); Contact Sheet (many thumbnails per sheet, a handy photographer's reference tool); Simple Border (up to four photos per layout, like school portrait packages, complete with printed "frames"); Simple Mat or Double Mat (a printed version of a cardboard frame placed around the photo to give it more impact).
Click the theme you want. If you're printing more ...
Get David Pogue's Digital Photography: The Missing Manual now with the O’Reilly learning platform.
O’Reilly members experience books, live events, courses curated by job role, and more from O’Reilly and nearly 200 top publishers.

